US Bumper tuck / lipo *DIY write-up

E28 technical advice asked and given! Troubleshooting, modifications and more.
Jake D
Posts: 2107
Joined: Jun 20, 2008
Location: Spokane, WA
Contact:

US Bumper tuck / lipo *DIY write-up

Post by Jake D »

The federal bumpers on BMWs sold in the US are pretty extreme and some feel that they detract from the clean lines of the car. It is possible to reduce the size of those "diving board" bumpers by simpily "modifying" the bumper shocks. Of course this means that the bumpers and shocks will no longer tolerate a 5mph collision as they are intended, so consider that before you grab your drill and go to town. The good news is that these shocks can quite often be found at your local wrecking yard if you make a mistake, or are not satisfied with the results.

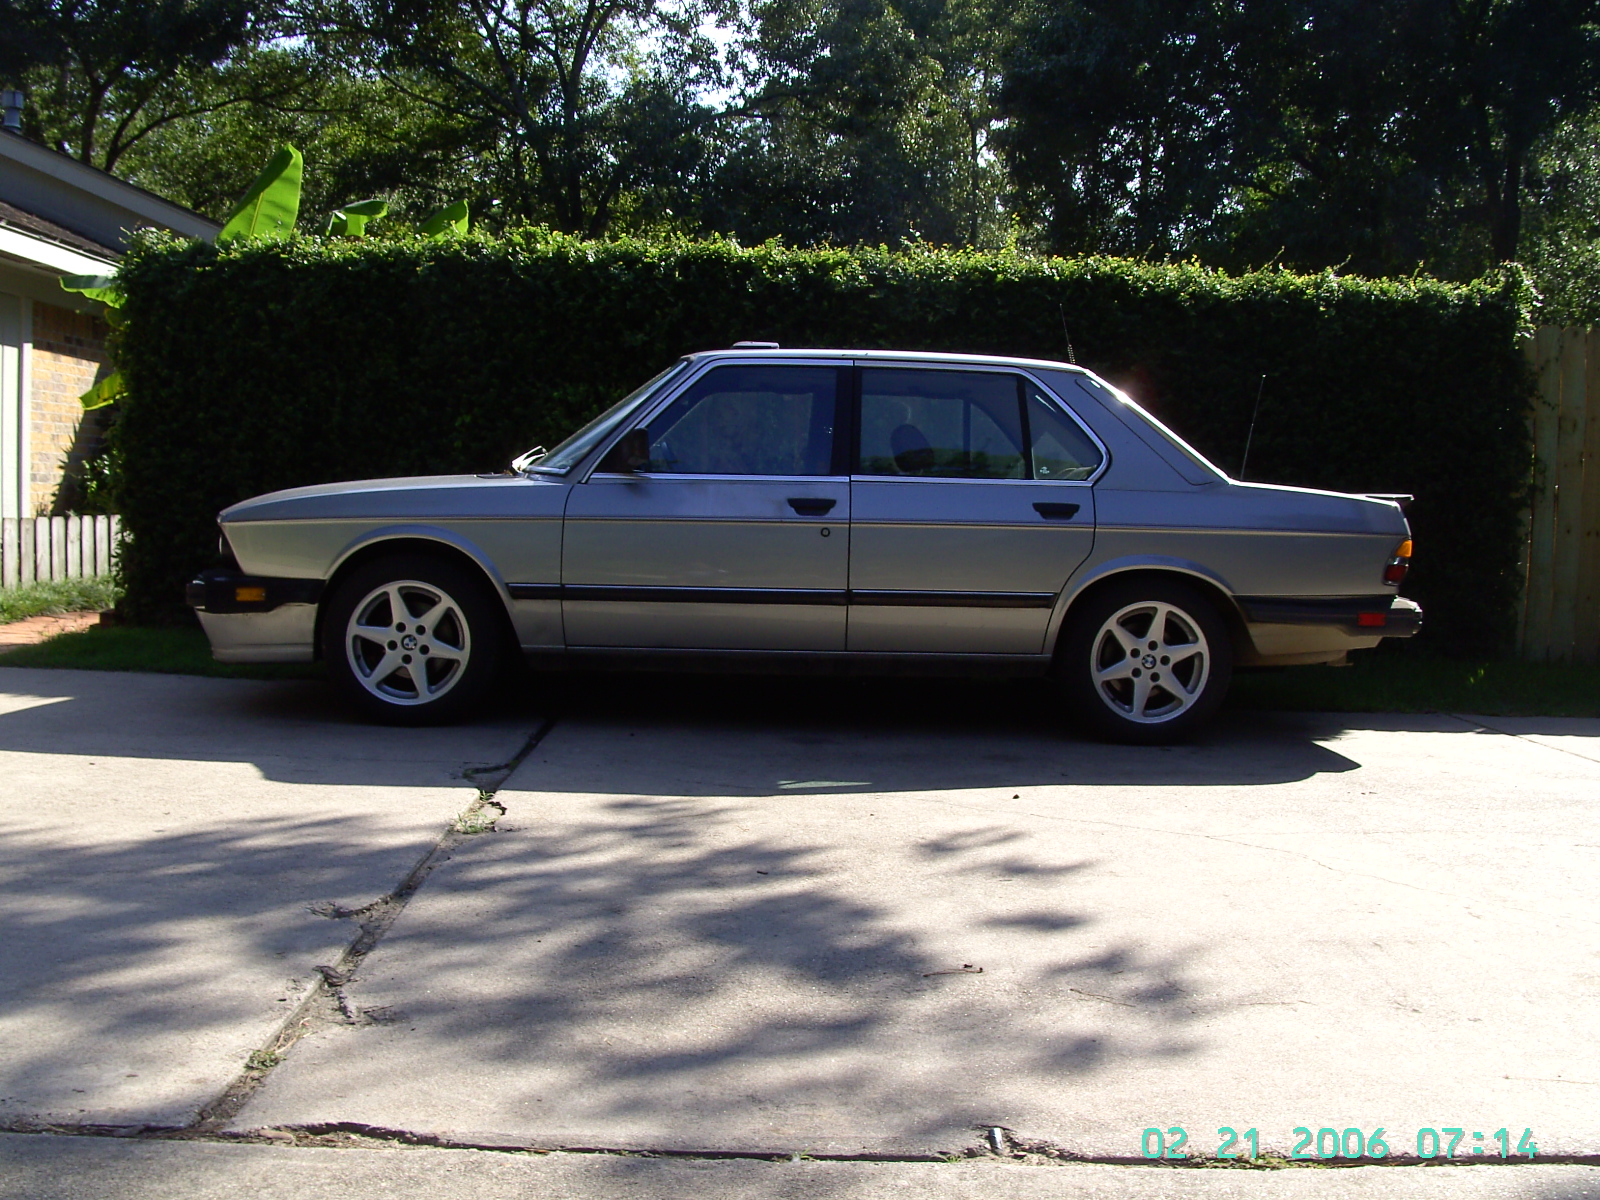
BEFORE:
Image

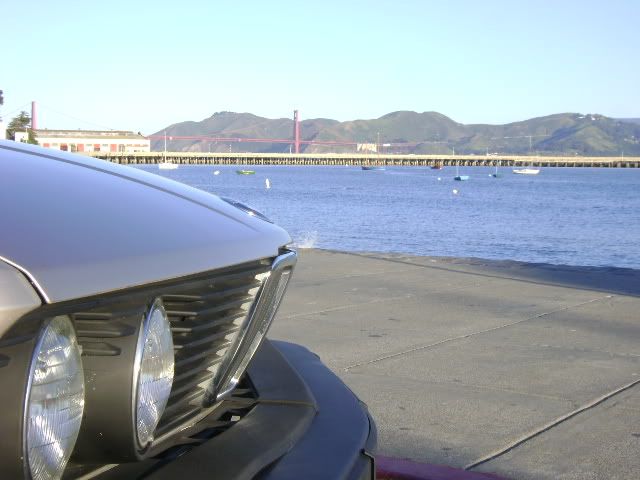
AFTER:
Image<---- This was TOO much tuckage for me. I adjusted it later.

Image

And... after Mtech spoiler install: (rear bumper has also been adjusted to match the front. A much better look than all the way in as pictured above)
Image

Tucking the front.
On several cars, this procedure can be done without removing many parts and on my e28, I only had to remove the foglights. The actual procedure involves drilling holes into the actual shock to release the pressurized fluid that keeps the shock extended.

You will need:
  • Power Drill
    Large drill bit (1/4" or larger)
    large peice of cardboard or a few paper plates
    Eye protection
    Old clothes
    Rags
    Drip cloth of some sort
    Ramps (optional)
    Jackstands (optional)
    Floor Jack. (optional)
You'll need to gain access to the bumper shocks. This may mean removing the bumper or other front end parts. (may vary by model/year)
It may also be helpful to get your front end up in the air a bit.

Lay out a drop cloth. Once the shock is punctured, it will spray everywhere.

Once you locate the shocks, get your drill ready.
Insert desired bit into the drill
Poke the bit thru the center of your paper plate / cardboard.

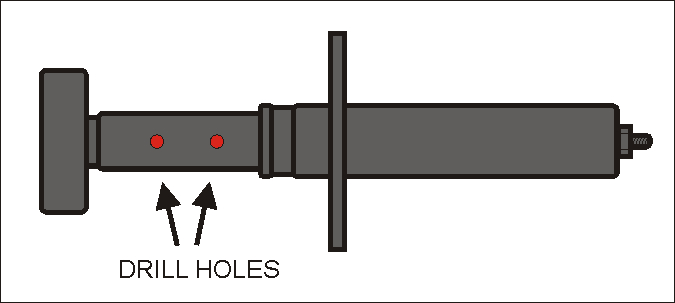
Apply eye protection and start drilling. Be prepared for that pressurized fluid to spew out. Hold the paper/plate "shield" as close as possible to the shock. (this also helps keep the metal shavings off of your hands)
Image

It may be necessary to drill a second hole to get the shock to fully compress. (If you did this with the shock REMOVED, drain out the fluid, but leave it extended until AFTER you reassemble the bumper, THEN push it in. If you don't, you may have a tough time getting everything back together again.)

Reassemble, push the bumper in to the desired amount of "tuck". This may take some force. I was able to "kick" it in with my foot. Others used a block of wood and a Big F*n Hammer (BFH) ...OR... in some cases, have actually bumped the car into a solid object such as a tree or a wall. If you find that the body of the car is at ALL rusty where the shocks mount, I would NOT do this. Also, the bumpers are made of aluminum and can crack easily, especially if there has been ANY prior "contact with objects"

Tucking the rear.
This is a bit harder because of the substance that is used in the shock itself. The "stuff" is a liquid, but when it is exposed to oxygen, it turns into a gel like substance that is not as easy to "squeeze" out of the shock. This will require a bit more work and something to provide steady pressure.

The prep is the same, but these shocks are usually easier to access.
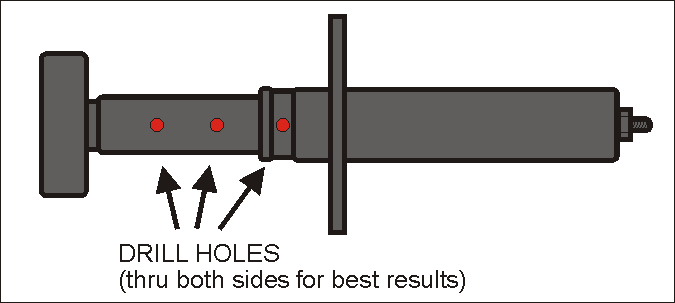
Notice that the MORE holes that you make for the goo to escape, the easier it will be to get the job done.
Image

When I did this, I removed the shocks and compressed them by using a floor jack, a 2x6 and my neighbors Trailblazer. I simply placed the block of 2x6 on the jack pad, stood the shock upright on the block, found a nice "notch" in the rear frame of the truck and used the jack to compress the shock. The goo slowly oozed out.

Reassemble.
Last edited by Jake D on Apr 19, 2010 8:05 PM, edited 3 times in total.
CSBolger
Posts: 3485
Joined: Nov 27, 2007
Location: Palmdale, CA

Post by CSBolger »

Though this forum's members have mixed feelings about doing this, I think it was an excellent writeup. :up:
Shawn D.
Beamter
Beamter
Posts: 22372
Joined: Feb 12, 2006
Location: Alpharetta, GA
Contact:

Post by Shawn D. »

CSBolger wrote:Though this forum's members have mixed feelings about doing this...
http://www.mye28.com/viewtopic.php?t=22781 ;)
CSBolger
Posts: 3485
Joined: Nov 27, 2007
Location: Palmdale, CA

Post by CSBolger »

Shawn D. wrote:
CSBolger wrote:Though this forum's members have mixed feelings about doing this...
http://www.mye28.com/viewtopic.php?t=22781 ;)
Holy monkey! I remember that thread and how badly it tanked from before I registered. Damn, I've been registered for a while now - how did that happen? :laugh:
Jake D
Posts: 2107
Joined: Jun 20, 2008
Location: Spokane, WA
Contact:

Post by Jake D »

CSBolger wrote:Though this forum's members have mixed feelings about doing this, I think it was an excellent writeup. :up:
Thanks Chris.
Yeah, there was an abundant lack of info on the procedure with the rear bumper and the issues with the 'gel' in the shocks.

I realize that ANY mod is going to be controversial with some folks. That being said, I was pretty frustrated with the amount of unsolicited "opinions" when I was looking for a decent write-up. Some people don't like it, that's fair, but it's pretty crappy for them to dump on somebody else and hijack EVERY lipo/tuck thread on this forum.

I made the decision to do it to my car... and don't plan on any covert operations to tuck the bumpers of other board members who don't like it. :roll: So... to each, his own.
edlocke
Posts: 1335
Joined: Jul 06, 2006
Location: Portland Or.
Contact:

bumper Lipo

Post by edlocke »

Great write up, very professionally presented.
The difference between the US bumper and Euro crash values is very slight. US is designed for a 5 mile an hour crash or bump and Euro is 3 mph bump without sustaining damage.
So you do the math or pick your crash.
Scottinva
Posts: 3663
Joined: Dec 07, 2008
Location: Norfolk, Virginia

Post by Scottinva »

Or your like me and ,You just use wood and a sledge hit the bumper in because there isn't any fluid anyway, and they get stuck in the lipoed position. 10 minute job :laugh:
tom4pope
Posts: 516
Joined: Oct 20, 2008
Location: San Diego, CA

Post by tom4pope »

Scottinva wrote:Or your like me and ,You just use wood and a sledge hit the bumper in because there isn't any fluid anyway, and they get stuck in the lipoed position. 10 minute job :laugh:
no fluid??
dermauser
Posts: 54
Joined: Oct 23, 2008
Location: Newton Falls, Ohio

Post by dermauser »

Beautiful write-up. I might do this to my beater 528e but not to my 533i!!! But i love the detail and pictures thanks.
1st 5er
Posts: 21966
Joined: Jun 13, 2008
Location: Cypress
Contact:

Post by 1st 5er »

I'm a fan...Image
Edited to add my $0.02.
Last edited by 1st 5er on Apr 19, 2009 12:34 PM, edited 1 time in total.
MrNic3Guy
Posts: 925
Joined: Dec 15, 2008
Location: Texas
Contact:

Post by MrNic3Guy »

Scottinva wrote:Or your like me and ,You just use wood and a sledge hit the bumper in because there isn't any fluid anyway, and they get stuck in the lipoed position. 10 minute job :laugh:
:rofl:

I just pushed mine in real hard, no drilling needed.
jeffluvse30s

Perfect

Post by jeffluvse30s »

This is just the touch it needed all along. Beautiful!
greghaz
Posts: 59
Joined: Dec 03, 2008
Location: Eugene, Oregon

Post by greghaz »

That was on my list of things to do.
Many thanks for the great write-up!
danielsandrew22
Posts: 13
Joined: Apr 15, 2009
Location: canton, GA

Post by danielsandrew22 »

thank you!!! very nice write up. especially for the rear. looks great on my '88 535i.
mooseheadm5
Posts: 23035
Joined: Apr 08, 2009
Location: Charlottesville, VA
Contact:

Post by mooseheadm5 »

Has anyone figured out what to do about the trim gap? Seriously considering a minor tuck on the M5.
maldo
Posts: 124
Joined: Apr 16, 2009
Location: Staten Island, NY

Post by maldo »

nice write up nice difference :up:
1st 5er
Posts: 21966
Joined: Jun 13, 2008
Location: Cypress
Contact:

Post by 1st 5er »

mooseheadm5 wrote:Has anyone figured out what to do about the trim gap? Seriously considering a minor tuck on the M5.
It really is fairly insignificant.
I've done my M5's rear bumper, will do the front later.
HOVER
Posts: 134
Joined: Feb 23, 2009
Location: San Jose, CA

Post by HOVER »

I just did the front... I'll do the rear later...

BEFORE:
Image

AFTER:
Image

Image


Image
1st 5er
Posts: 21966
Joined: Jun 13, 2008
Location: Cypress
Contact:

Post by 1st 5er »

HOVER wrote: AFTER:
Image

Image
:clap: Looks great, especially the shadowed aluminum. :clap:
cavemanDarrell
Posts: 301
Joined: Apr 05, 2009
Location: Long Beach, CA

Post by cavemanDarrell »

anyone ever pull the 'rubber shroud' piece that the bumper sucks back in to off and just keep the metal portion of the bumper?
cavemanDarrell
Posts: 301
Joined: Apr 05, 2009
Location: Long Beach, CA

Post by cavemanDarrell »

bump for the 'no shroud' question.
Shawn D.
Beamter
Beamter
Posts: 22372
Joined: Feb 12, 2006
Location: Alpharetta, GA
Contact:

Post by Shawn D. »

Without the bumper covers, it'll look really bad. You'll have the seam w/ bolts between the valance and fender, large gaps at the side and top of the bumper, and no place for your sidemarkers.
Snakeyestx
Posts: 2168
Joined: Jul 27, 2009
Location: Houston, TX

Post by Snakeyestx »

I may be :deadhorse: here but I've got a 3 day weekend, and nothing to do and really not fond of the picnic bench look.

I took a peek under the upper trim and I can see the shock's top bolts, however, I'm fairly certain I won't be able to get to the bottom ones without taking off the m-tec chin diffuser with the fog lights built in.

Anyone got a good how-to on removing that or is there a simpler way to reach the bottom bolts on the shocks?
wkohler
Posts: 50939
Joined: Oct 05, 2006
Location: Phönix, Arizona, USA
Contact:

Post by wkohler »

Reach up behind the spoiler and undo the two nuts on each side of the shock absorber at the bumper. They're 17mm IIRC. You'll want a long extension and a ratchet for this.

Putting the bumper back on will be interesting to say the least because of how little space you'll have.

That said, if you have a gearwrench or similar, you could undo the top two bolts on the frame rail and get the bottom one from underneath with a ratchet. It could go back the same way.

I have no idea why I'm helping since your car is guaranteed to look like Chewbacca puke when you're done.

My first 533 had a lipoed bumper (because the car didn't fit in the PO's garage without it. :nuts: It took me two-and-a-half hours to remove the bumper - with no airdam, etc. I tried a couple of other methods like removing the set screw he installed, etc and pulling, but that didn't go well. I didn't have ratcheting wrenches in college, so I sat there using a combination box-end/open-end 10mm wrench undoing those top bolts. I spent about 15 minutes on each with about 5° or less of movement each time. I had to remove the headlamps and everything.
Snakeyestx
Posts: 2168
Joined: Jul 27, 2009
Location: Houston, TX

Post by Snakeyestx »

wkohler wrote:I have no idea why I'm helping since your car is guaranteed to look like Chewbacca puke when you're done.
Well, I definitely appreciate the effort of explaining it... the more I look at it, the more I think "Well... if I do this, it'll make me lazier on just swapping to the Euro style bumpers"

Then again... I really want to do the back one because there's a huge crack along the top side but not on the bottom, just to cover it up.
Jake D
Posts: 2107
Joined: Jun 20, 2008
Location: Spokane, WA
Contact:

Post by Jake D »

If you have the Mtech lower airdam, you only be able to "tuck" your front bumper an inch MAX. If I in your shoes, I would really think about whether it would be worth all that trouble.

Here is a closer shot of my front end.
Image
Snakeyestx
Posts: 2168
Joined: Jul 27, 2009
Location: Houston, TX

Post by Snakeyestx »

Man, I'm glad you said that.. I was looking under the airdam thinking "I don't think I can push this all the way in or this is going to stick out past the bumper"

I have to take the airdam off anyway to straighten out a brace on the underside and I've been toying with the idea of shadowing the aluminum anyway. I've got to get motivated to take it all apart, but I guess it'll wait a while since it doesn't look like the weather is going to cooperate with me this weekend.
1st 5er
Posts: 21966
Joined: Jun 13, 2008
Location: Cypress
Contact:

Post by 1st 5er »

Pulling the airdam is no big deal.
CSBolger
Posts: 3485
Joined: Nov 27, 2007
Location: Palmdale, CA

Post by CSBolger »

When my car had NA bumpers, I just adjusted the brackets on the spoiler. The bumper was pushed in all the way.
Zach716
Posts: 1376
Joined: Sep 02, 2009
Location: Winston-Salem, NC
Contact:

Post by Zach716 »

great tut man, i tucked 'em both and it looks great! ill post pix later.
Post Reply