How I installed E34 seats in my E28 now with rear seats too!
Posted: Jul 15, 2011 12:27 AM
Seems to be a lot of interest in this swap. I bought both fronts and the rear seat from an Canadian expat living in Cap Cod. They were stated to be "High Mileage" They must have smaller miles up there!
Anyway, here's how I did it, with pics and commentary:
First you acquire seats like these:
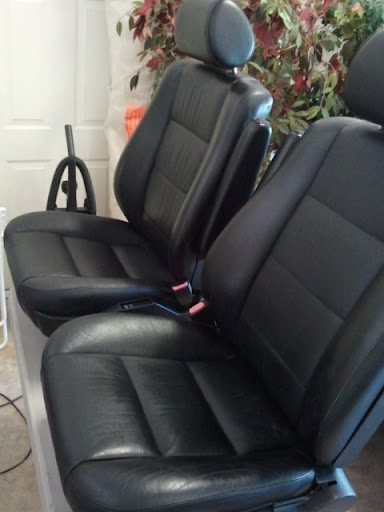
Amazingly clean:
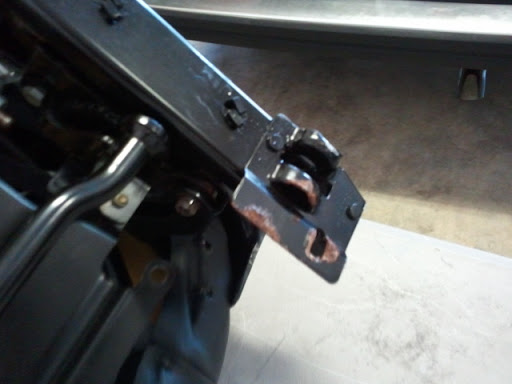
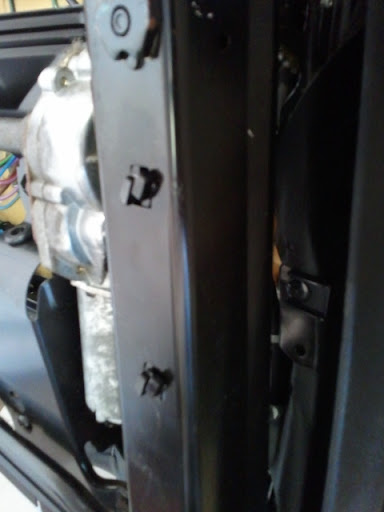
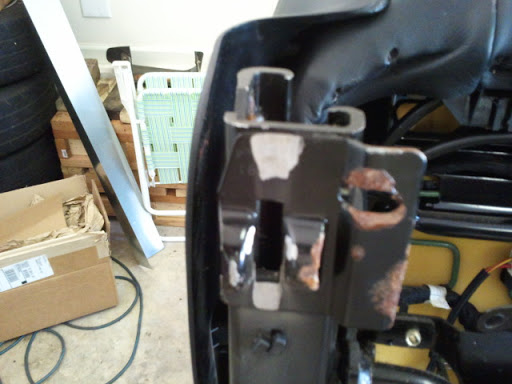
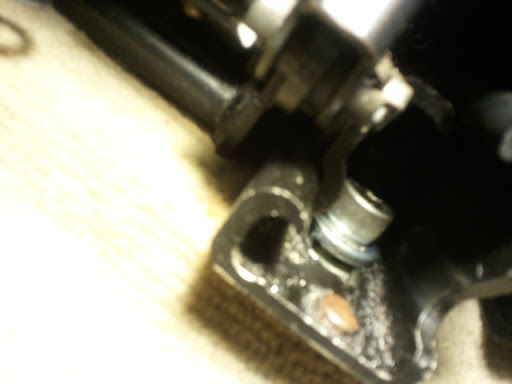
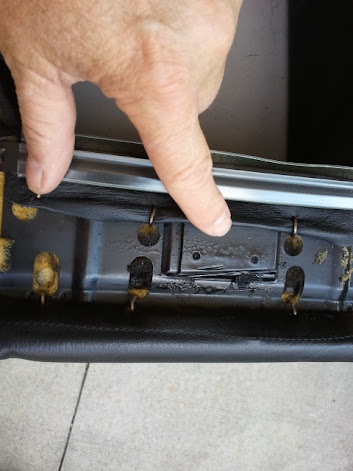
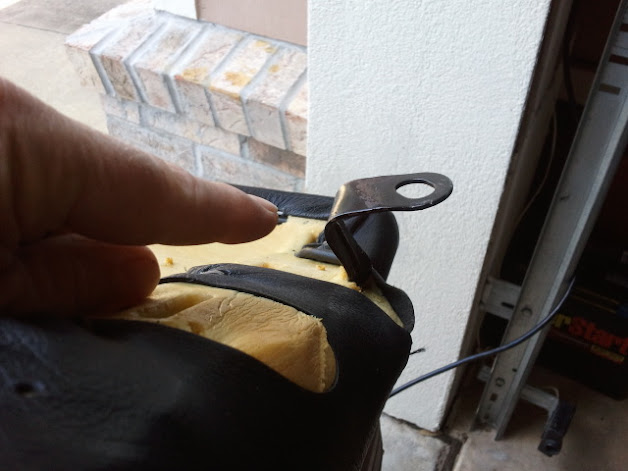
This is the "Hook Receiver" that has to be removed:
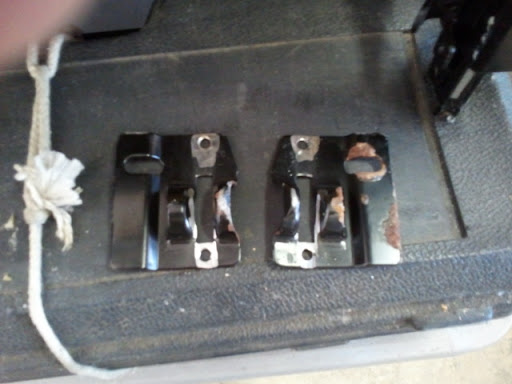
These upset retainers are a bit worrisome for the carpet and call for a spacer in the front:
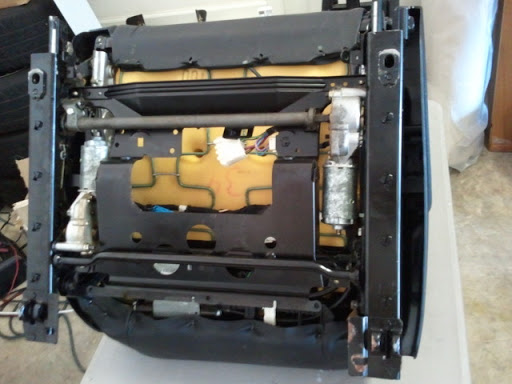
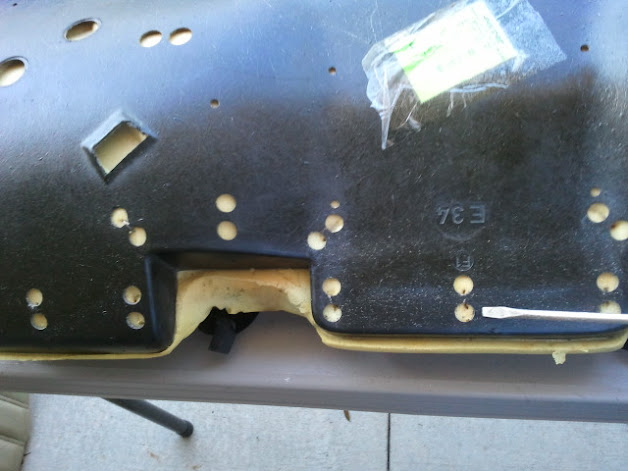
Stock seats are smooth on bottom:
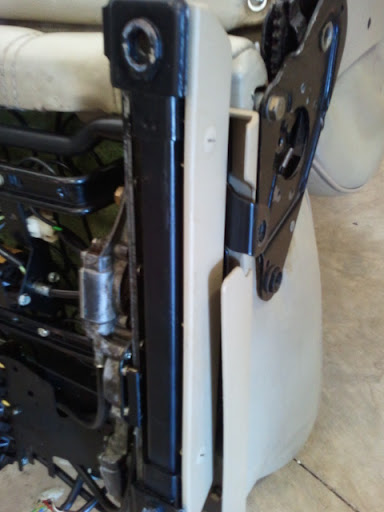
These rivets must be removed:
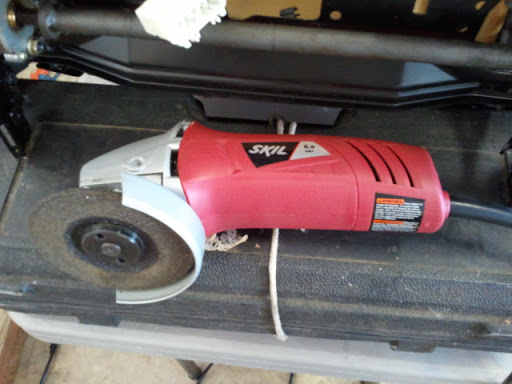
My weapon of choice, use a thick grinding disc not a thin cutting disc:
Thus:
Just pop 'em off:
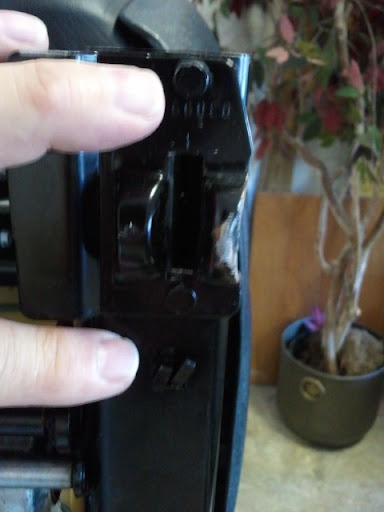
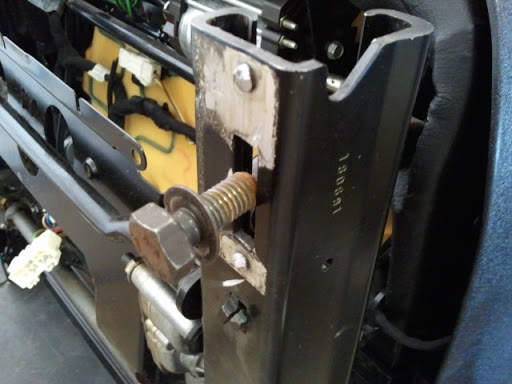
Hmm, not quite the right size:
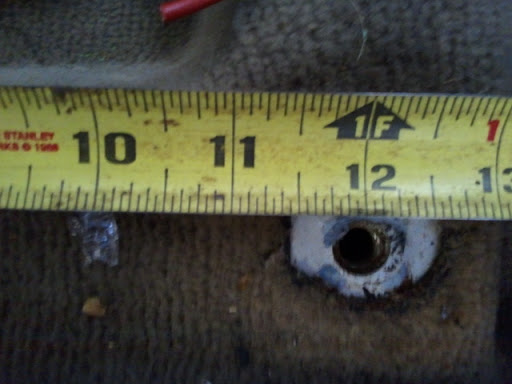
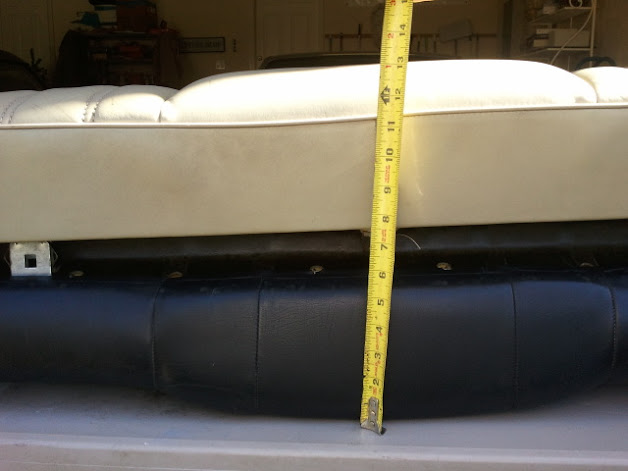
Measure a few times:
Upon measuring it becomes obvious the slots must be widened On the inside edge only! You need to take about 1/16 to 3/32 off. I used a flat bastard file and elbow grease. Five minutes per side.
Clean up the stump of the rivet with the grinder, prime and paint. Your almost done now.
We need power, but the old connectors and new seat harness are not compatible so:
I stole the hot and ground feed from the old seat:
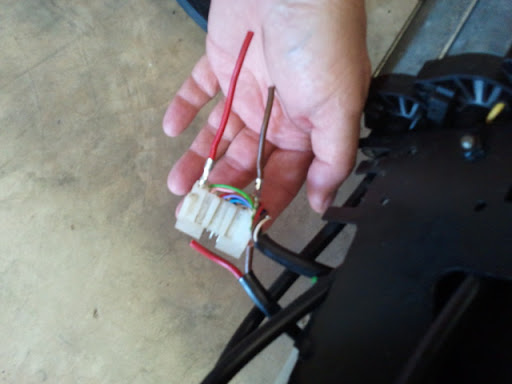
And built a new sub-harness, having learned you can never have too many fuses, I wired in a fuse holder. The main fuse for the seat is 8A so I used a 7.5A to protect the main harness:
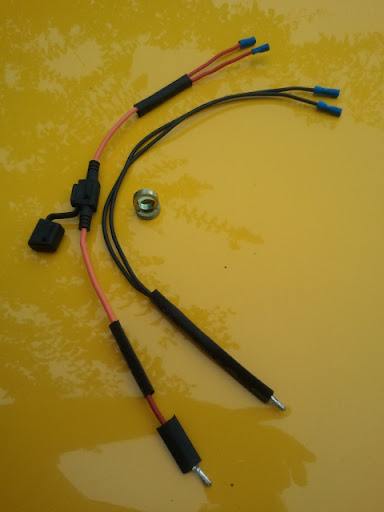
Took the pics before I stole her hair dries to shrink the shrink tubing!
Close up of the fuse holder and spacers for front to keep the carpet from being chewed up:

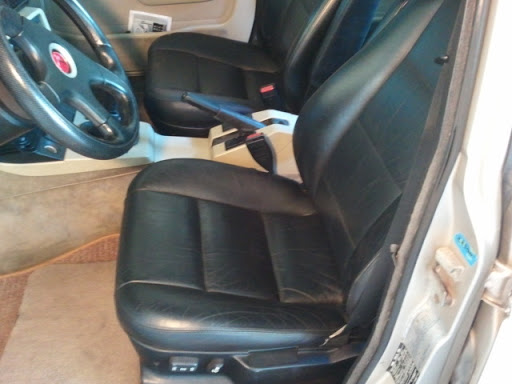
New seats with heaters and power lumbar support installed, they are awesome!
The rear seat will have to wait until I figure out how to get them from Cape Cod to Florida
Edit:
I realized I failed to mention a couple important details.
One is that you will need to transfer the seat belt receiver from your old seat to the new seat as the original seat belts will not work in the E34 receiver. Or you could install the entire E34 seat belt system i suppose.
Two, and it is a bit more involved. You cannot use the stock bolts on the front of the seat rail. When you move the bolts in to fit the floor pan the bolt head will hit the slider and prevent full movement of the seat. The solution I used is to use a 10x24 mm 1.50 machine screw (Allen head bolt). I used two washers under the head to approximate the surface area a hex bolt would have on the rail.

Sorry not good views of the situation. It is not easy to take pictures of the area.
Okay I finally got around to it and installed the rear seats and this is how I went about it.
First a few important points:
!: Your going to have to accept that the rear seat is too big for the car. It must be slightly modified to fit, there is no way around this (I tried).
2. I made it a point to not modify the chassis in any way (Except a few mounting holes). I also chose not to do any welding. This was so as many folks as possible could do this, with the minimum tools and expense.
3 Beg, buy or borrow a right angle grinder it will make your life much easier
4. Your going to have to do some of the engineering yourself and the seats are going to be in and out of the car 20 times. The relationships are complex and cannot be described or pictured well here.
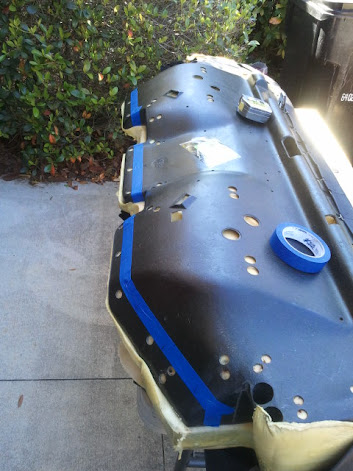
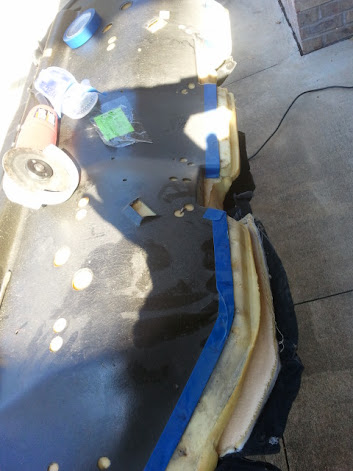
First off, once you try to squeeze the seats in you will understand the statement the seats are too big. They are too big in every direction except thickness and even that is close on the bottom cushion. The bottom is the worst so it will be addressed first. The bottom cushion is too wide and will tip up in the back if left stock width, causing the seat back to sit too high. So we need to reduce the width:
First remove the hog rings from the back of the bottom seat so it looks like this
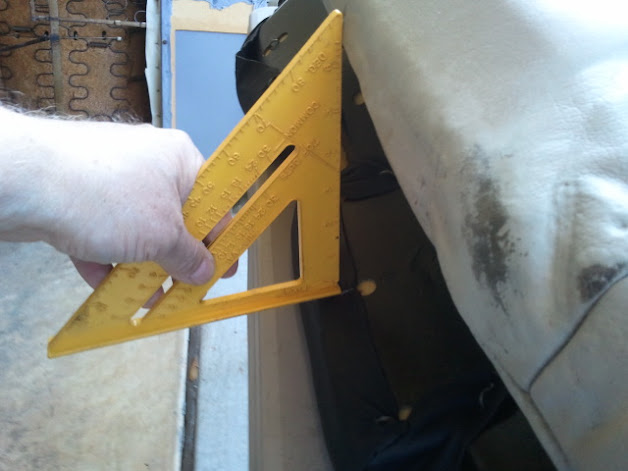
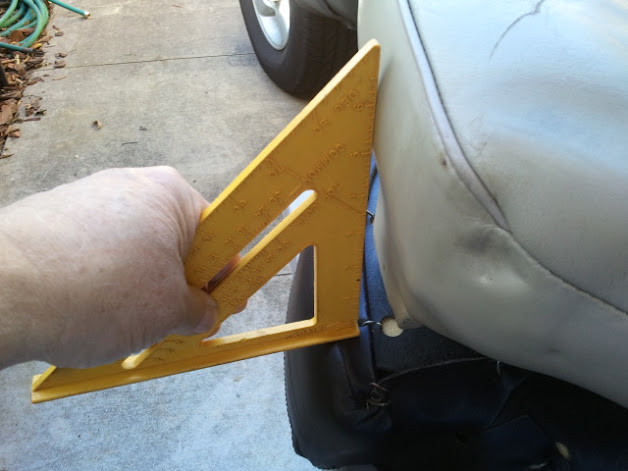
By my measurements we need to reduce the with to the front of the first hog ring hole, where the screw driver is pointing. Mark the cutting line somehow, I used blue painters tape.
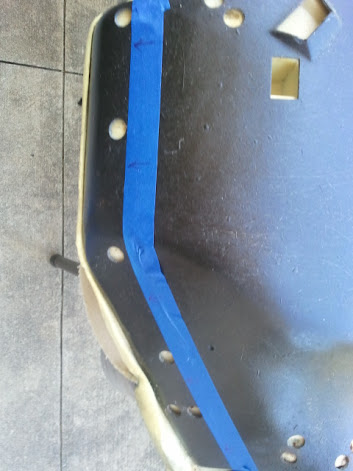
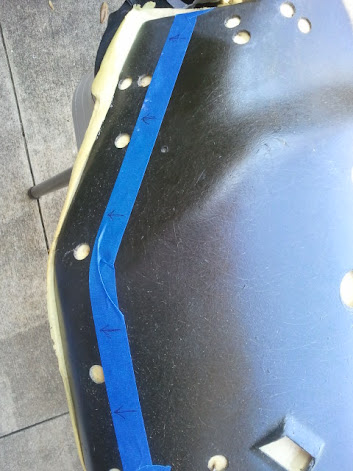
Using the right angle grinder and a thin cutting wheel, which cuts through the glass reinforced plastic like butter, you get this
You can trim the foam even with the new edge of the plastic tub. Then drill a new set of 3/8" holes for the hog rings to thread through.
You can now reinstall the hog rings, snugging the leather to make up for difference in the seat pan width, there will be a few puffy spots but it is hidden behind the seat and not visible, don't sweat perfection here.
The other modification to the bottom is to reduce the width of the shell by 1". You will need to remove 1/2" from each end. If you do not do this and slam the doors to make them close tight, you will crush the plastic on the door cards.
Simply slice off 1/2" off the end of the plastic seat tub (Do not cut the seat foam!), it is curved and you only need to remove the widest part. You will end up with a long wedge piece removed. There will be a bit of bagginess in the leather when you reattach it, just stuff a bit of fiberfill between the foam and the leather, it will readily compress but make the leather look smooth. Sorry no pictures for this, I took a couple but didn't allow the camera to save them. The whole thing is readily apparent anyway.
This concludes the seat bottom modifications it will now fit "Properly".
On to the rear seat back.
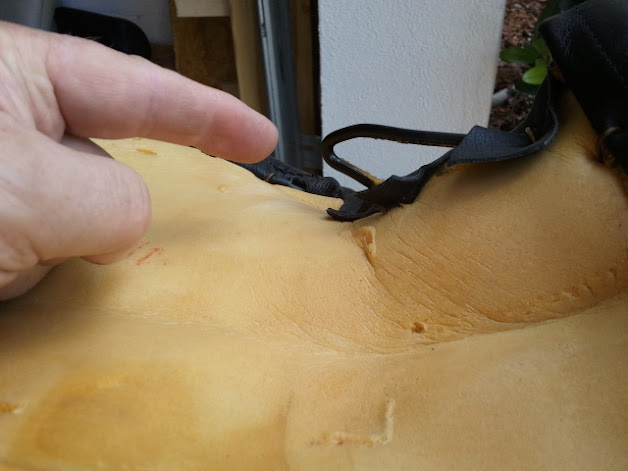
The seat back is somewhat easier as it has no hard shell. It is foam around a welded wire frame and is somewhat flexible. We are going to exploit that flexibility as much as we can. When you trial fit the seat back you will notice you can "Spring" the back into place to make it fit. You will also notice the back wants to sit high in relation to the parcel shelf. When installing we need to keep the back pushed down as much as possible, which is why we cut the seat pan width. Notice that the back prevents the seat belt retractors from taking up the slack because it is pressing on the belt. Also notice the bolster area tends to sit proud of the wheel arch. And lastly the "Hook" in the center of the seat interferes with the seat dropping down. So we remove the "hook" as shown. (Try not to have cutting wheel explode when doing this, it will look neater.) Paint the cut edge.
The two hoops on the top outside ends do not interfere with anything and can be left intact. (I found this amazing)
To fix the interference with the seat belts remove several hog rings on the top corners, use a serrated knife and carefully remove as much foam as you can in that area. Don't go crazy here. When you reinstall the hog rings snug the leather and clip any long ends. The seat belts will now retract. No pictures for this and none needed.
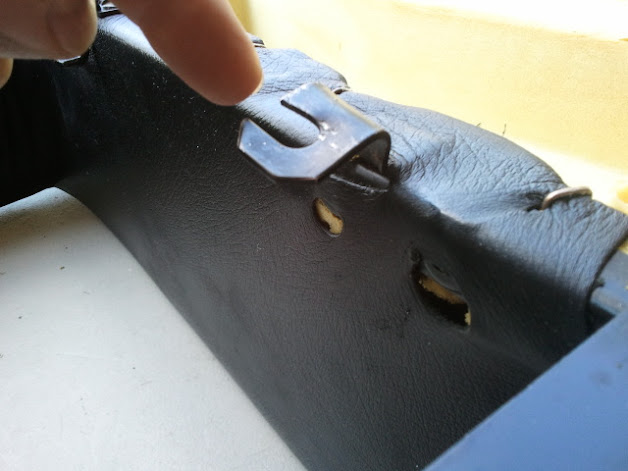
To mount the seat back you will need to reform the four tangs mounted on the seat. The stock shape is not even close to what we need, fortunately the location is almost ideal. Re-bend them to look like this:
Pass through area tang
Bolster area tang, which if bent just a touch short will pull the bolster down tight to the door/wheel well shape.
The head rests can either be simple or difficult, and of course I chose the difficult way.
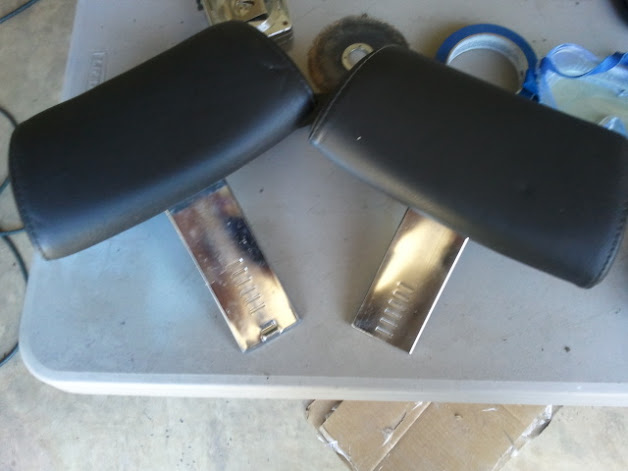
I wanted the head rests to be removable for DD use visibility and for autocross weight reduction (They are heavy). However, you cannot remove the headrests in the E28 unless you shorten the mounting slider, it will hit the rear window and prevent removal. So I cut 'em off like the one on the right.
Mounting the headrest receiver is probably hardest thing of the entire project. You have no access with the seat back in place and the location has to be precise to mount to the seat back, once bolted down. I resorted to strong magnets,tape, and one mis-drilled hole, however I was finally able to get the whole mess assembled so everything worked and is strong. It is impossible to take pictures of this so your on your own here. (Hint .. think "Ohmmm")
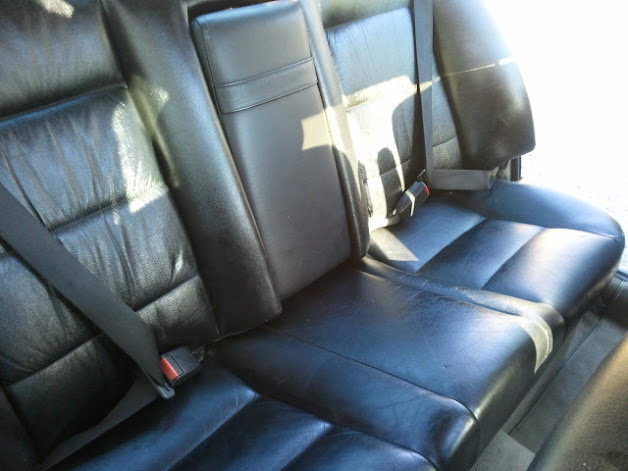
My seats had the pass through behind the rear arm rest! Not sure it all E334's have it but I was happy. The PO of my car had cut an opening in the trunk bulkhead that fit the pass through almost perfectly (what are the odds?). All I had to do was smooth the rough edges and put some vinyl edge molding on it to have a working pass through for my skis (In Florida!)
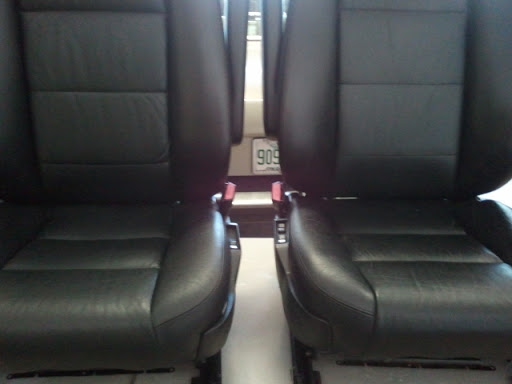
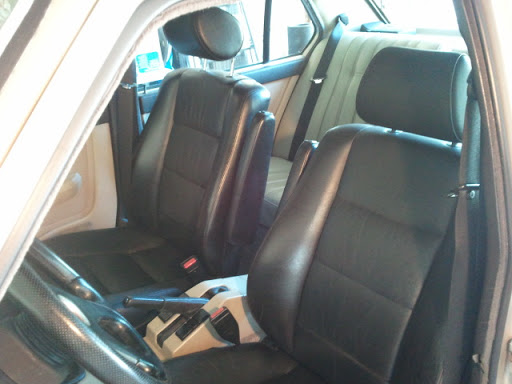
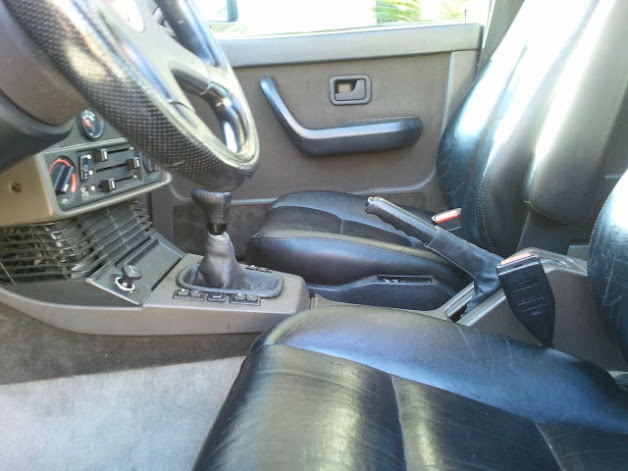
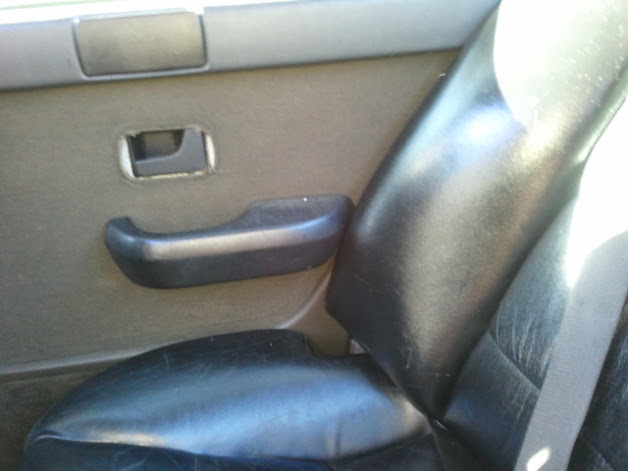
And there we have it folks. You will not have it done in a day and maybe not in a weekend but when your finished you have this.
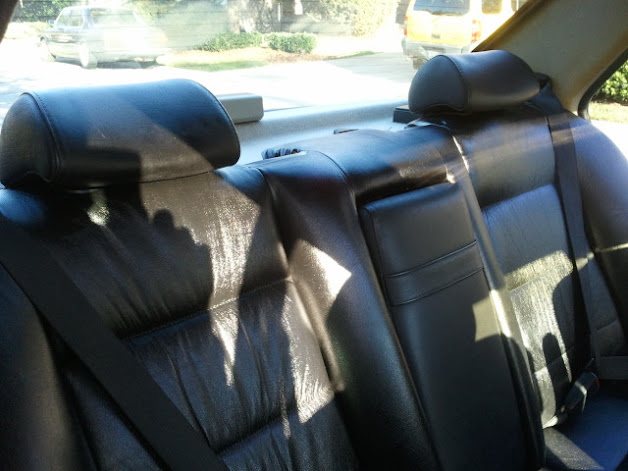
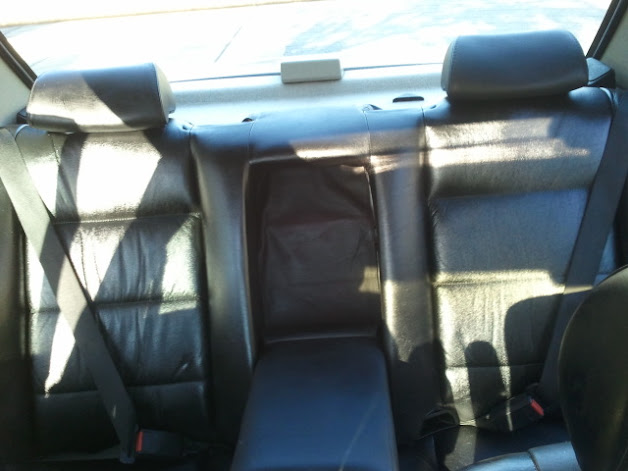
Notice how nicely the door pull clears the bolster!
If I can answer any questions feel free to ask, I'll mislead you as much as possible.
Anyway, here's how I did it, with pics and commentary:
First you acquire seats like these:
Amazingly clean:
This is the "Hook Receiver" that has to be removed:
These upset retainers are a bit worrisome for the carpet and call for a spacer in the front:
Stock seats are smooth on bottom:
These rivets must be removed:
My weapon of choice, use a thick grinding disc not a thin cutting disc:
Thus:
Just pop 'em off:
Hmm, not quite the right size:
Measure a few times:
Upon measuring it becomes obvious the slots must be widened On the inside edge only! You need to take about 1/16 to 3/32 off. I used a flat bastard file and elbow grease. Five minutes per side.
Clean up the stump of the rivet with the grinder, prime and paint. Your almost done now.
We need power, but the old connectors and new seat harness are not compatible so:
I stole the hot and ground feed from the old seat:
And built a new sub-harness, having learned you can never have too many fuses, I wired in a fuse holder. The main fuse for the seat is 8A so I used a 7.5A to protect the main harness:
Took the pics before I stole her hair dries to shrink the shrink tubing!
Close up of the fuse holder and spacers for front to keep the carpet from being chewed up:
New seats with heaters and power lumbar support installed, they are awesome!
The rear seat will have to wait until I figure out how to get them from Cape Cod to Florida
Edit:
I realized I failed to mention a couple important details.
One is that you will need to transfer the seat belt receiver from your old seat to the new seat as the original seat belts will not work in the E34 receiver. Or you could install the entire E34 seat belt system i suppose.
Two, and it is a bit more involved. You cannot use the stock bolts on the front of the seat rail. When you move the bolts in to fit the floor pan the bolt head will hit the slider and prevent full movement of the seat. The solution I used is to use a 10x24 mm 1.50 machine screw (Allen head bolt). I used two washers under the head to approximate the surface area a hex bolt would have on the rail.
Sorry not good views of the situation. It is not easy to take pictures of the area.
Okay I finally got around to it and installed the rear seats and this is how I went about it.
First a few important points:
!: Your going to have to accept that the rear seat is too big for the car. It must be slightly modified to fit, there is no way around this (I tried).
2. I made it a point to not modify the chassis in any way (Except a few mounting holes). I also chose not to do any welding. This was so as many folks as possible could do this, with the minimum tools and expense.
3 Beg, buy or borrow a right angle grinder it will make your life much easier
4. Your going to have to do some of the engineering yourself and the seats are going to be in and out of the car 20 times. The relationships are complex and cannot be described or pictured well here.
First off, once you try to squeeze the seats in you will understand the statement the seats are too big. They are too big in every direction except thickness and even that is close on the bottom cushion. The bottom is the worst so it will be addressed first. The bottom cushion is too wide and will tip up in the back if left stock width, causing the seat back to sit too high. So we need to reduce the width:
First remove the hog rings from the back of the bottom seat so it looks like this
By my measurements we need to reduce the with to the front of the first hog ring hole, where the screw driver is pointing. Mark the cutting line somehow, I used blue painters tape.
Using the right angle grinder and a thin cutting wheel, which cuts through the glass reinforced plastic like butter, you get this
You can trim the foam even with the new edge of the plastic tub. Then drill a new set of 3/8" holes for the hog rings to thread through.
You can now reinstall the hog rings, snugging the leather to make up for difference in the seat pan width, there will be a few puffy spots but it is hidden behind the seat and not visible, don't sweat perfection here.
The other modification to the bottom is to reduce the width of the shell by 1". You will need to remove 1/2" from each end. If you do not do this and slam the doors to make them close tight, you will crush the plastic on the door cards.
Simply slice off 1/2" off the end of the plastic seat tub (Do not cut the seat foam!), it is curved and you only need to remove the widest part. You will end up with a long wedge piece removed. There will be a bit of bagginess in the leather when you reattach it, just stuff a bit of fiberfill between the foam and the leather, it will readily compress but make the leather look smooth. Sorry no pictures for this, I took a couple but didn't allow the camera to save them.
This concludes the seat bottom modifications it will now fit "Properly".
On to the rear seat back.
The seat back is somewhat easier as it has no hard shell. It is foam around a welded wire frame and is somewhat flexible. We are going to exploit that flexibility as much as we can. When you trial fit the seat back you will notice you can "Spring" the back into place to make it fit. You will also notice the back wants to sit high in relation to the parcel shelf. When installing we need to keep the back pushed down as much as possible, which is why we cut the seat pan width. Notice that the back prevents the seat belt retractors from taking up the slack because it is pressing on the belt. Also notice the bolster area tends to sit proud of the wheel arch. And lastly the "Hook" in the center of the seat interferes with the seat dropping down. So we remove the "hook" as shown. (Try not to have cutting wheel explode when doing this, it will look neater.) Paint the cut edge.
The two hoops on the top outside ends do not interfere with anything and can be left intact. (I found this amazing)
To fix the interference with the seat belts remove several hog rings on the top corners, use a serrated knife and carefully remove as much foam as you can in that area. Don't go crazy here. When you reinstall the hog rings snug the leather and clip any long ends. The seat belts will now retract. No pictures for this and none needed.
To mount the seat back you will need to reform the four tangs mounted on the seat. The stock shape is not even close to what we need, fortunately the location is almost ideal. Re-bend them to look like this:
Pass through area tang
Bolster area tang, which if bent just a touch short will pull the bolster down tight to the door/wheel well shape.
The head rests can either be simple or difficult, and of course I chose the difficult way.
I wanted the head rests to be removable for DD use visibility and for autocross weight reduction (They are heavy). However, you cannot remove the headrests in the E28 unless you shorten the mounting slider, it will hit the rear window and prevent removal. So I cut 'em off like the one on the right.
Mounting the headrest receiver is probably hardest thing of the entire project. You have no access with the seat back in place and the location has to be precise to mount to the seat back, once bolted down. I resorted to strong magnets,tape, and one mis-drilled hole, however I was finally able to get the whole mess assembled so everything worked and is strong. It is impossible to take pictures of this so your on your own here. (Hint .. think "Ohmmm")
My seats had the pass through behind the rear arm rest! Not sure it all E334's have it but I was happy. The PO of my car had cut an opening in the trunk bulkhead that fit the pass through almost perfectly (what are the odds?). All I had to do was smooth the rough edges and put some vinyl edge molding on it to have a working pass through for my skis (In Florida!)
And there we have it folks. You will not have it done in a day and maybe not in a weekend but when your finished you have this.
Notice how nicely the door pull clears the bolster!
If I can answer any questions feel free to ask, I'll mislead you as much as possible.