Outside Mirror "Rebuild" Photo Guide
Posted: Jun 26, 2011 10:42 PM
My RH mirror's motor assembly had failed and would not keep the mirror pointed anywhere it wouldn't just reflect asphalt. With the help of a generous junkyard donor car's mirror innards, I swapped clean, new-looking bits into my fancy-pants color-keyed mirror housing. It's a simple procedure, but since I couldn't find any good pictures online I'm posting some here in case anyone wants to do this.
Time required:
For someone like me who studies the parts and cleans everything: 30 minutes.
Someone just trying to get the job done: 5-10 minutes.
Professional: Look at it and it's done.
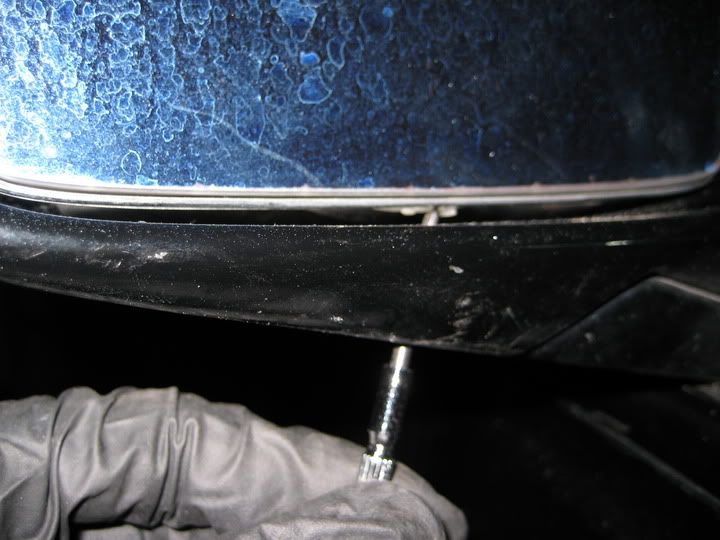
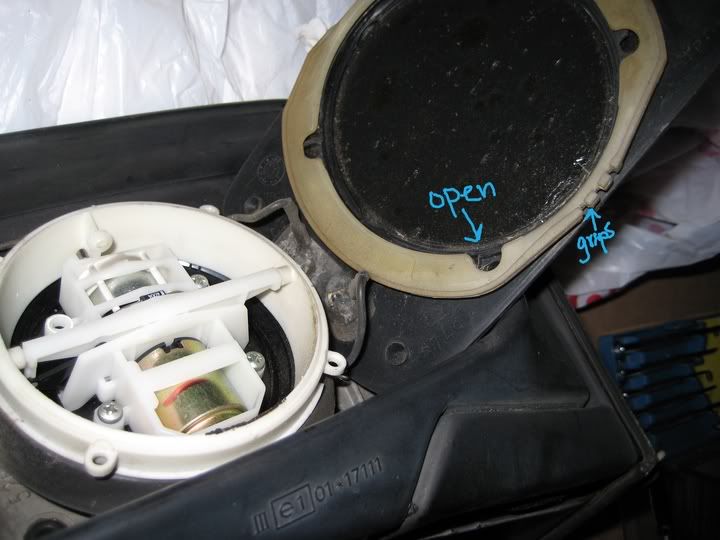
First, with the mirror centered, reach through the access hole at the bottom with a small flathead screwdriver and push the grips to the right (rotating the plastic lock plate counterclockwise as you face the mirror). It may take some force (more than I expected anyway).
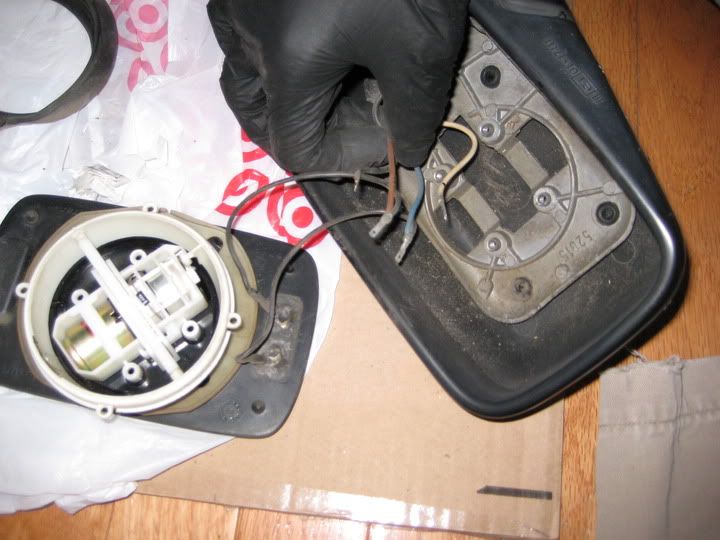
The mirror will come off and you will see four Phillips head screws holding the motor assembly to the mirror housing. Remove the screws, then carefully disconnect the four spade-connected wires. I marked the wires with a Sharpie for reassembly. I found no reason to disconnect the mirror itself, but it's also connected with spade connectors if you want to (or isn't connected at all if you don't have heated mirrors).
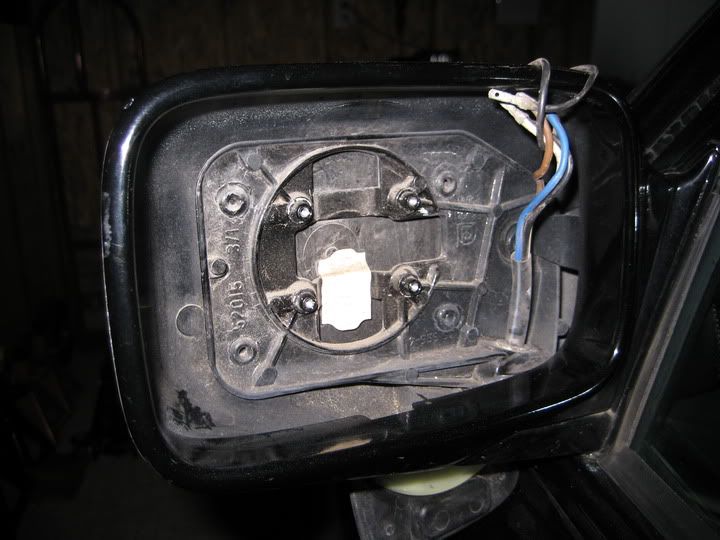
Housing with motor assembly and mirror removed:
Lock plate assembly in locked (normal) position:
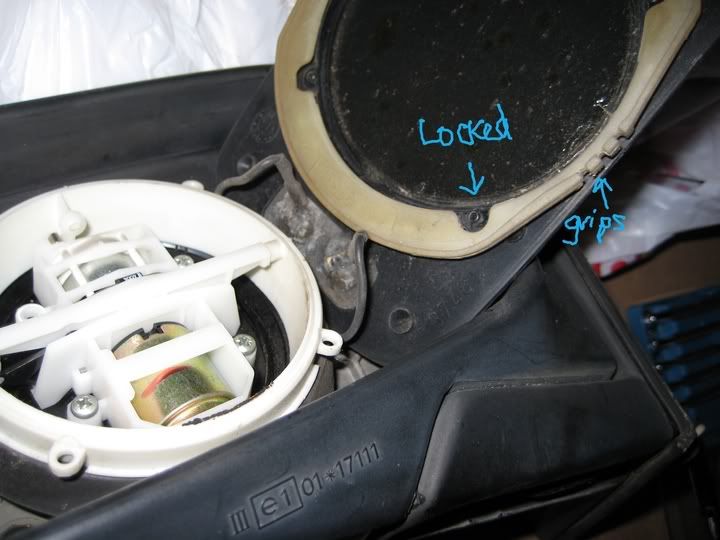
Lock plate assembly rotated to unlocked position:
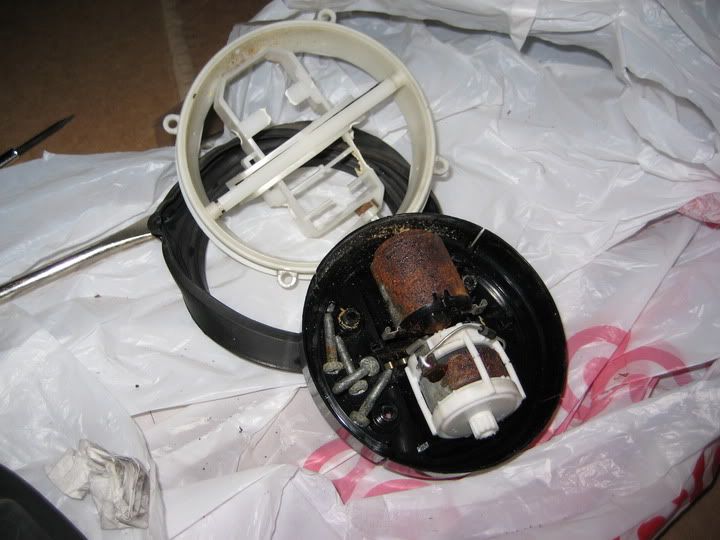
Old, failed bits:
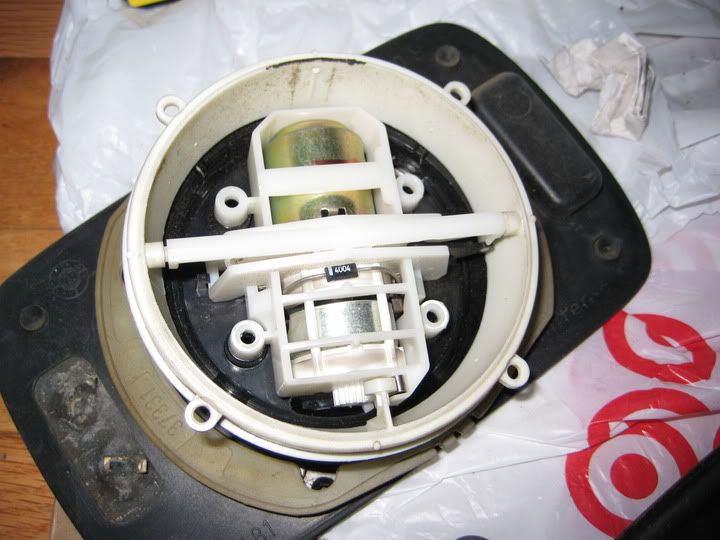
Happy "new" bits:
Swap in the bits you need from the donor mirror assembly and reassemble.
Time required:
For someone like me who studies the parts and cleans everything: 30 minutes.
Someone just trying to get the job done: 5-10 minutes.
Professional: Look at it and it's done.
First, with the mirror centered, reach through the access hole at the bottom with a small flathead screwdriver and push the grips to the right (rotating the plastic lock plate counterclockwise as you face the mirror). It may take some force (more than I expected anyway).
The mirror will come off and you will see four Phillips head screws holding the motor assembly to the mirror housing. Remove the screws, then carefully disconnect the four spade-connected wires. I marked the wires with a Sharpie for reassembly. I found no reason to disconnect the mirror itself, but it's also connected with spade connectors if you want to (or isn't connected at all if you don't have heated mirrors).
Housing with motor assembly and mirror removed:
Lock plate assembly in locked (normal) position:
Lock plate assembly rotated to unlocked position:
Old, failed bits:
Happy "new" bits:
Swap in the bits you need from the donor mirror assembly and reassemble.