Installed my remote garage door opener
Posted: Aug 01, 2010 4:54 PM
So, I took some time off from trying to figure out the cause of my IS's running issues and made a modification I've wanted to do since I bought the car a couple of months ago, permanently installing a remote garage door opener. I've been using a standard opener that you would clip onto your visor Velcroed to the sunroof motor cover. Not only did it look tacky, but it moved around too much and was a pain to use. Here's what I did (excuse the lousy pics, apparently my old digital camera does not like to focus this closely):
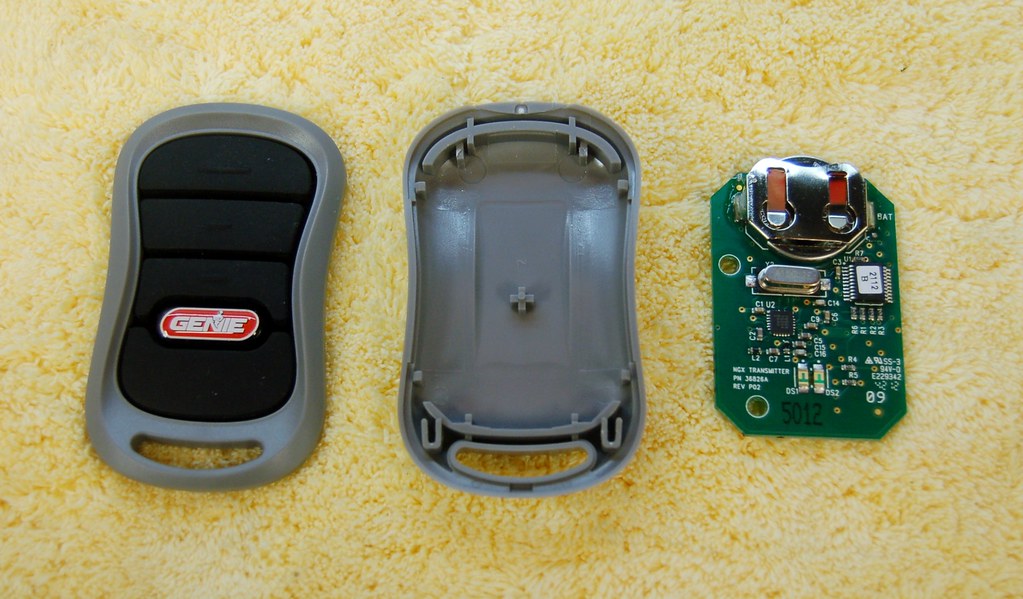
Here's what I was using:

______________________________________________________________________________________________
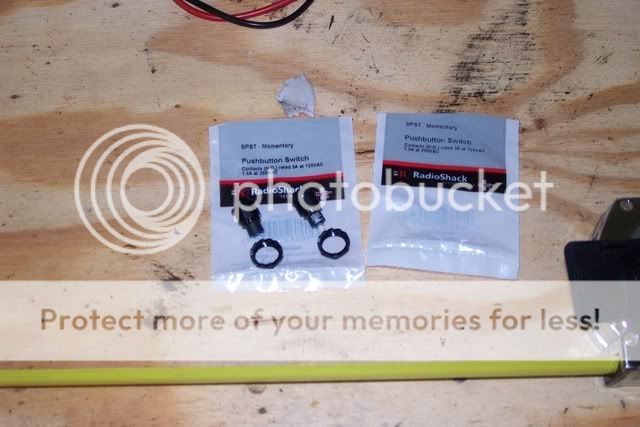
What I decided to do was to simply mount two switches in the sunroof motor cover, and wire them to activate the remote opener switches on the remote's circuit board. Here are the switches I used (Radio Shack PN 275-644, $2.69 each):
______________________________________________________________________________________________
I took the cover off, measured how far in from the right and left side the sunroof items interfered to make sure I could fit two switches in between, found the center of the cover and marked the spots for the centers of the switch holes 1/2" to each side, which would leave 1/2" between the switches. you can just see the pencil marks shining in the camera's flash, and this is after I center punched the hole centers:

______________________________________________________________________________________________
After drilling the two 1/2" holes (even with center punching the plastic, the drill wandered a bit, so for the next hole I started with a 1/4" drill and worked my way up to 1/2"), I mounted the two switches (really lousy pic, but I think you can get the idea):

______________________________________________________________________________________________
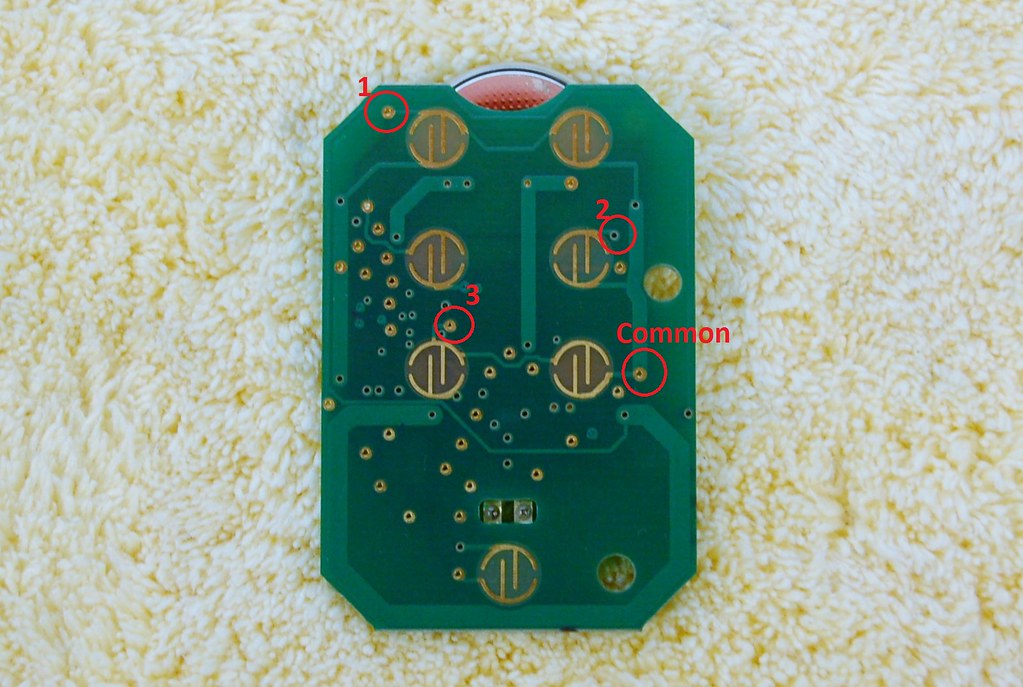
I popped open the case of the remote, and removed the circuit board. The controller board switches had one common terminal so I made that the black wired terminal, ran one black wire between the two switches and another to that common terminal. I then ran one red wire from the other terminal of each switch to the other switch contacts on the circuit board:

______________________________________________________________________________________________
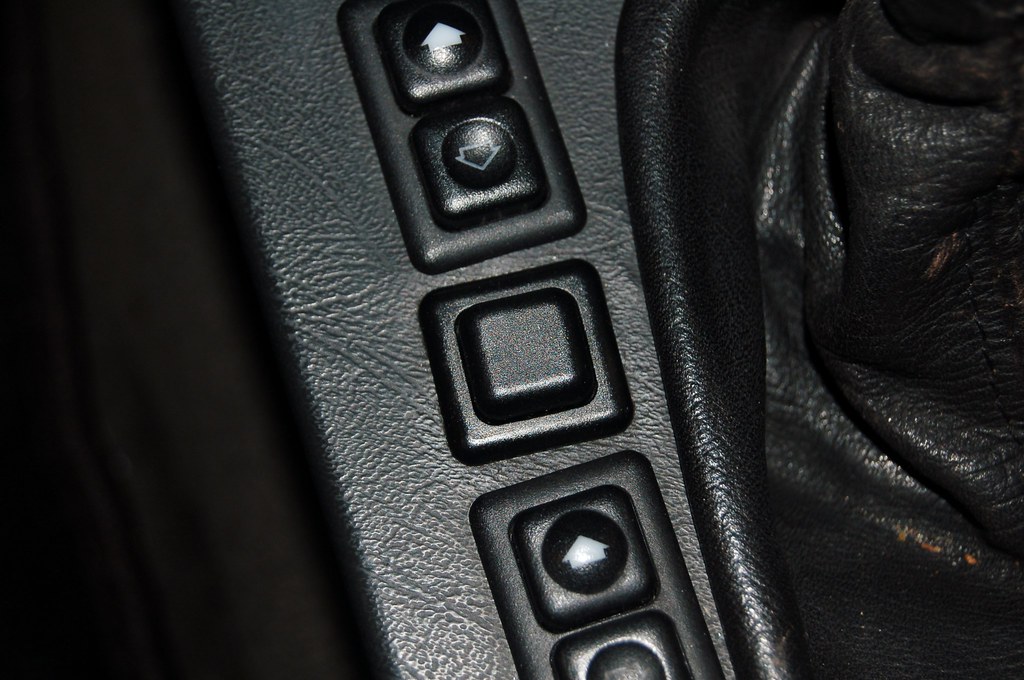
The final step in assembly was to cover the exposed circuit board with electrical tape, insert the circuit board up into the cavity where the sunroof motor is and pop the cover back in place. Here's the final result:

______________________________________________________________________________________________
It works like a charm and I think it looks a lot more "factory". All in all, it took less than an hour and cost just over 5 bucks.
Here's what I was using:
______________________________________________________________________________________________
What I decided to do was to simply mount two switches in the sunroof motor cover, and wire them to activate the remote opener switches on the remote's circuit board. Here are the switches I used (Radio Shack PN 275-644, $2.69 each):
______________________________________________________________________________________________
I took the cover off, measured how far in from the right and left side the sunroof items interfered to make sure I could fit two switches in between, found the center of the cover and marked the spots for the centers of the switch holes 1/2" to each side, which would leave 1/2" between the switches. you can just see the pencil marks shining in the camera's flash, and this is after I center punched the hole centers:
______________________________________________________________________________________________
After drilling the two 1/2" holes (even with center punching the plastic, the drill wandered a bit, so for the next hole I started with a 1/4" drill and worked my way up to 1/2"), I mounted the two switches (really lousy pic, but I think you can get the idea):
______________________________________________________________________________________________
I popped open the case of the remote, and removed the circuit board. The controller board switches had one common terminal so I made that the black wired terminal, ran one black wire between the two switches and another to that common terminal. I then ran one red wire from the other terminal of each switch to the other switch contacts on the circuit board:
______________________________________________________________________________________________
The final step in assembly was to cover the exposed circuit board with electrical tape, insert the circuit board up into the cavity where the sunroof motor is and pop the cover back in place. Here's the final result:
______________________________________________________________________________________________
It works like a charm and I think it looks a lot more "factory". All in all, it took less than an hour and cost just over 5 bucks.