E28 Homelink DIY Install
Posted: Aug 15, 2009 2:26 AM
Homelink E28 Install
by Brad Denton
Purpose:
Many new vehicles come with Homelink installed. It offers a high level of convenience and security by consolidating all of your "openers" and prevents you from having to leave them in your vehicle. Since the e28 was never blessed with the convenience of Homelink, I decided to retrofit a modern unit into the car and have it look discreet.
The Install:
The Homelink modules are standardized regardless of the vehicle they are installed in. Only the buttons vary. The unit that I used was purchased on ebay for $15 and was from a Lincoln vehicle.
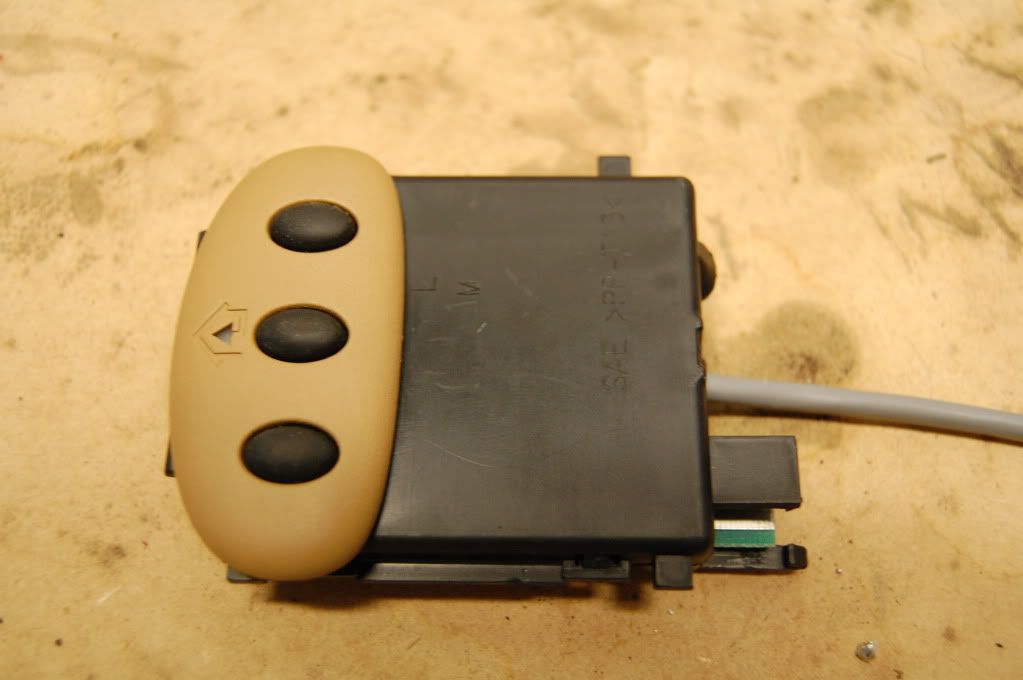
(The grey wire exiting the right side is the remote button wire that I added. It is not part of the original unit.)
Make sure that the unit that you purchase is a later model that is compatible with rolling security codes. Early units will not work with many new gates and garage doors. The unit is very small, only slightly larger than a deck of cards.
The unit only requires switched 12V and a ground making a basic installation very easy. While I could have used the existing buttons and bezel, which actually matches my llama interior quite well, I wanted a more discreet set of buttons and did not want to cut up any of the interior to mount the unit.
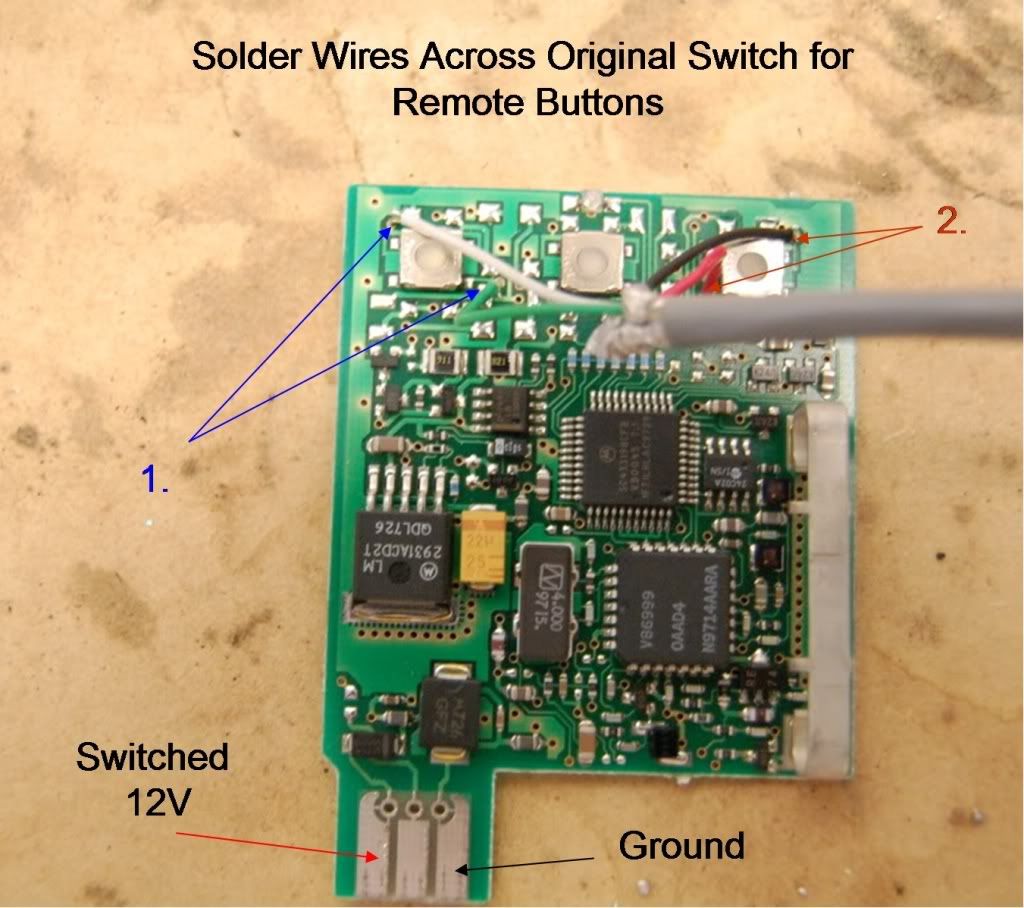
My solution was to bypass the on-board switches and remote mount them by using a factory BMW window switch. Any momentary switch would work though. Since the window switch only has two buttons, you can only control two devices. I chose to use the outer buttons so that the unit can be programmed from the remote buttons. Here is the board and the location of the remote switch wiring. There are existing solder pads which make adding wiring very easy. I used a run of two pair shielded wire to make for a clean wiring run to the switch. I mounted the control unit above the glovebox with some double sided tape.
-Button Modification:
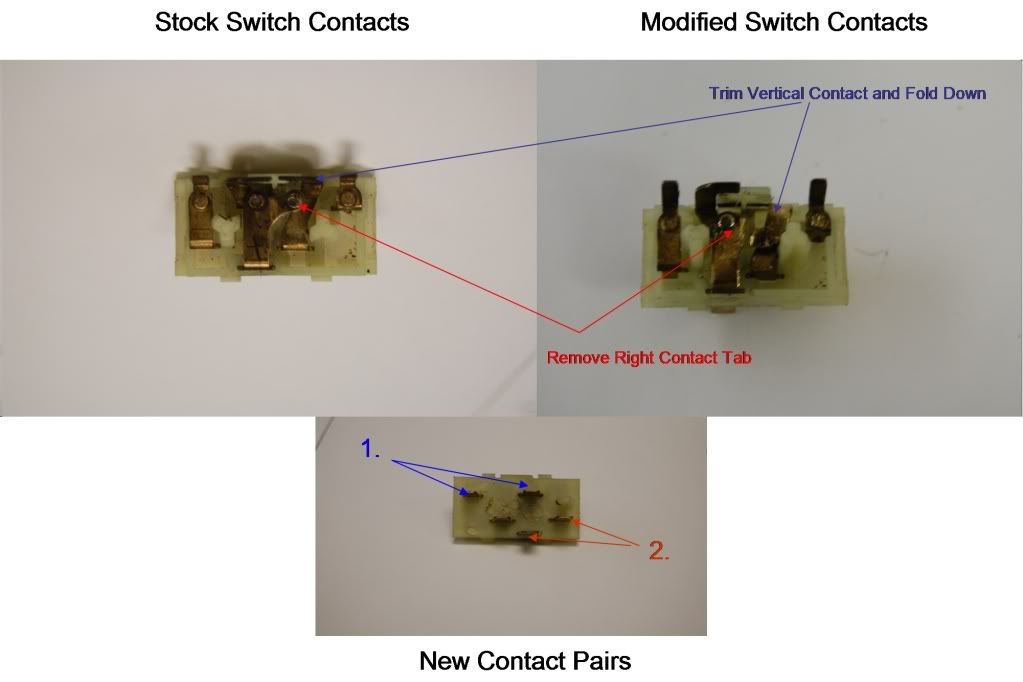
The factory operation of the BMW window switch is not optimal for operating the Homelink module. The contacts share a common power pin and switch the other pins between power and ground. I wanted two independent switches so internal modifications were required. The image below summarizes the changes made inside the switch.
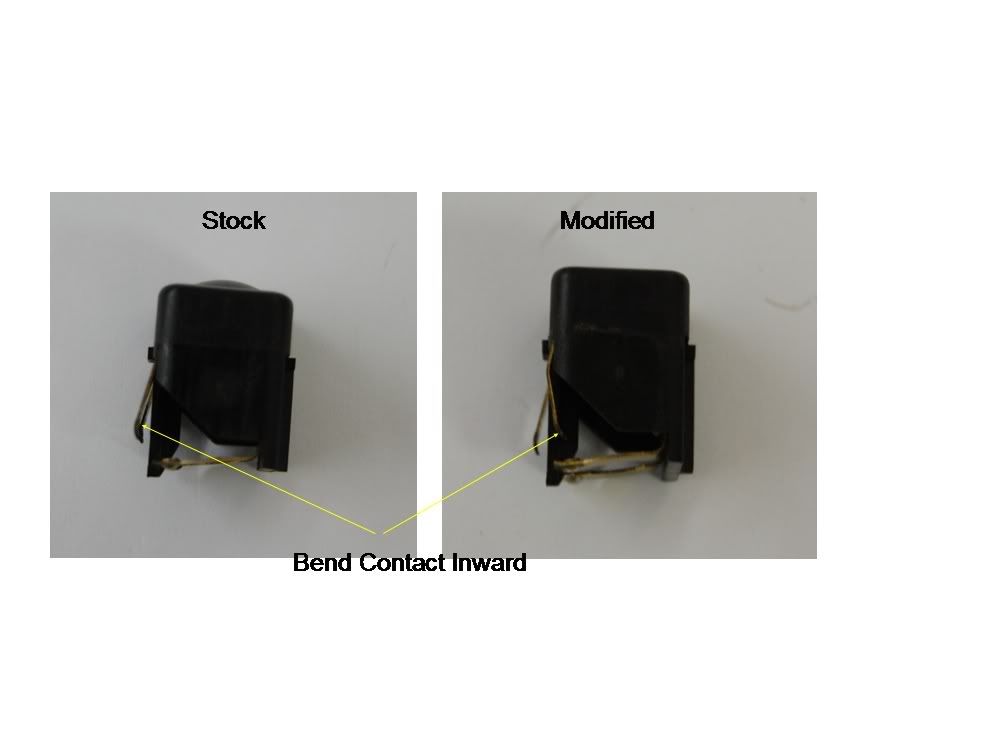
Since the contact wipers are now changed the button on the side with the bent vertical tab needs its contact bent inwards so that it will not interfere with its operation.
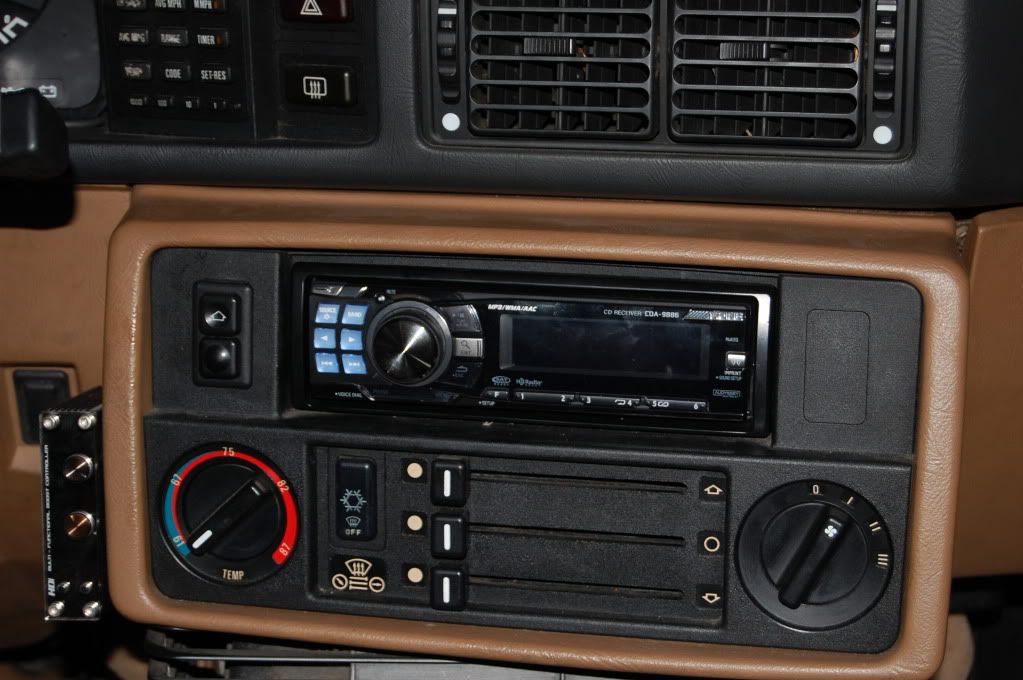
I mounted the window switch next to the radio in the location where the original fader used to sit. It is right at hand and looks very factory.
Programming:
Programming the unit is extremely easy. For the first time of use turn the ignition on and hold down either the two outer buttons or your remote switch buttons for approximately 20 seconds until the led flashes rapidly. This clears any old codes stored in the unit. To program hold down the button for the channel you wish to program and simultaneously hold the button on your original transmitter. Do this until the light flashes rapidly confirming that it has stored the code. If you have a garage door with a rolling code you will now need to sync up the devices. Press the "learn" button on your garage door or gate unit and then press the button that you previously programmed and it learn the new transmitted code and everything should work great.
Conclusion:
This is one of the best simple mods I have made to my car. For less than an hour of my time I have added a high level of convenience to the car. It works extremely well and looks very stock. For less than $30 (depending on what you pay for your unit and switch of choice) it is a great upgrade and would recommend it to everyone!
by Brad Denton
Purpose:
Many new vehicles come with Homelink installed. It offers a high level of convenience and security by consolidating all of your "openers" and prevents you from having to leave them in your vehicle. Since the e28 was never blessed with the convenience of Homelink, I decided to retrofit a modern unit into the car and have it look discreet.
The Install:
The Homelink modules are standardized regardless of the vehicle they are installed in. Only the buttons vary. The unit that I used was purchased on ebay for $15 and was from a Lincoln vehicle.
(The grey wire exiting the right side is the remote button wire that I added. It is not part of the original unit.)
Make sure that the unit that you purchase is a later model that is compatible with rolling security codes. Early units will not work with many new gates and garage doors. The unit is very small, only slightly larger than a deck of cards.
The unit only requires switched 12V and a ground making a basic installation very easy. While I could have used the existing buttons and bezel, which actually matches my llama interior quite well, I wanted a more discreet set of buttons and did not want to cut up any of the interior to mount the unit.
My solution was to bypass the on-board switches and remote mount them by using a factory BMW window switch. Any momentary switch would work though. Since the window switch only has two buttons, you can only control two devices. I chose to use the outer buttons so that the unit can be programmed from the remote buttons. Here is the board and the location of the remote switch wiring. There are existing solder pads which make adding wiring very easy. I used a run of two pair shielded wire to make for a clean wiring run to the switch. I mounted the control unit above the glovebox with some double sided tape.
-Button Modification:
The factory operation of the BMW window switch is not optimal for operating the Homelink module. The contacts share a common power pin and switch the other pins between power and ground. I wanted two independent switches so internal modifications were required. The image below summarizes the changes made inside the switch.
Since the contact wipers are now changed the button on the side with the bent vertical tab needs its contact bent inwards so that it will not interfere with its operation.
I mounted the window switch next to the radio in the location where the original fader used to sit. It is right at hand and looks very factory.
Programming:
Programming the unit is extremely easy. For the first time of use turn the ignition on and hold down either the two outer buttons or your remote switch buttons for approximately 20 seconds until the led flashes rapidly. This clears any old codes stored in the unit. To program hold down the button for the channel you wish to program and simultaneously hold the button on your original transmitter. Do this until the light flashes rapidly confirming that it has stored the code. If you have a garage door with a rolling code you will now need to sync up the devices. Press the "learn" button on your garage door or gate unit and then press the button that you previously programmed and it learn the new transmitted code and everything should work great.
Conclusion:
This is one of the best simple mods I have made to my car. For less than an hour of my time I have added a high level of convenience to the car. It works extremely well and looks very stock. For less than $30 (depending on what you pay for your unit and switch of choice) it is a great upgrade and would recommend it to everyone!