Page 1 of 1
M5 engine bay detailed
Posted: Feb 04, 2013 4:30 PM
by RoyW
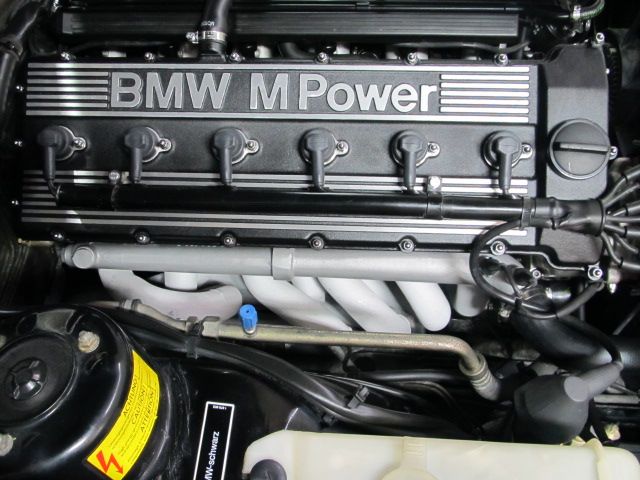
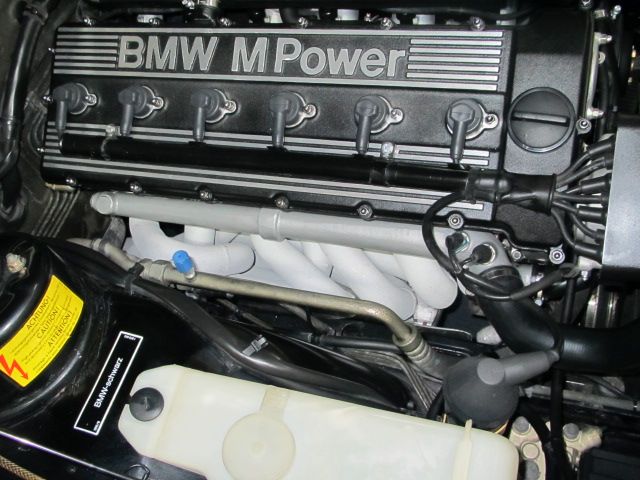
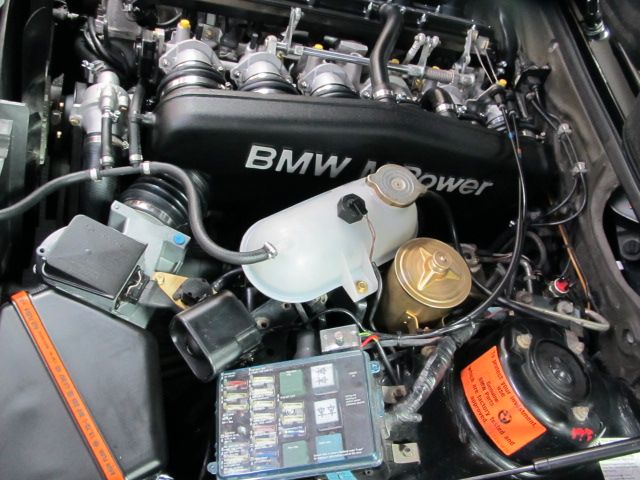
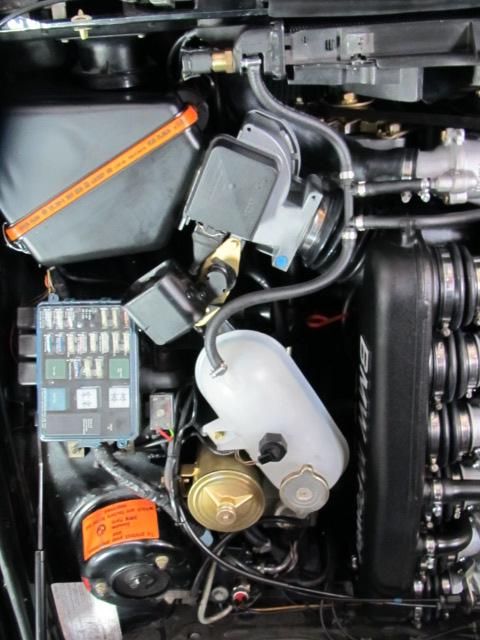
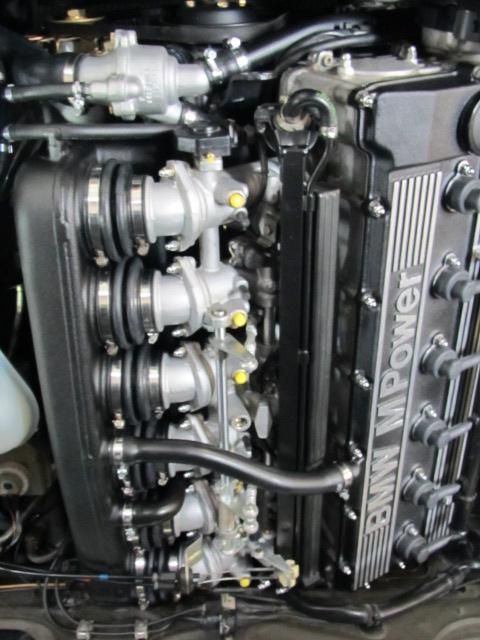
One of this year's winter projects was to get my M5 engine bay detailed, so it looked at least as good as the exterior and interior of the car. It had a serious cosmolene (sp?) issue! And, to additionally get a set of euro headers installed that I had purchased and had jet-coated last year.
Last week I got the car back from VSR, where the headers were installed, the freshly powder coating of valve cover and plenum was done, and much of the engine/engine bay detailing was completed (I was there doing some it myself)

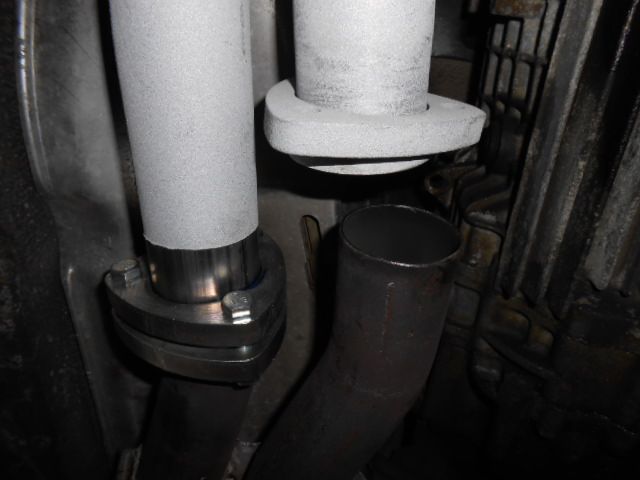
I might add, as has been mentioned on this Forum before, that the euro headers that you get these days from BMW are of much poorer quality that in the past. The weld are not very good, and they are bigger dimensionally (not as compact) and difficult to fit. The worse thing, per Mario at VRS, is the poor alignment both in the horizontal and vertical plane. Generally the only modification he says he typically always made to install a new VSR Dual Cat Center Section to the original Euro headers was a length alteration and a change from a 2 bolt to a 3 bolt flange... but, that is not the case with the current headers BMW is selling! See picture below of the alignment issue that had to be addressed.
Anyway, here's a few shots of the finished work on the engine bay... looks pretty good I think

-RoyW
Posted: Feb 04, 2013 4:46 PM
by wkohler
Roy, that's simply stunning.
Posted: Feb 04, 2013 5:45 PM
by Bulletproof 5
look awesome great job.

Posted: Feb 04, 2013 6:50 PM
by Mark 88/M5 Houston
Looks great Roy.
Posted: Feb 04, 2013 7:04 PM
by ealinn
Perfect, that's how it's done. I was saddened to learn today that a good friend of mine who worked on your car left last week. He was always excited when one of your cars came in.
Posted: Feb 04, 2013 7:26 PM
by Coldswede
Fess up Roy, those are really pictures of a New E28 M5 that you found someplace. Right?
As always Roy it looks perfect.

Posted: Feb 04, 2013 7:29 PM
by positiv
Very well done Roy. The engine compartment looks like new.

Regards
Bent
Posted: Feb 04, 2013 7:37 PM
by T_C_D
Beauty!
Posted: Feb 04, 2013 9:04 PM
by Adam W in MN
Inspirational!

Posted: Feb 04, 2013 10:03 PM
by ldsbeaker
Wow. That is unreal.
Posted: Feb 04, 2013 10:53 PM
by bhopp
I'm crying, that is so beautiful
Posted: Feb 05, 2013 1:31 AM
by leadphut
Pretty nice Roy.
Posted: Feb 05, 2013 11:13 AM
by Brad D.
Wow.
Posted: Feb 05, 2013 11:46 AM
by gray635
Roy:
The engine bay looks great! I haven't seen your M5 since 5erFest in Chattanooga, 2007 - I've got the panoramic group photo framed and hanging in my office. Hope you will bring it to The Vintage this year.
Posted: Feb 05, 2013 1:49 PM
by PorscheDude
As someone who just did an engine detail and cosmolene removal, I know your pain. But the end result is so gratifying.
Very nice!
Posted: Feb 05, 2013 4:30 PM
by Mab1957
Looking Good, Billy Ray

Posted: Feb 06, 2013 12:32 AM
by 2ndeagle
Wow!! Hat's off.
Posted: Feb 06, 2013 1:40 PM
by e_schauble
Beautiful! Ok, gotta ask what product(s) and/or process did you use to get the engine bay SO clean? Any wisdom you can share is greatly appreciated!
Posted: Feb 06, 2013 1:57 PM
by johnnye23
Like stepping back in time and looking at an engine bay in 1988. Great job as usual Roy.
Posted: Feb 06, 2013 3:02 PM
by OcCoupe
Nicely done!!! Hats off to you.
Posted: Feb 06, 2013 8:00 PM
by RoyW
e_schauble wrote:Beautiful! Ok, gotta ask what product(s) and/or process did you use to get the engine bay SO clean? Any wisdom you can share is greatly appreciated!
Thanks everyone for the nice compliments on the results of my M5 engine/engine bay detailing... much appreciated

As for the question regarding the process and products used, it was basically a complete removal of pretty much everything on the engine and then either: 1) media blasting or renovation and re-spray of parts; 2) lots of elbow grease cleaning with brushes, rags, and Purple Power everywhere (that was my major contribution); 3) or parts replacement with a new ones where necessary to make it look new, e.g., hoses, clamps, tanks, etc.
The blasting and re-coating was needed on all the parts with the cosmolene issue. I had tried just about everything cleaning-product-wise prior, with little to no improvement.
Of course, with all the items removed from the engine, it seemed prudent to replace all of the small hoses that are up against the firewall and impossible to get to other-wise. Also, decided to replace the starter while assessable. And, of course, I was having the headers installed, and some basic maintenance work done, so stuff had to come off for that work which made it logical to do the "detailing" at the same time.
Finally, I had a number of items cad-plated to give it a little more pizazz.

All in all, it was a lot of man-hours.

But, well worth IMO

-RoyW
Posted: Feb 06, 2013 8:45 PM
by Karl Grau
My engine bay didn't look too bad until I saw your pics. Thanks a LOT.

Posted: Feb 07, 2013 4:58 AM
by Das_Prachtstrasse
Karl Grau wrote:My engine bay didn't look too bad until I saw your pics. Thanks a LOT.

Ditto. Beautiful job.
Posted: Feb 07, 2013 7:43 AM
by Ben
Gorgeous work Roy! You have the coolest cars.

Posted: Feb 07, 2013 8:17 AM
by Duke
Mehhhhh....looks OK. Missing stickers on the top of the power steering container. Paint either chipped or on the outside of the right strut tower

Posted: Feb 07, 2013 12:57 PM
by Eddie in TO
It looks spectacular.
I feel your pain on the parts cleaning experience. The patience and elbow grease required on a job like this may not be for everyone.
BTW...love the header color! Those are some very sexy curves.

Posted: Feb 07, 2013 4:36 PM
by RoyW
Duke wrote:Mehhhhh....looks OK. Missing stickers on the top of the power steering container. Paint either chipped or on the outside of the right strut tower

And this ^ from my "secret Santa box swap" buddy

I can always count on you Duke for some "constructive" criticism

I'll check on the validity of that sticker and get one if appropriate. And, as for the chipped paint on the right strut tower?? Made me look

-RoyW
Posted: Feb 07, 2013 5:42 PM
by Duke
RoyW wrote:I'll check on the validity of that sticker and get one if appropriate. And, as for the chipped paint on the right strut tower?? Made me look

-RoyW
Nothin but LUV Roy

....gotta keep you straight.

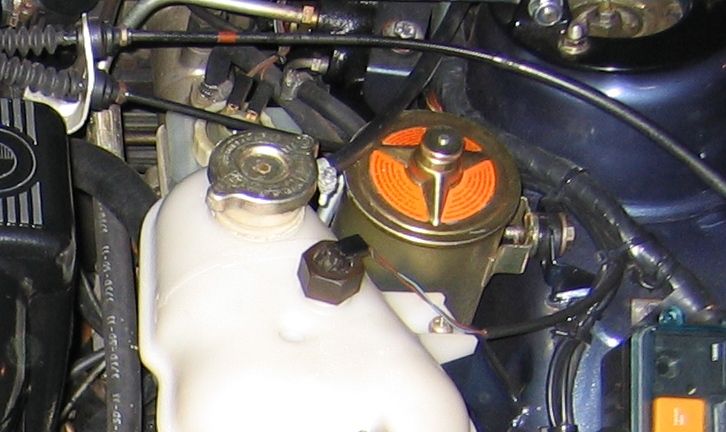
There are actually three in different languages.
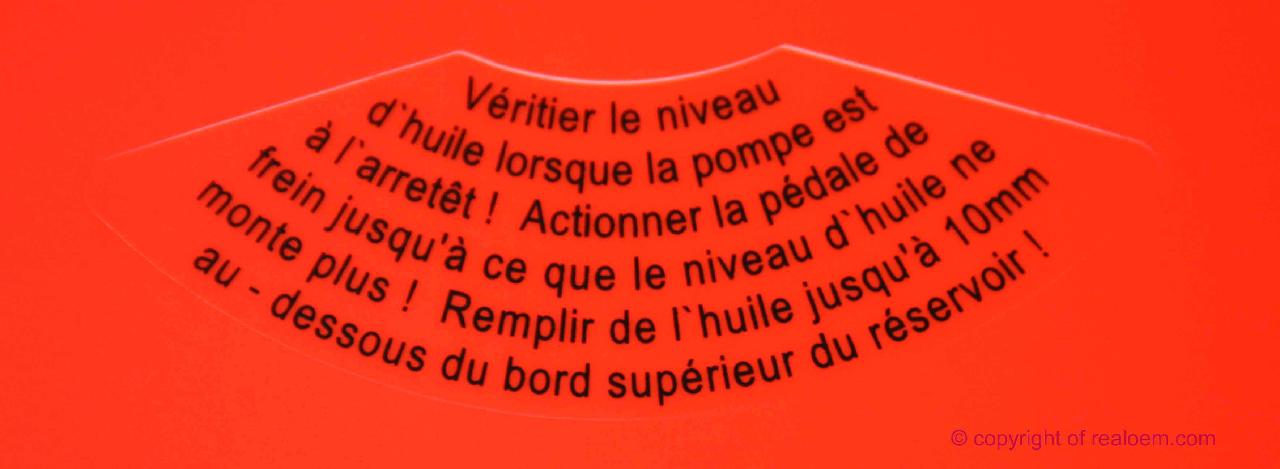
03 Label (DEUTSCH) 32411123325
03 Label (ENGLISH) 32411123326
03 Label (FRANCAISE) 32411123327
What is the red in the pic?
Posted: Feb 07, 2013 6:58 PM
by Eddie in TO
Duke wrote:

What is the red in the pic?
Roy's a vampire!
 Anyone that comes too close will...


