Page 3 of 10
Posted: Jul 28, 2013 1:08 PM
by M. Holtmeier
This build is fantastic! I can't wait to see the finished product.
Posted: Aug 03, 2013 3:37 PM
by leadphut
Posted: Aug 03, 2013 4:33 PM
by bkbimmer
Very nice project, sir.
Posted: Aug 31, 2013 10:26 AM
by Nebraska_e28
Looking great!!!
Roy since your switching to r134, did you keep the stock condensor & fan? If not, what's your secret recipie?

Posted: Sep 01, 2013 7:06 AM
by RoyW
Nebraska_e28 wrote:Looking great!!!
Roy since your switching to r134, did you keep the stock condensor & fan? If not, what's your secret recipie?
Yes, we plan to keep both. Won't know if the system works until she's fired up and things like that get tested... probably know in a month or two.
-RoyW
Posted: Sep 01, 2013 11:03 AM
by Coldswede
RoyW wrote:Nebraska_e28 wrote:Looking great!!!
Roy since your switching to r134, did you keep the stock condensor & fan? If not, what's your secret recipie?
Yes, we plan to keep both. Won't know if the system works until she's fired up and things like that get tested... probably know in a month or two.
-RoyW
You both should be just fine with stock parts. My iS has stock parts and is converted and works quite well even here in Florida this summer.
A parallel flow condenser will change good performance to "Ice Box". Not sure if it worth Roy's time or money given his location. LJ might see some benefit of the Parallel Flow condenser.

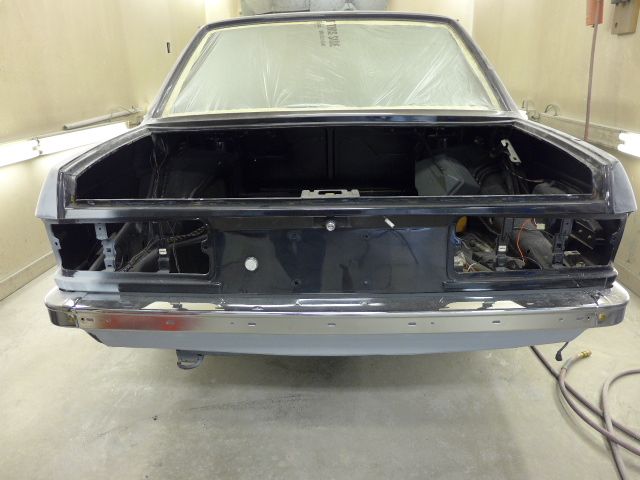
Posted: Sep 14, 2013 7:57 PM
by RoyW
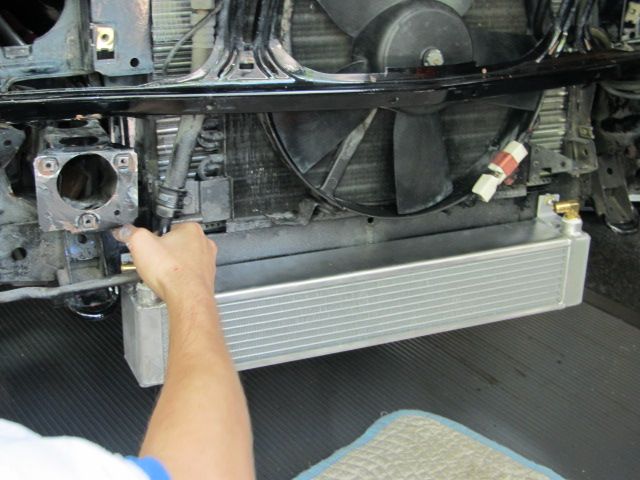
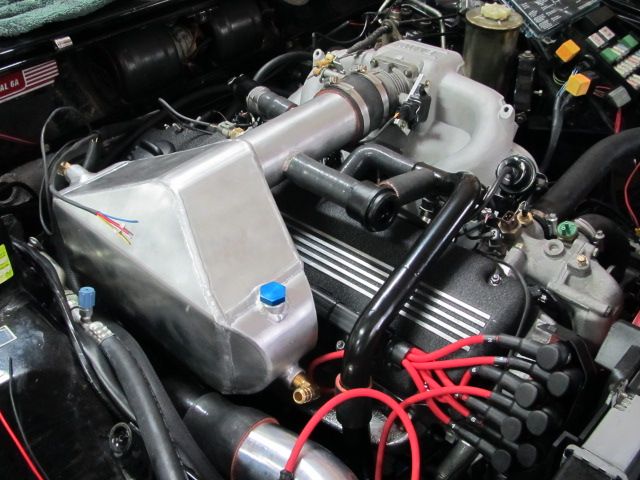
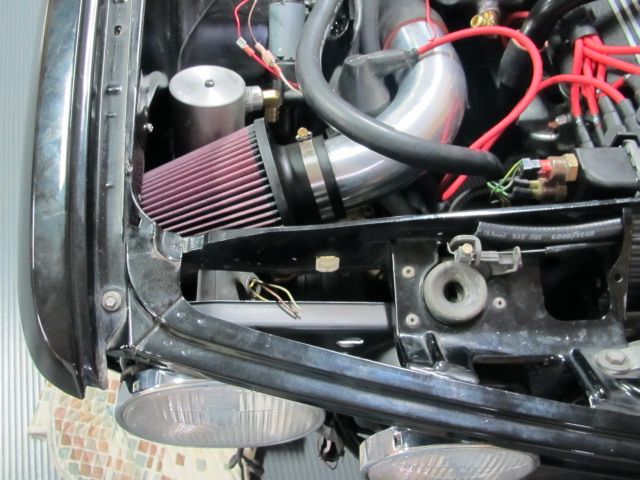
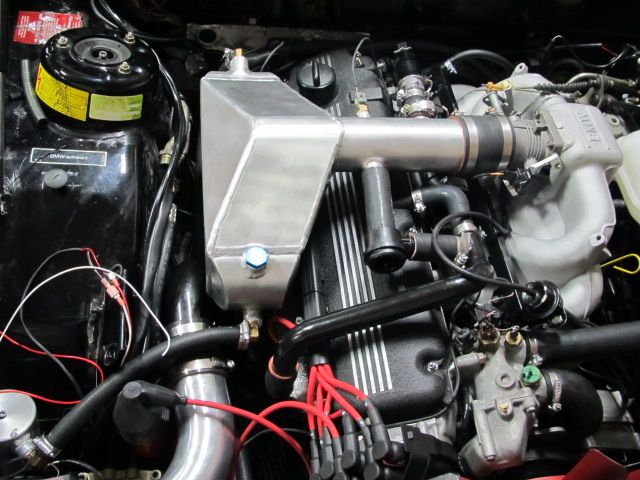
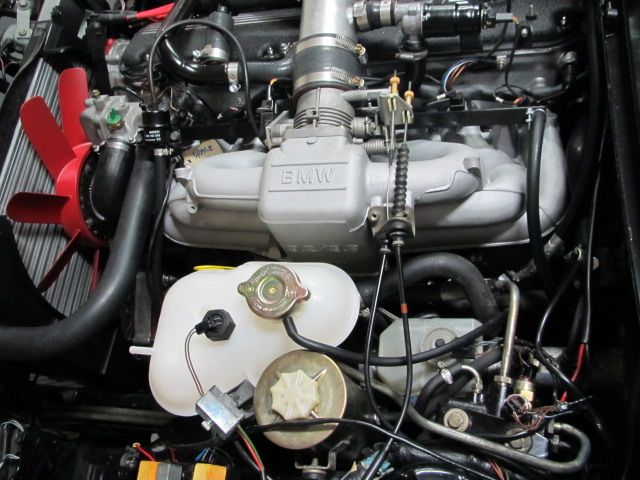
Well, we finally got back to work on the project car today. Personal schedules and other circumstances have put things on delay for the past 6 weeks, but, we did make some good progress today.
My friend Steve and my nephew Brad were there to lead the way, and I had gathered or procured some parts and tools that were identified as needed at our last session.
Today's progress included:
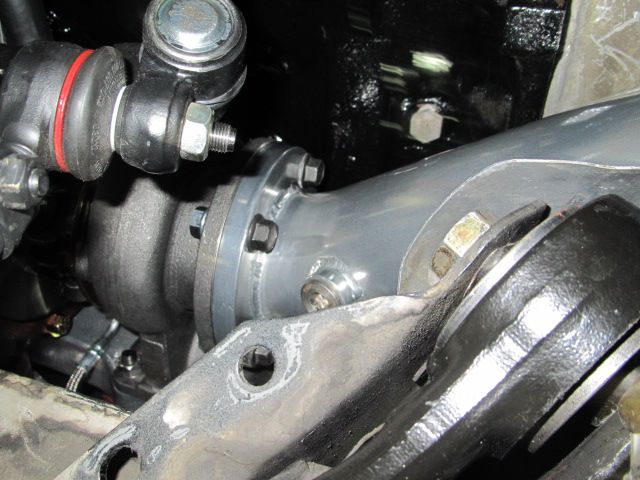
- installed the custom TCD oil cooler and associated hoses
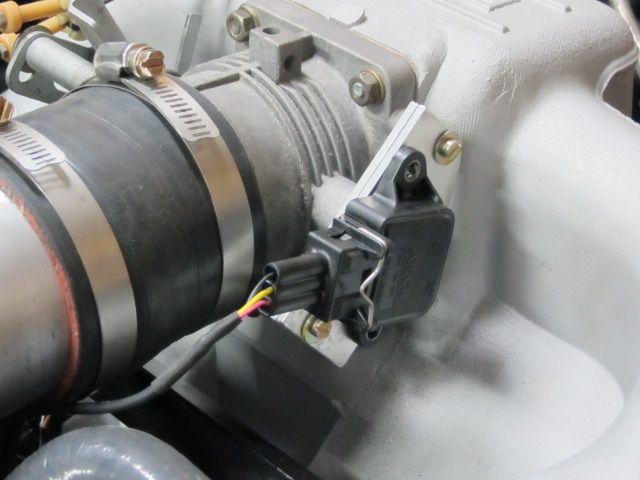
- installed the wide-band O2 sensor
- installed new TPS (Volvo) with custom-made bracket
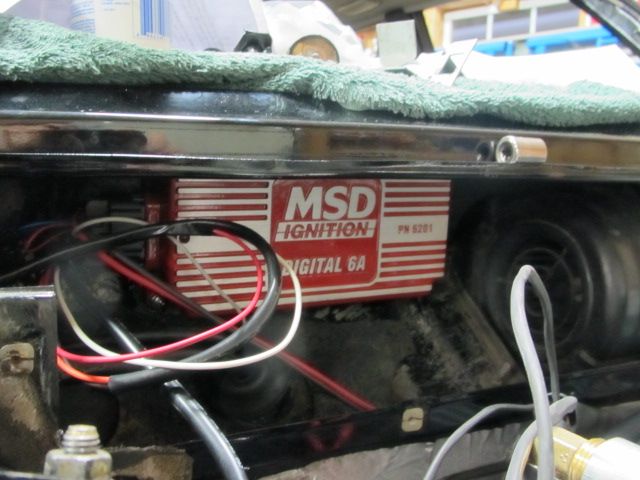
- installed MSD ignition box
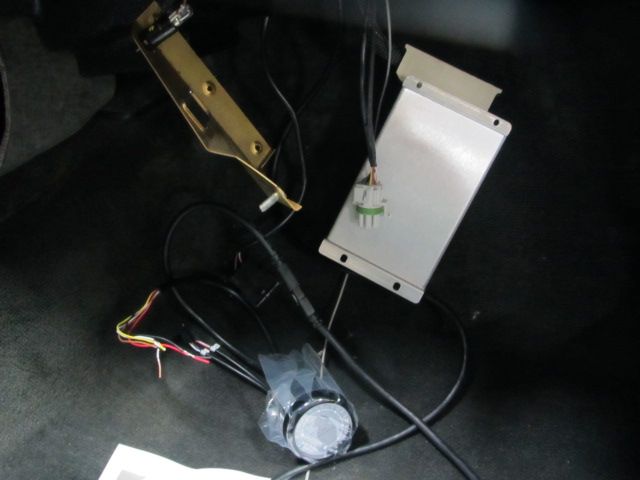
- connected the Megasquirt box and wired up a number of engine items to the associated harness
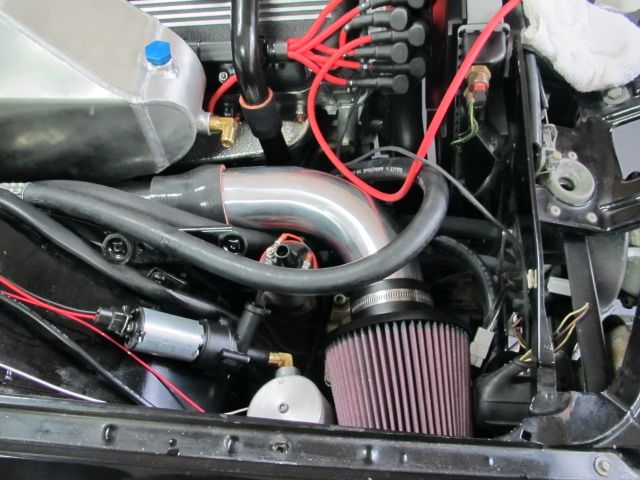
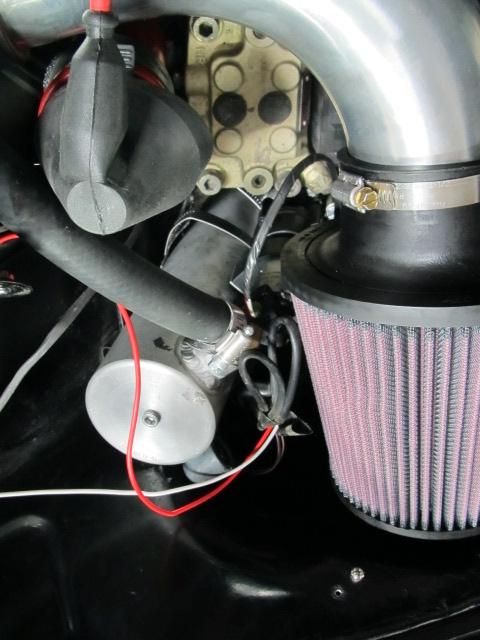
- test-fit installed the complete TCD system, i.e., inter-cooler, hoses & pipes, air filter, etc., (clamped some things down, but not everything quite yet... but we're close)
- temp. install of right headlight bucket to determine room available for K&N air filter, oil cooler hoses, tank & pump that will all be in that corner
- put fresh oil in the engine
- installed battery and check for power at a number of key area, and just for grins....
- turned the key... and SHE FIRED RIGHT UP!!

Fantastic!!
- identified a few more needed parts, another custom bracket or two that will be needed, plus a couple questions for Peter Florance and Todd that require answers for our next session
- identified install location for some turbo kit parts, e.g., tank, pump, etc.
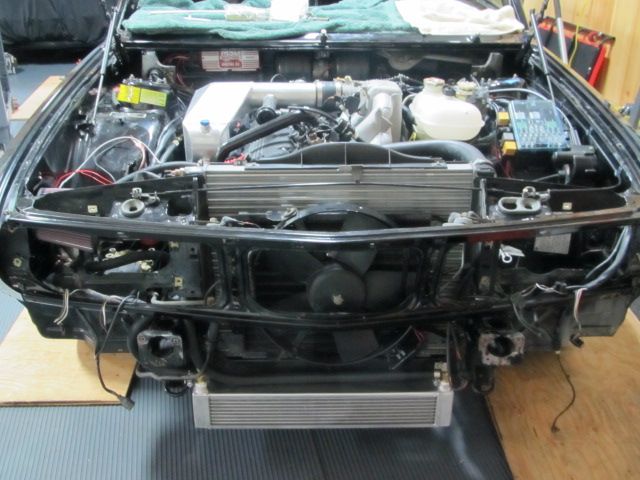
At our next session (mid-Oct.) we will clamp everything down; install remaining TCD kit items in selected locations; get the cooling system installed; finish all wiring and associated connections; mount Megasquirt box and associated gauges; button-up engine bay complete (or nearly so, I hope)
So, with any luck I'll be towing the car up to a upholstery shop for a new headliner in late Oct., and then on to VSR for paint and the install of the new euro bumpers, glass, and a few other items. Hope to have it back in the barn before the end of the year, so we can spend the Winter putting the trim, custom stereo system, and interior back in the car. Hope springs eternal.

Here are some pictures of today's work.
-RoyW
Posted: Sep 14, 2013 8:40 PM
by Coldswede
Looking good Roy, looking good.

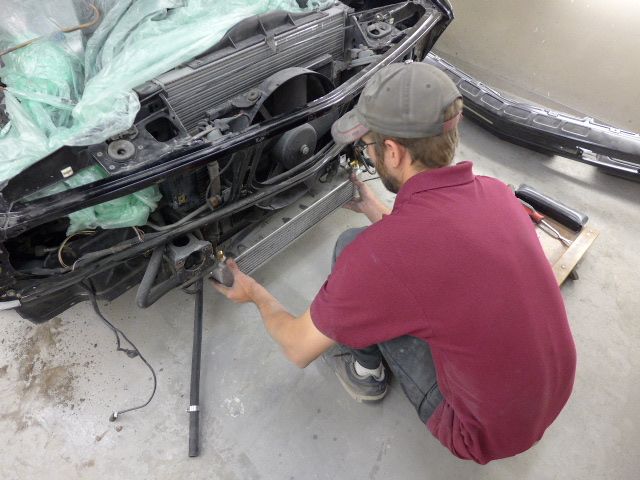
Posted: Oct 08, 2013 9:46 AM
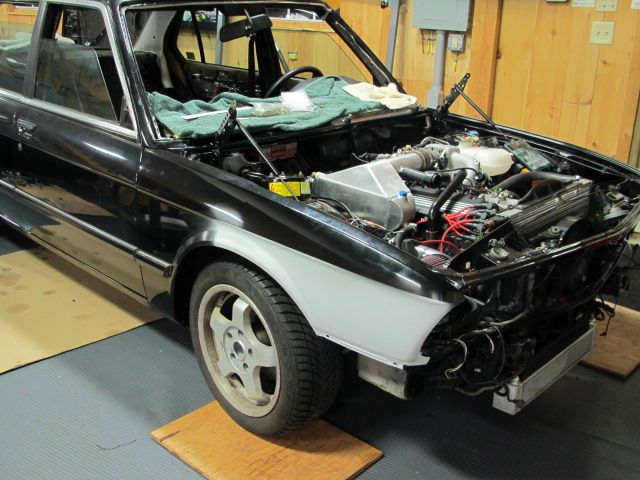
by RoyW
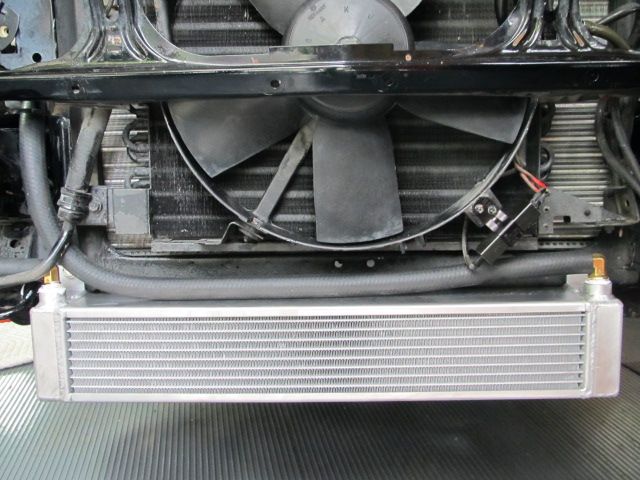
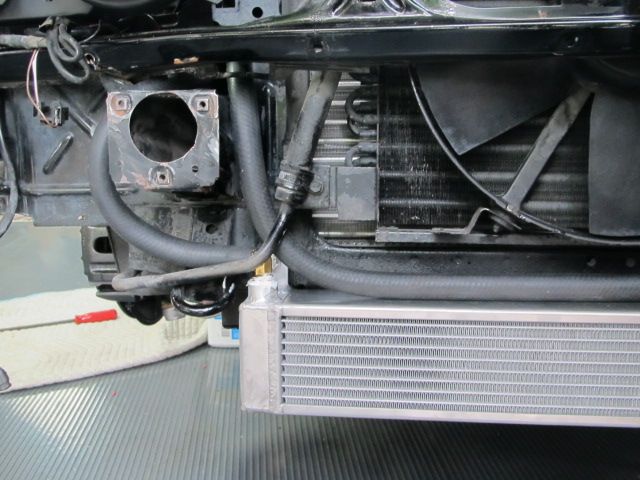
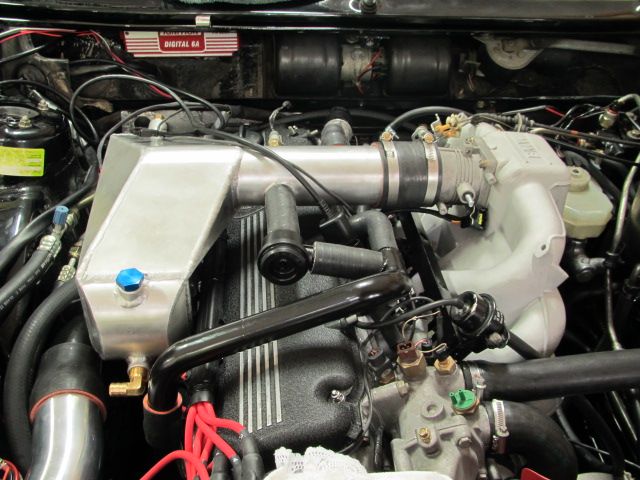
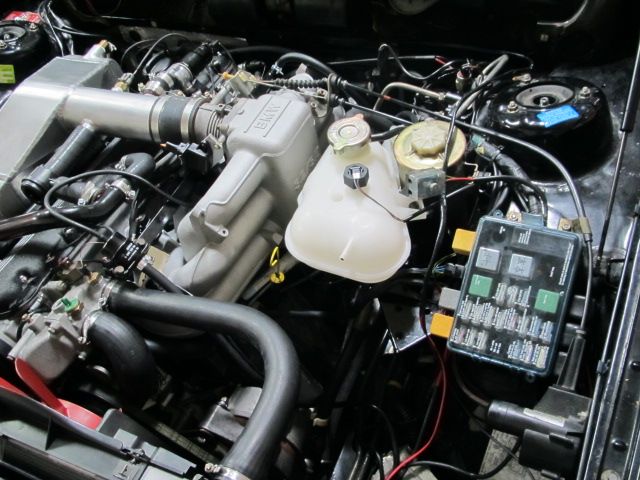
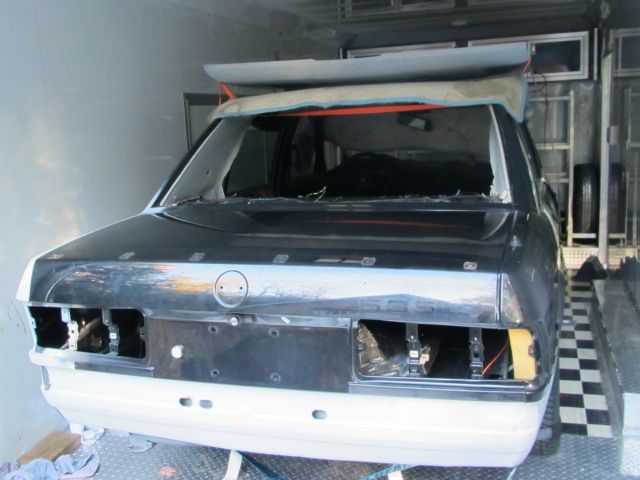
Worked on the car this past Saturday and got things pretty buttoned-up... enough so it's ready to head to VSR for paint
so we can get it back to the Barn before Winter sets in and have that season to finish up and put everything else back together.
Here's a summary of what we (mostly my friend Steve
) accomplished this past Saturday:
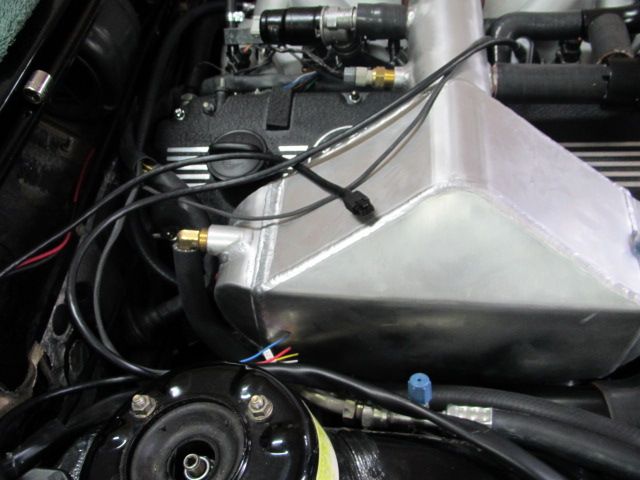
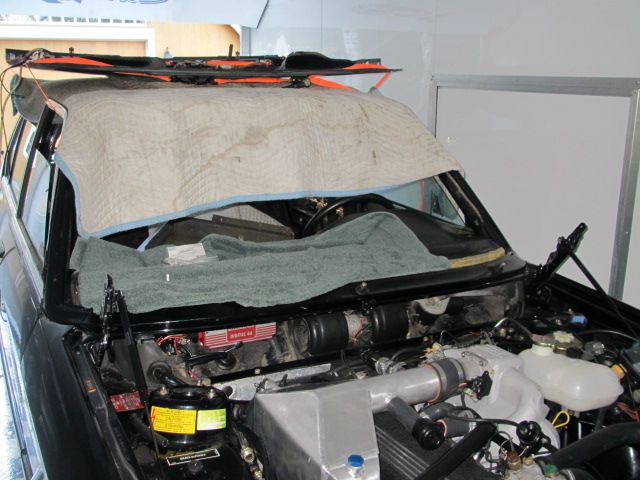
- installed reservoir tank and inter-cooler pump (mounted pump to reservoir and then the reservoir to a bracket down where the bottom of the windshield washer tank would normally go)
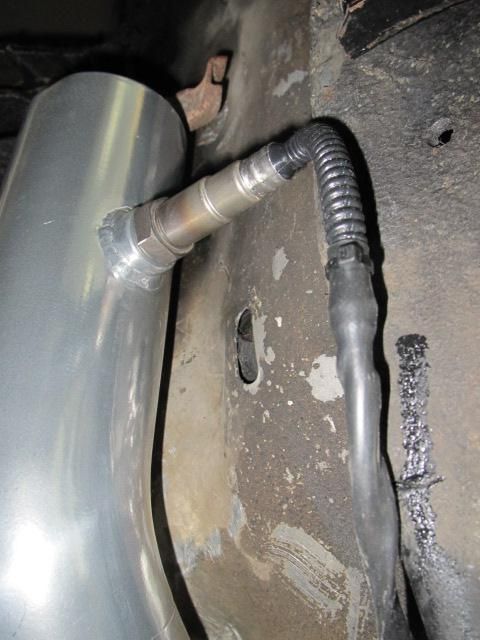
- hose clamped almost all hoses (need a few bigger ones) and tighten everything down
- extended some and finished up most of the wiring, e.g., Megasquirt, pump, etc.
- installed new overflow tank
- installed new brake switch. Installed fab'ed bracket for TPS
- started car again while trying to resolve no power to coil issue (jumpered from battery to coil to get it started)... still need to figure out why we're not getting power to the coil thru normal circuitry?
- removed jack stands and put wheels on the car
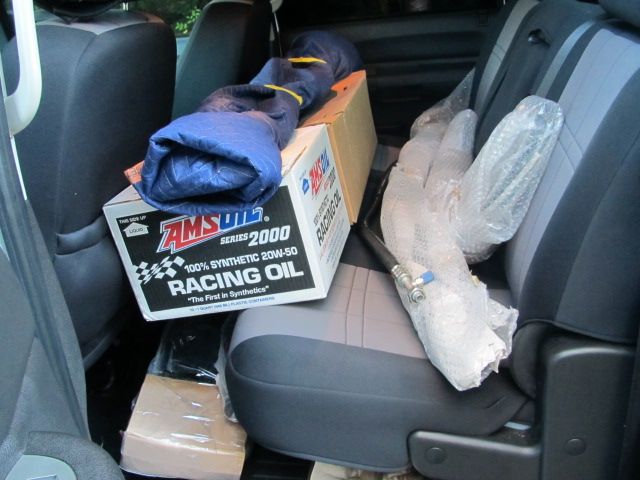
- loaded car in trailer for trip to VSR, including hood, sunroof, trunk spoiler, rear valance, wheel arches, new windshield, rear window, new window gaskets, etc.
Next steps while at VSR will be: fab of "Y" downpipe; install SS exhaust system; paint prep; paint; install new euro bumpers and front euro valance. I will also get a new alcantra headliner made (using the old one as a template), which VSR will install, then install front & rear windows
Then back to the Barn for Winter and putting everything else back together, e.g., exterior trim, grills, lights, trunk carpeting & pieces, complete interior assembly, plus the installation of things like gauges, custom stereo system, etc. And, completion of engine items that need attention.
With any luck she should be ready for a Megasquirt system tuning by Peter Florance in April and ready to drive the first warm day of Spring

Here are some pictures from Saturday work and loaded into the trailer from today.
-RoyW


Posted: Oct 09, 2013 7:08 PM
by Motronic

Now that I have seen the car I want to follow it's progress. Finally you get to work on one of
your projects

Posted: Oct 16, 2013 6:21 PM
by RoyW
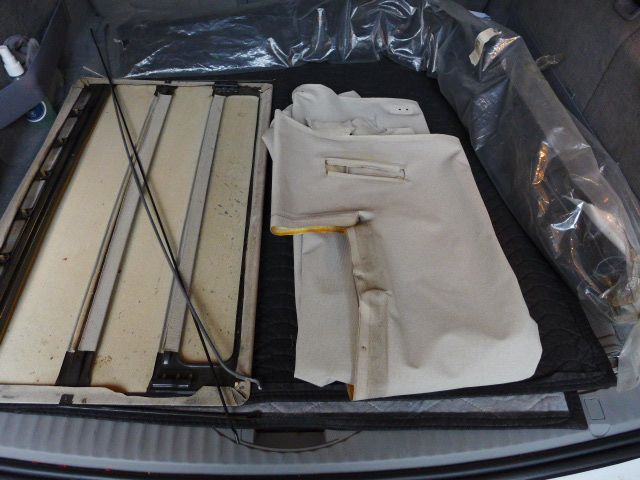
Today I took a drive up to NH to visit VSR and to bring some parts up that I had forgotten when I dropped the car off early last week, e.g., "c" pillar vents, mirrors, and a couple other items. Also, needed to make a few decisions based on the measurements and mock-ups that Mario had done on the front and rear valances, i.e., fitment issue. And, I wanted to see things for myself and discuss options. Also, I needed to get the headliner that they had removed, so I can take it to the upholsterer that will be making the custom new one (using the old as a template)... the new one will be black alcantara.
The rear valance that I'm using (after-market piece) was really made for a U.S. bumpered car, not a euro one, so that presented some fitment and esthetics issues. We decided to trim it up a bit so the mounting tabs wouldn't show under the euro bumper, nor the notches where the U.S. shocks would normally go...but, we'll then need to fabricate/modify the valance for a different mounting approach.
The front valance I have to use is a euro 535 one (an M5 one would be better) and so it doesn't have the cut-out where the turbo oil cooler sits (as the M5 one does for the S38). So this will have to be modified, trimmed, and some fab work done to make it work where we have located said cooler to allow for airflow and for fitment... since the custom cooler TCD had made for me is larger than the M5 one.
Additionally, after reviewing the two-tone paint scheme I have planned for this car with the VSR team and others, I've decided that the less expensive and more flexible option is to have it paint all one color (Sepang Bronxe Metallic) and then have the lower portion (below the door guard molding and the front & rear valances below the bumpers) wrapped in the satin black color, rather than have it painted that black color. Same effect, but cheaper, and if I don't like it it can be easily remove or changed to a different color or just leave the whole car one color
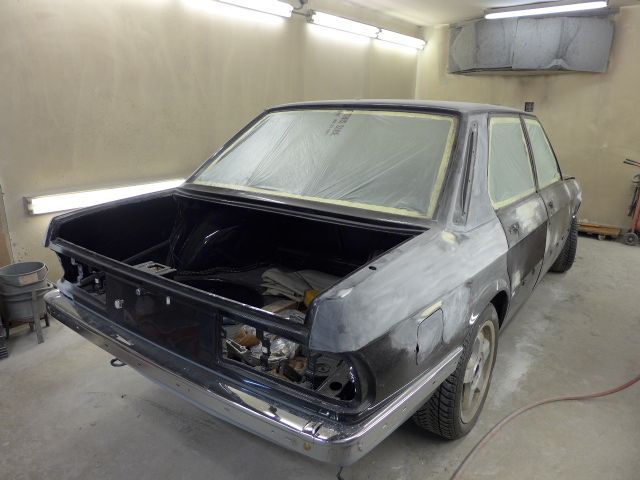
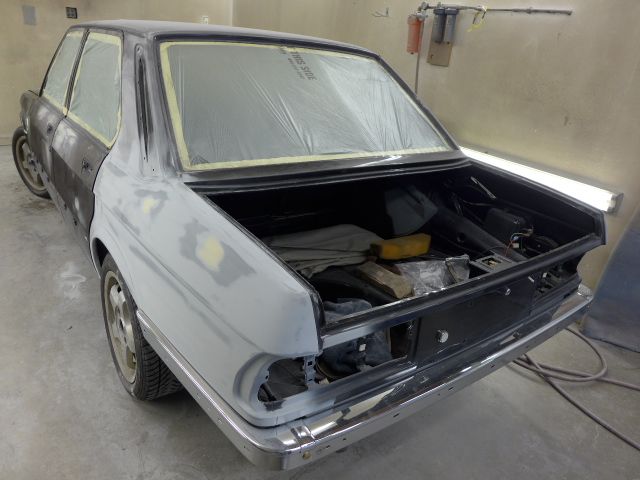
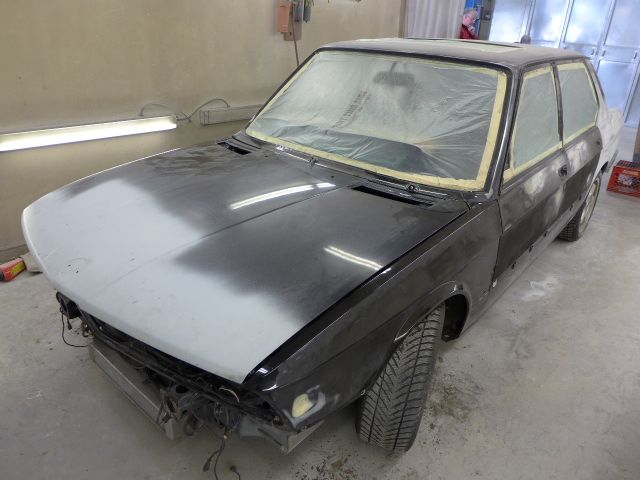
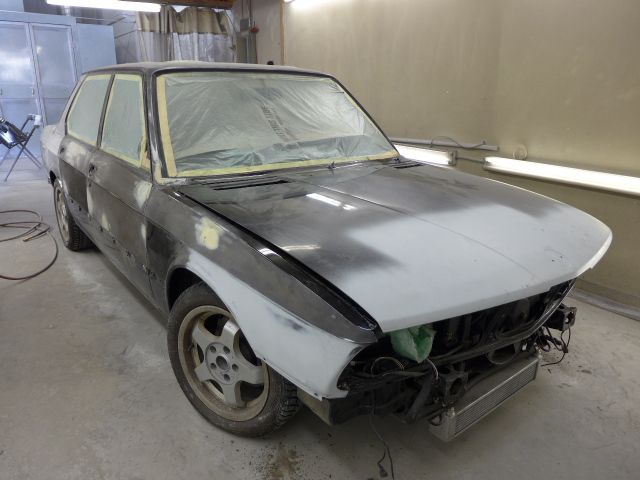
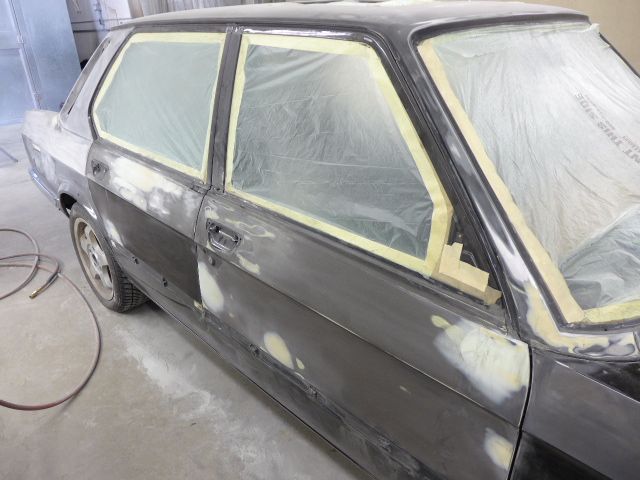
Anyway, the car has now been pretty much prepped for primer, e.g., stripped, wiped, masked, filled, block-sanded, etc. But, the euro bumper fitment and valance(s) fitment needs to be finalized and mocked-up before they will proceed with paint. Here are a few pictures of the car in the pre-paint booth.
I plan to be back up there next week to watch progress and help where I can, e.g., wet sanding, etc. I was pretty excited today thinking about this stage of the project and looking forward seeing it get painted.
-RoyW
Posted: Oct 16, 2013 8:12 PM
by davintosh
Posted: Oct 16, 2013 8:21 PM
by Kyle in NO
Glad to hear you decided against the two-tone color scheme. It will look much classier this way.
Posted: Oct 16, 2013 11:23 PM
by 87royal
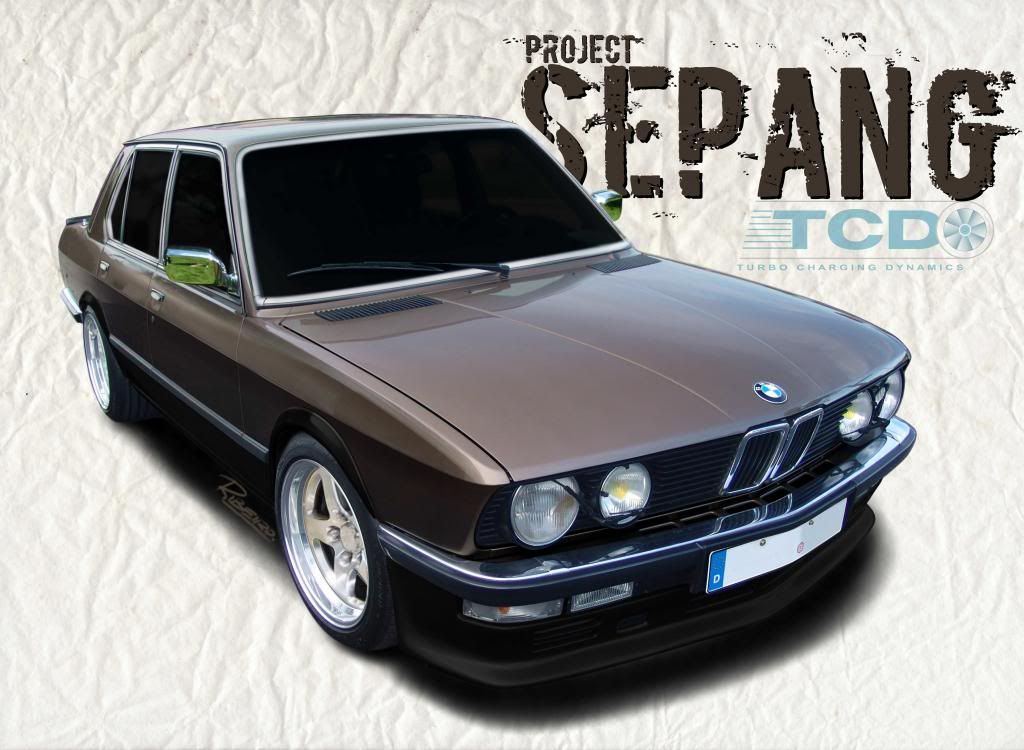
RoyW wrote:My good friend Eddie (from T.O.) did a great rendering of what my 535i project car will look like when its completed... right down to the bumpers, trim, wheels, TCD turbo, and two-tone paint scheme it will have. It going to be bitchin'
He calls it "Project Sepang"... I think I like that and will adopt that moniker during the build phase.
-RoyW
Are those the actual wheels that will be installed on this car?
Posted: Oct 16, 2013 11:24 PM
by DerPanzer
All those new shiny parts!
I'll do exactly this to my car someday....
Great work
Posted: Oct 16, 2013 11:43 PM
by RoyW
87royal wrote:RoyW wrote:My good friend Eddie (from T.O.) did a great rendering of what my 535i project car will look like when its completed... right down to the bumpers, trim, wheels, TCD turbo, and two-tone paint scheme it will have. It going to be bitchin'
He calls it "Project Sepang"... I think I like that and will adopt that moniker during the build phase.
-RoyW
Are those the actual wheels that will be installed on this car?
Yes. Fikse FM-5s size17x8
-RoyW
Posted: Oct 16, 2013 11:45 PM
by RoyW
Kyle in NO wrote:Glad to hear you decided against the two-tone color scheme. It will look much classier this way.
I didn't... I just said I was going to do a wrap on the lower portion, rather than paint it that way. Making it easily reversible, should I not like it.
-RoyW
Posted: Nov 01, 2013 9:21 AM
by RoyW
Posted: Nov 01, 2013 4:49 PM
by zachmanners
car looks amazing!!
Posted: Nov 04, 2013 6:05 PM
by RoyW
Posted: Nov 04, 2013 6:30 PM
by Coldswede
Exciting stuff Roy!
When and where do you plan on introducing this car to it's public?
Posted: Nov 04, 2013 9:55 PM
by 1121fresh
I will be follow this thread, and I think you know why
It has been a pleasure to work on this project and can't wait to see the final result.
Posted: Nov 18, 2013 5:54 PM
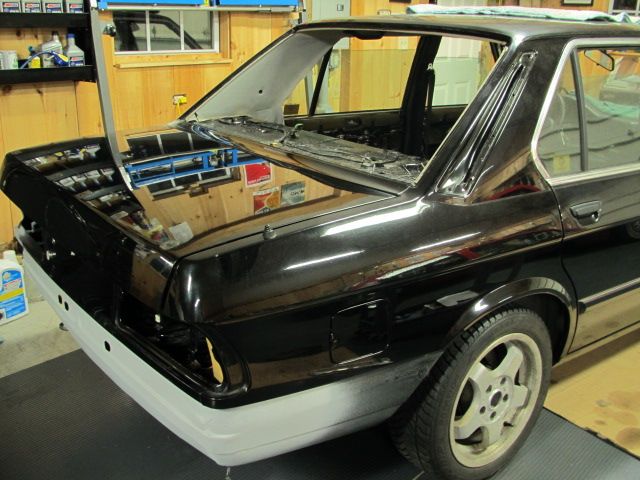
by RoyW
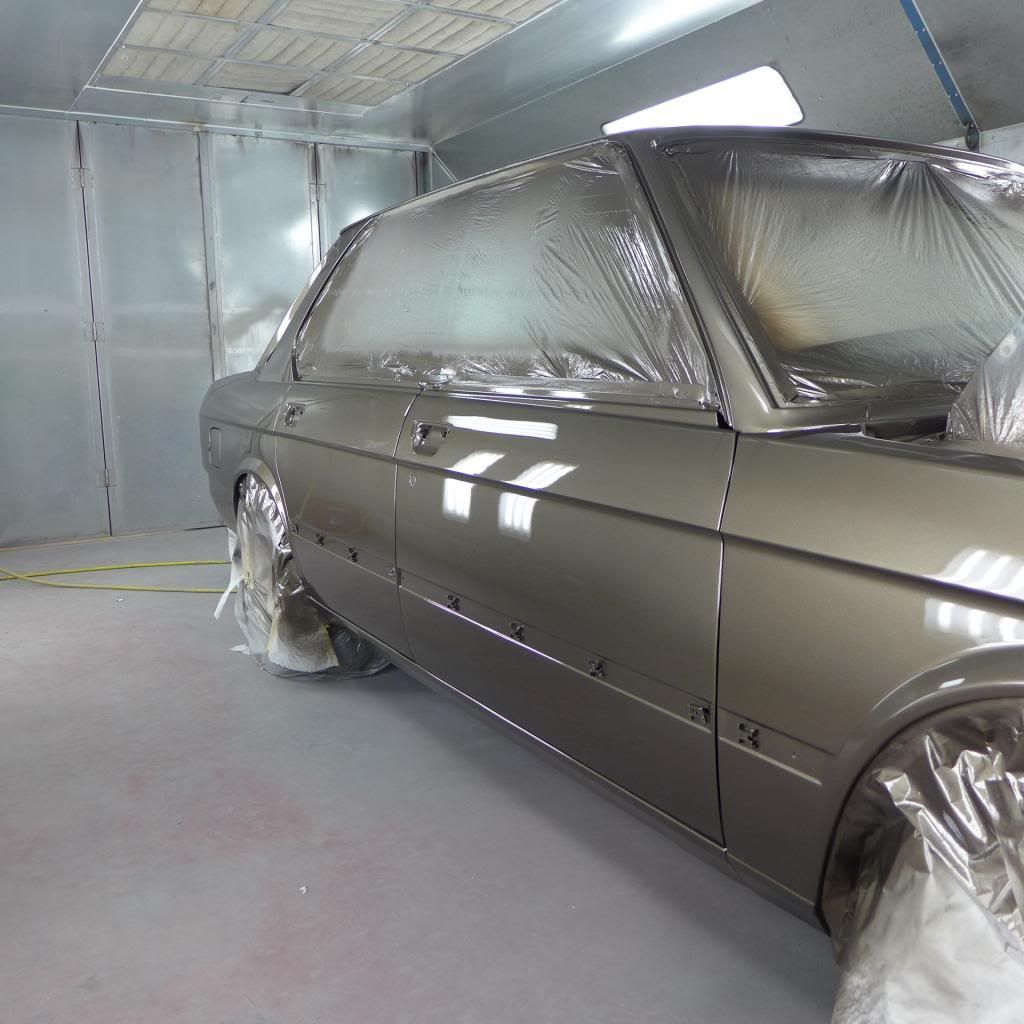
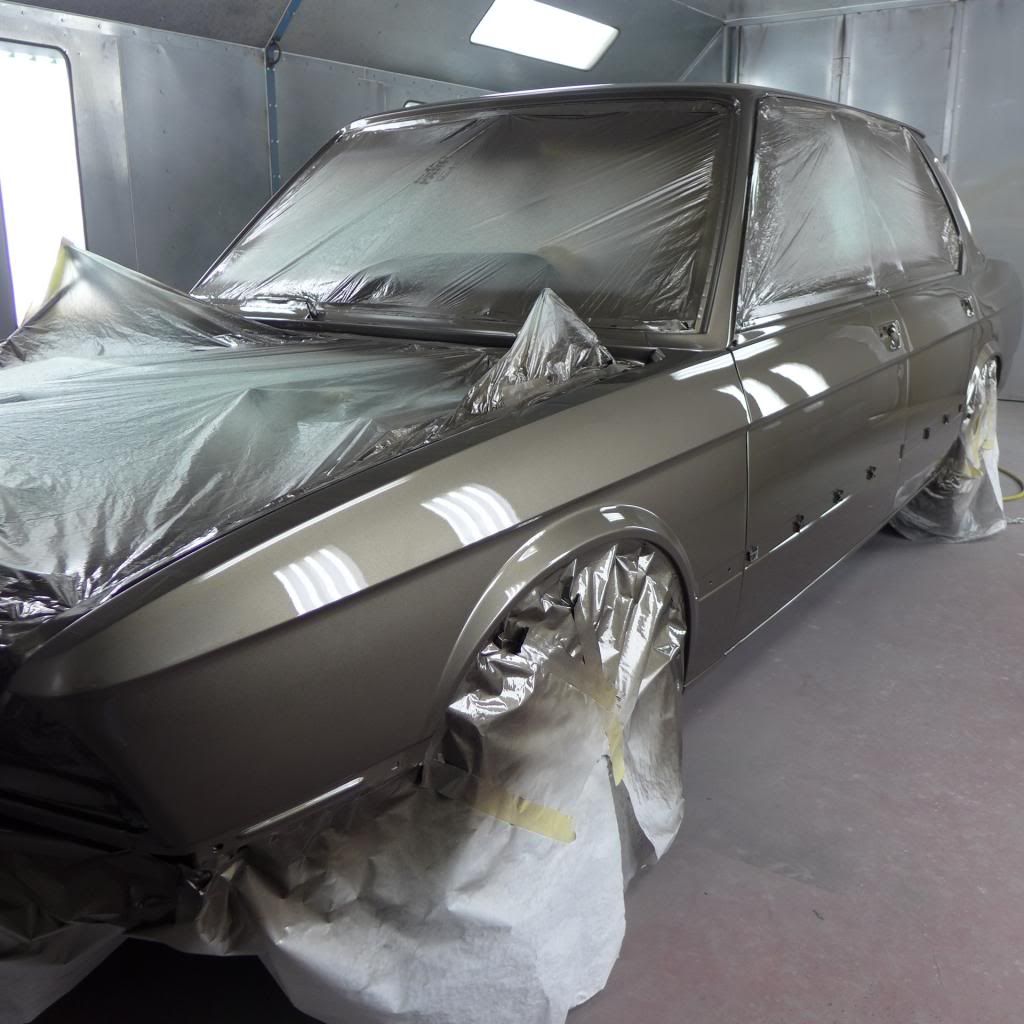
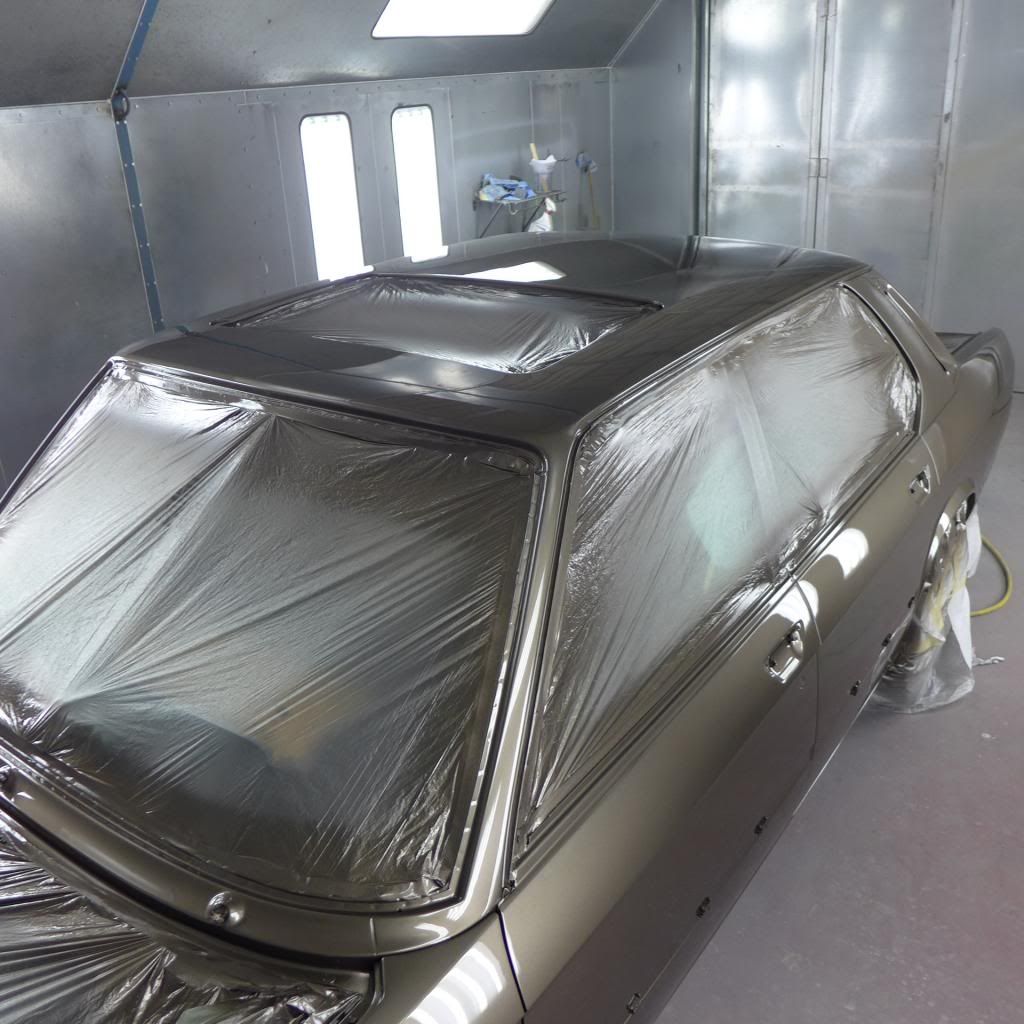
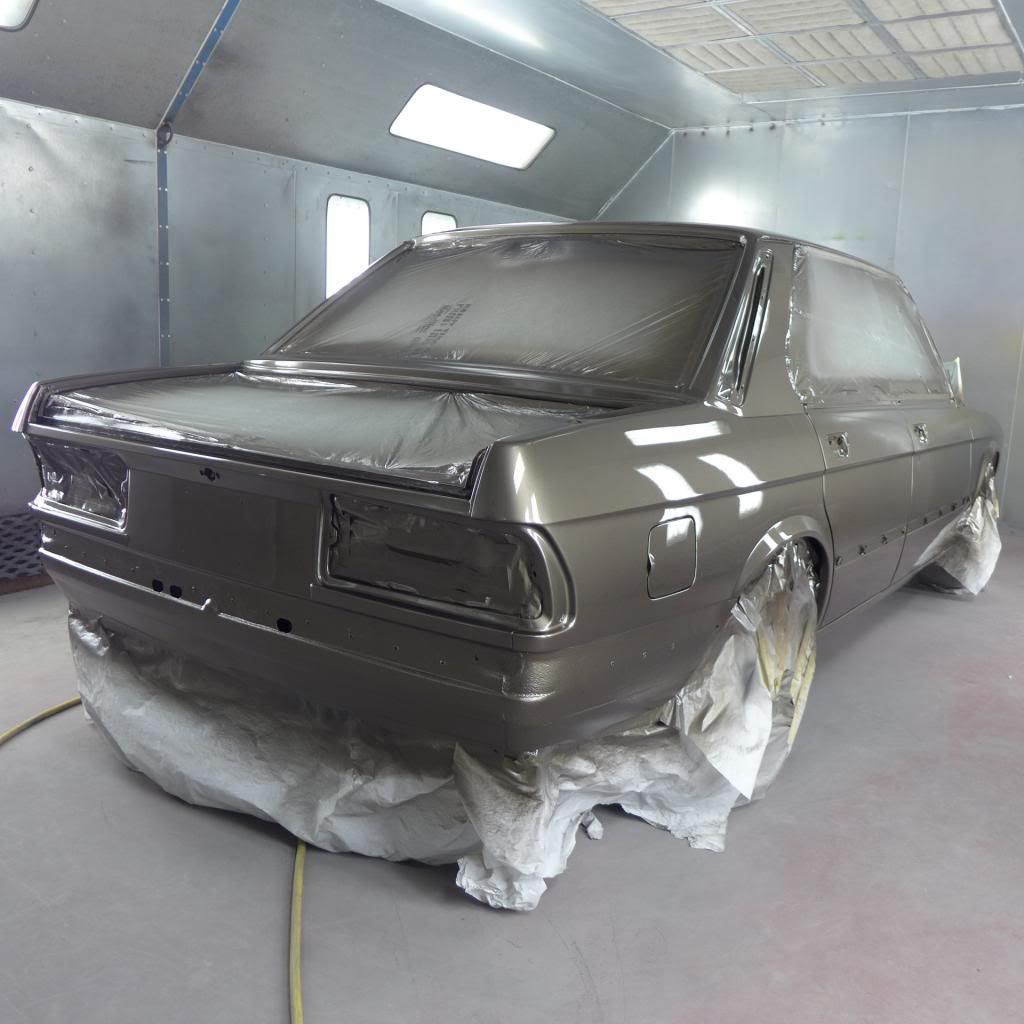
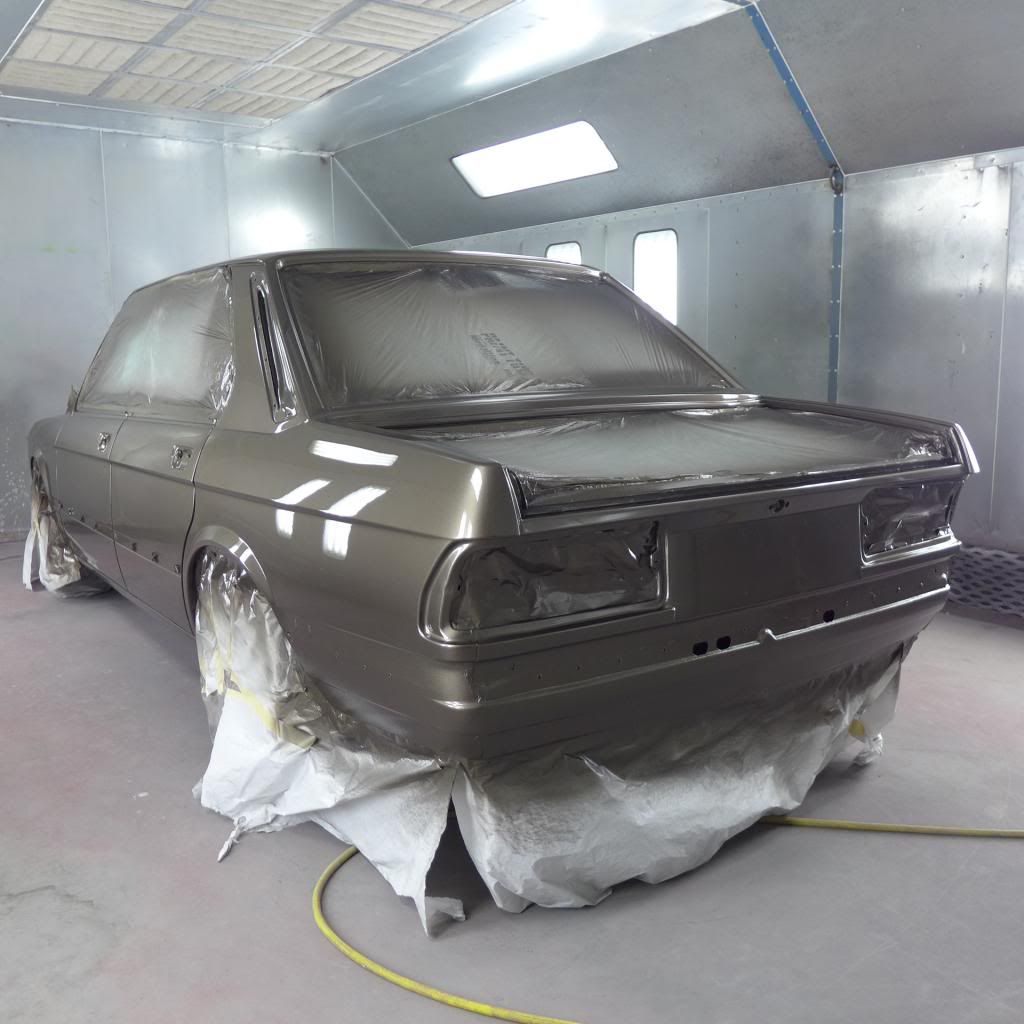
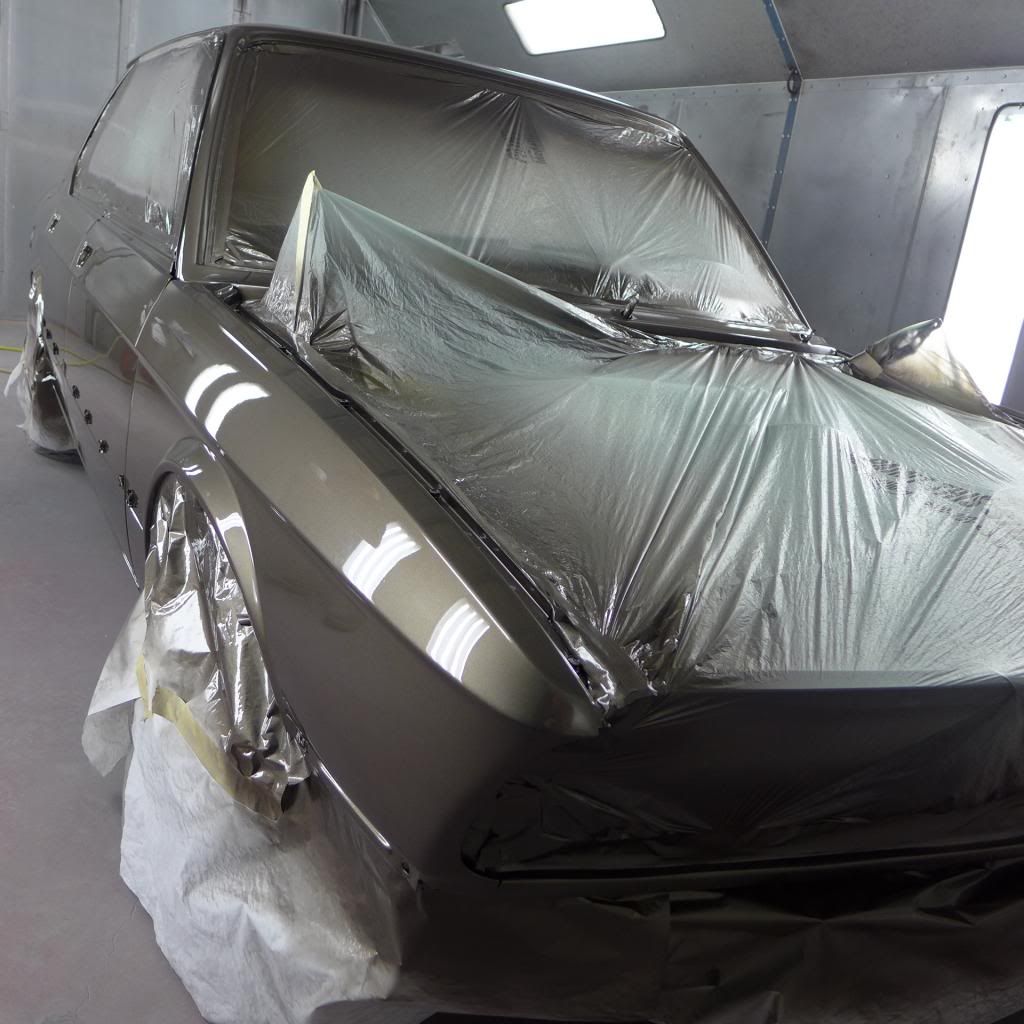
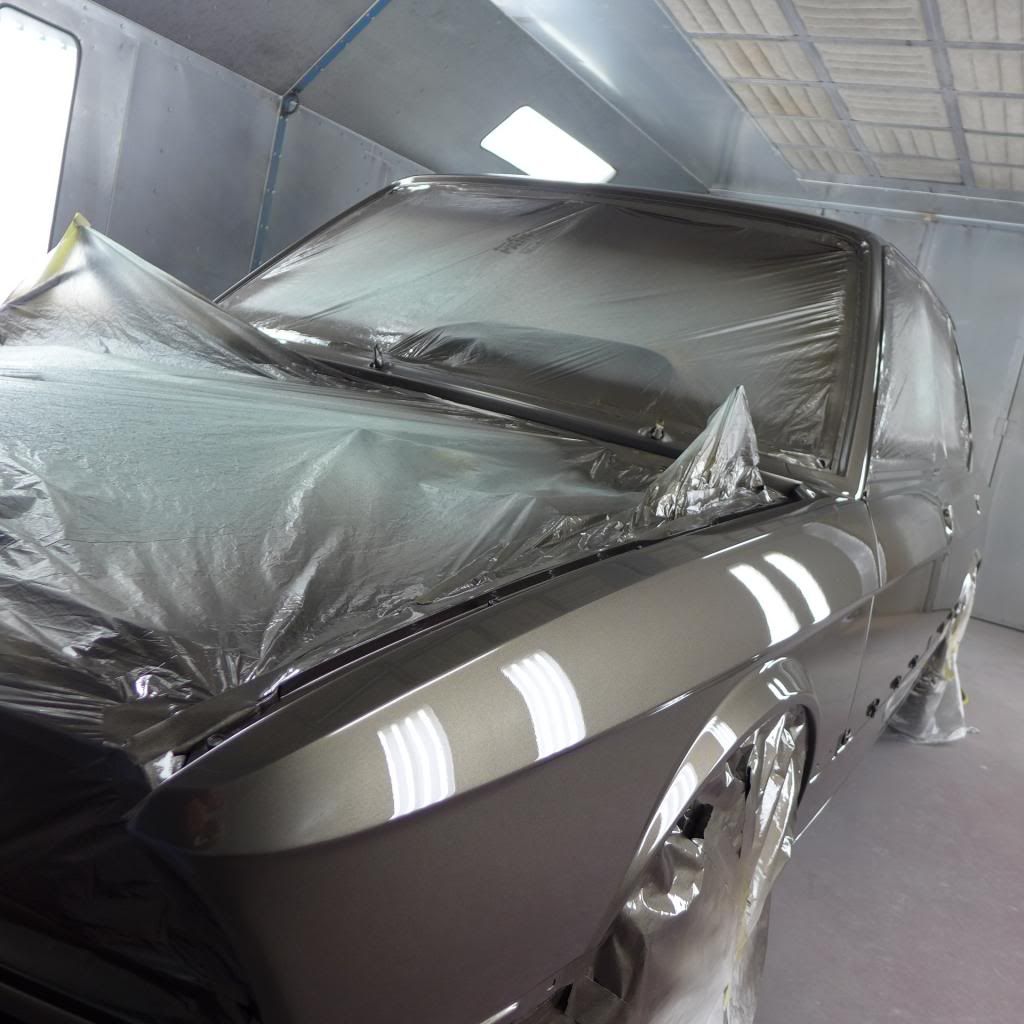
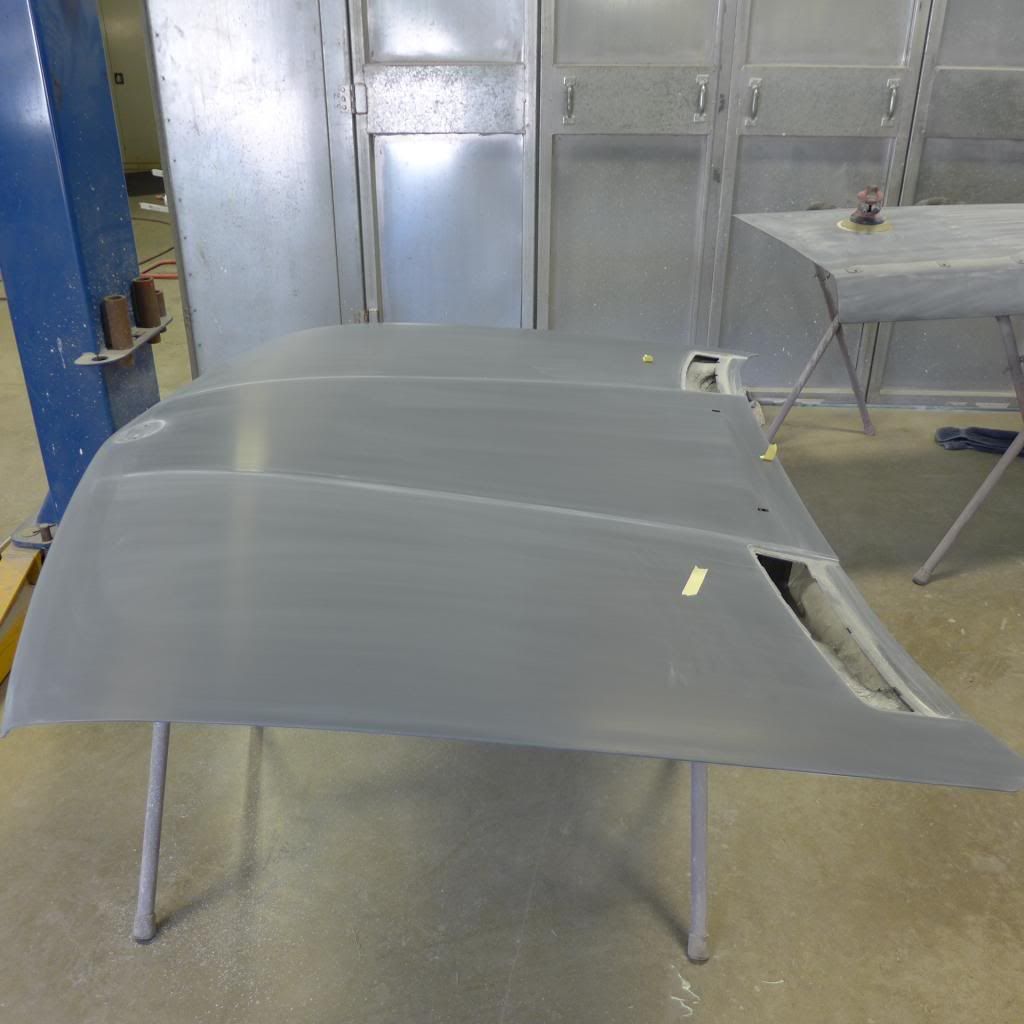
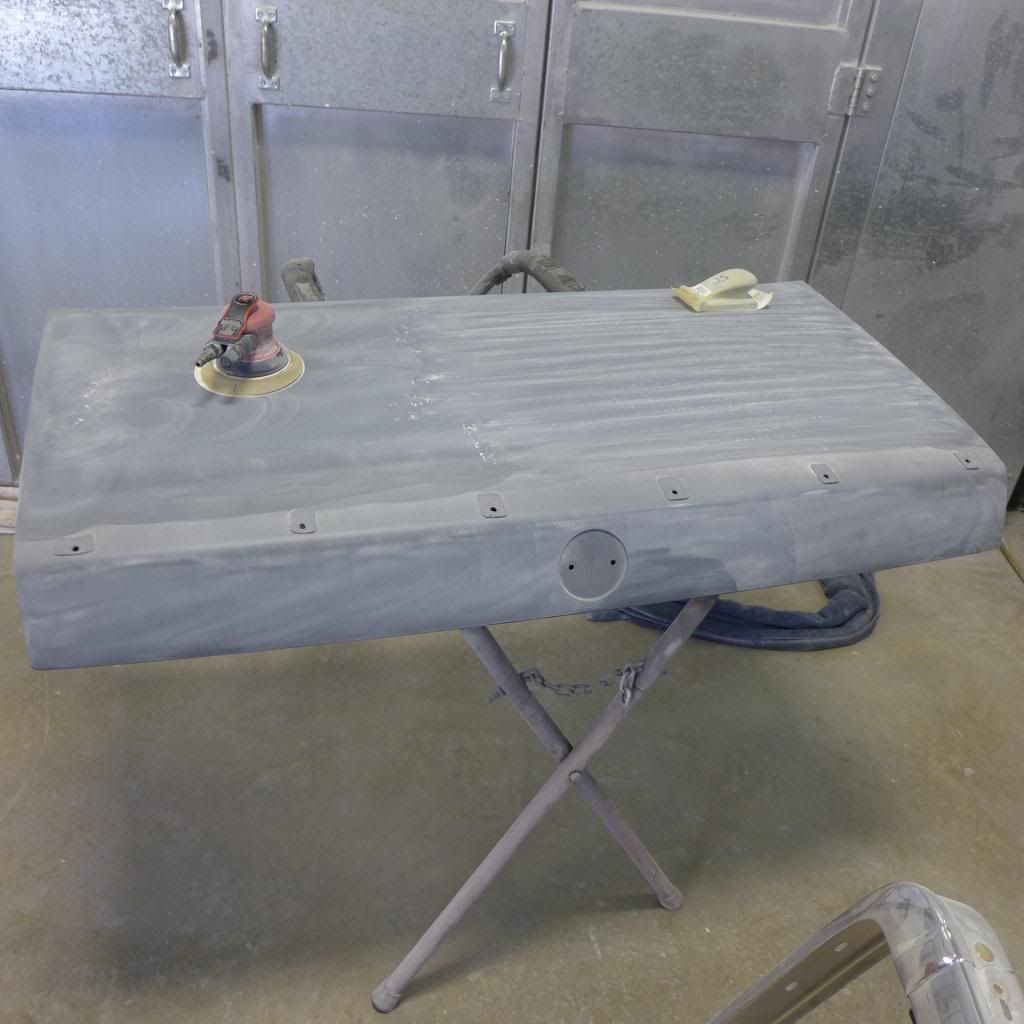
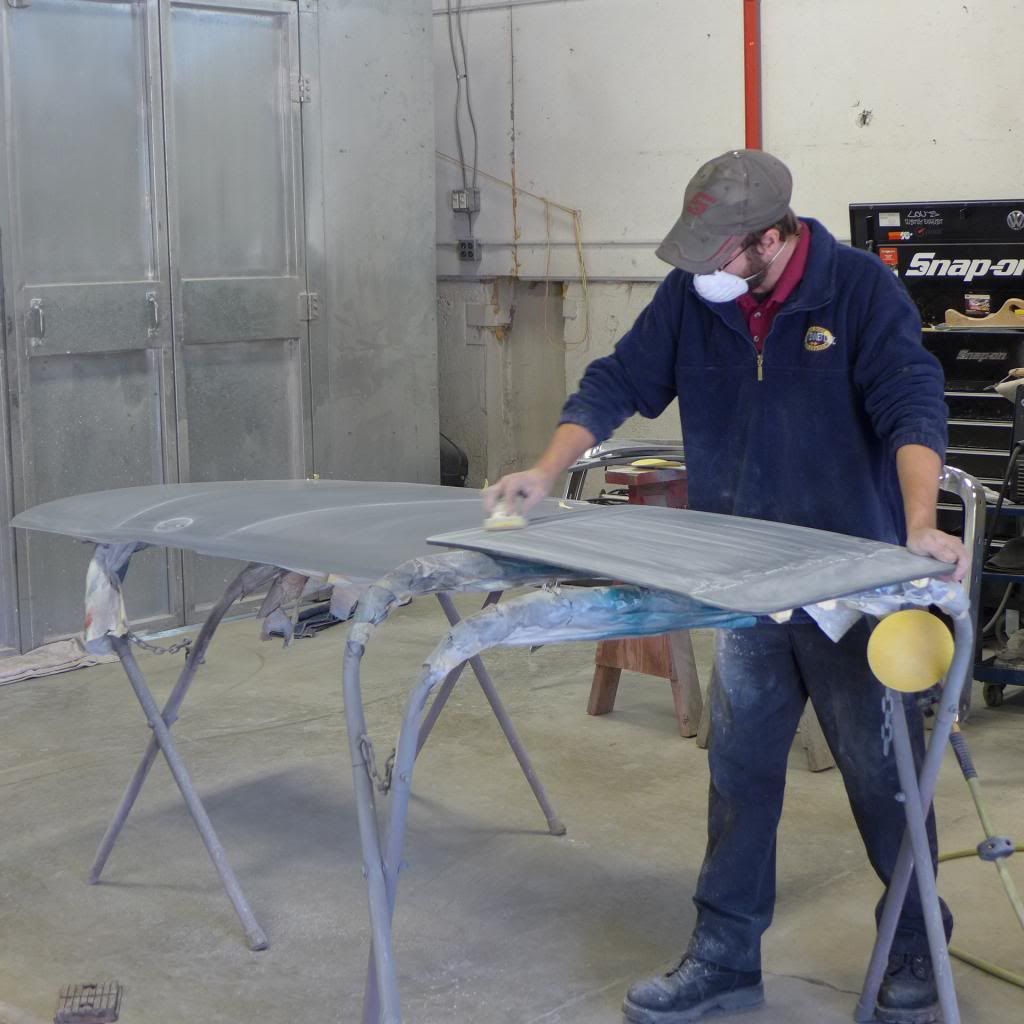
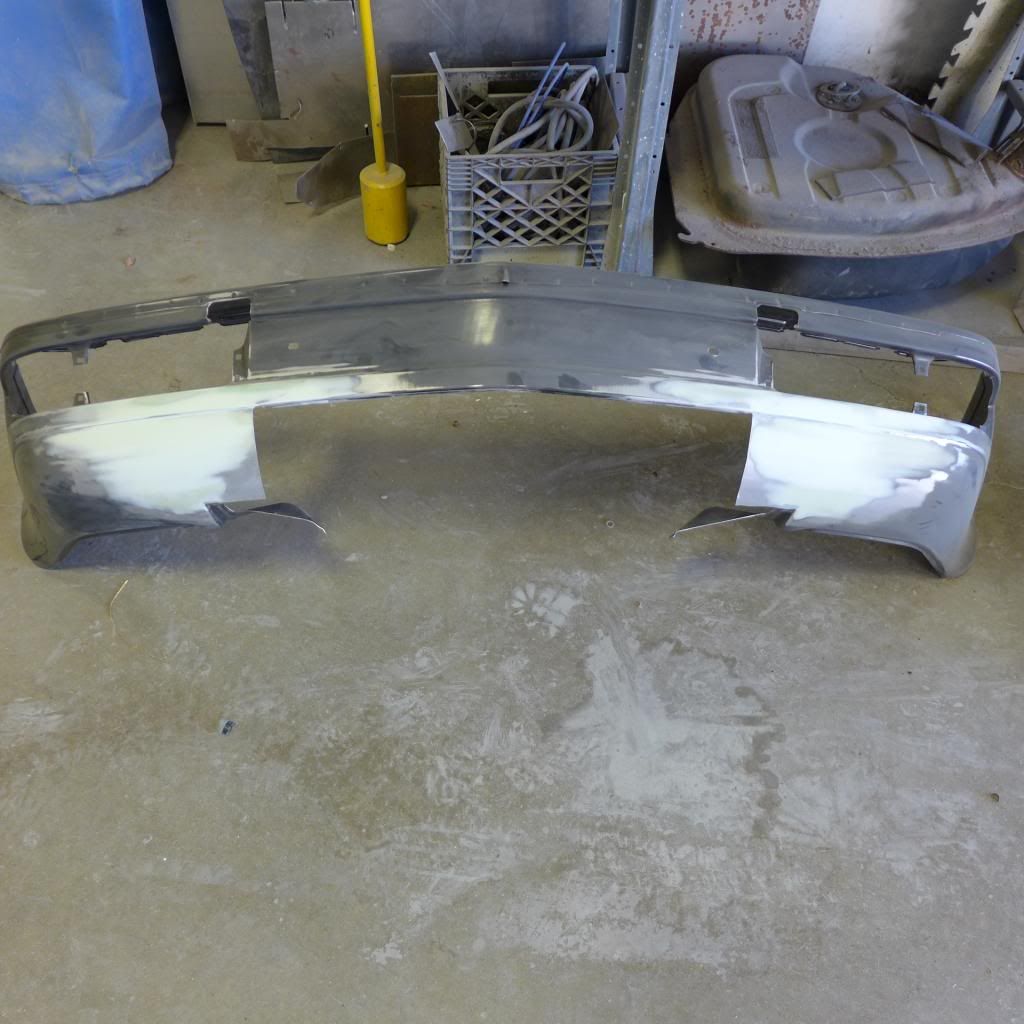
Drove up to VSR today to deliver the new sunroof gasket/seal and the hardware for putting it back into place. I had brought the newly created black Alcantara headliner (that I had a local upholstery shop make using the old one as a template) up the previous week, along with the inner sunroof panel that was also re-covered in the same material. The headliner came out real nice... can't wait to see it installed.
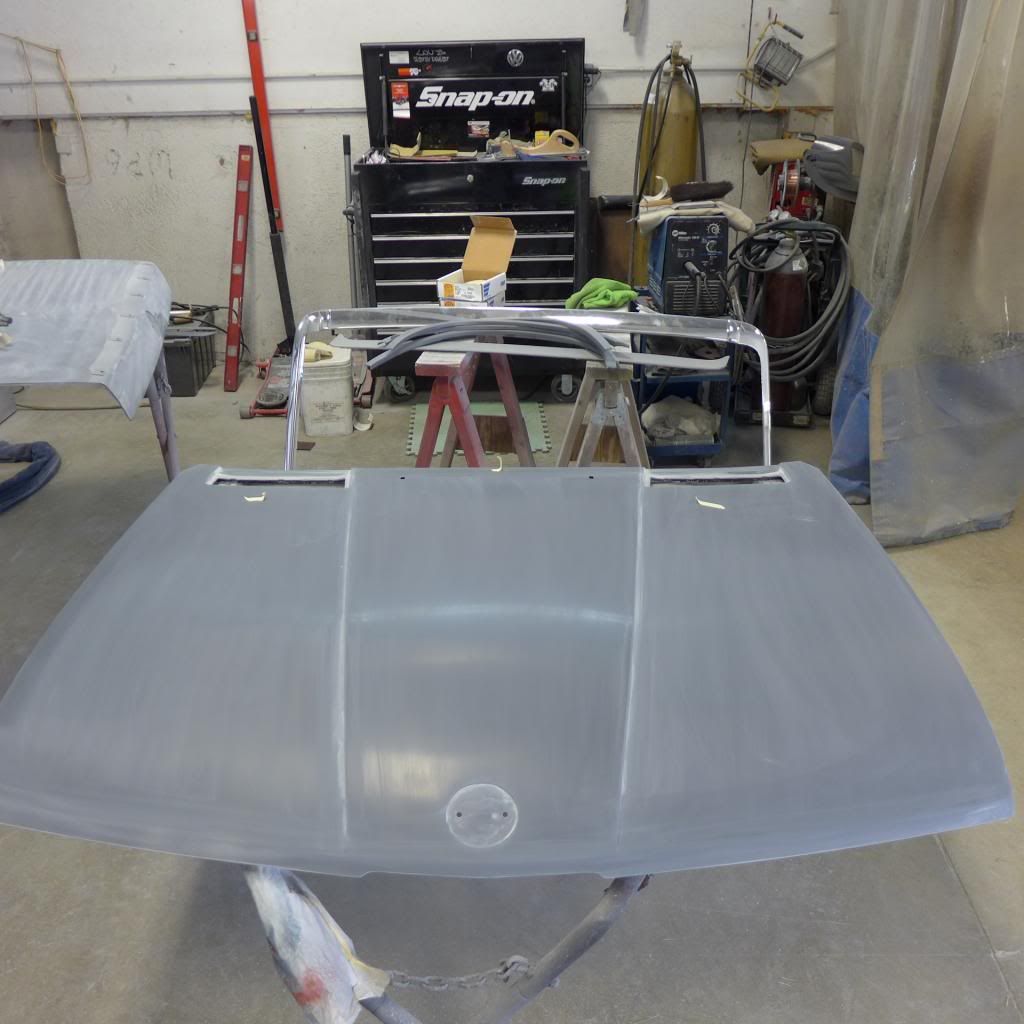
Anyway, lots of progress was make last week and now the body is painted (3 coats base, 3 coats clear) and it just needs a final wet sand and buff. All the other body parts, e.g., hood, trunk lid, sunroof panel, front & rear valance, wheel arches, mirrors will be painted either tomorrow or Wednesday... once the car is out of the paint booth and that final wet sanding is done to it. The body panels were getting a final block sanding today while I was there today (after some more prep had been done to most all of them), and the valances still need to be primered. The valances have been trimmed, modified, and fitted to the car... so, they will be a perfect fit. The VSR team is doing a fantastic job!!
The Sepang Bronze color on the e28 body looks absolutely stunning IMO... I can't wait to see it in the sun, where its metallic aspect will really show thru. Here are some pictures of the body and the final block sanding on the various panels.
When the paint work is completed, and all the panels are attached to the car, VSR will put the euro bumpers on, install the headliner, install the front windshield & rear window, and do a few things under the car, i.e., install the Supersprint exhaust system. Then, with any luck in the schedule, I'll pick it up a week from Wednesday. From there we'll have the next 4-5 months to get the rest put back together in my barn.
Here are some pictures from today. I plan to go back up to VSR on Thursday and get some pictures of the painted panels, etc.
-RoyW
Posted: Nov 18, 2013 6:06 PM
by Coldswede
That is such a classy, elegant color Roy. I can't wait to see this thing in the sun. It looks great.
Posted: Nov 18, 2013 8:53 PM
by 5280 JB
The paint just looks fantastic! That color is going to jump out in sunlight
What a fun re-assembly project it will be for the winter. Always the best part is seeing it come back together!
Jim
Posted: Nov 23, 2013 9:13 PM
by RoyW
Posted: Nov 24, 2013 12:07 AM
by GBel
Fantastic Roy. Colour is grand and I am really looking forward to seeing it.
Gary
Posted: Nov 24, 2013 1:03 AM
by wkohler
Looks great! Somehow I missed all of these updates. Can't wait to see it all back together.
Posted: Nov 24, 2013 9:12 AM
by Mab1957
Keep 'em coming, Roy. It looks great!
Posted: Nov 24, 2013 12:14 PM
by bkbimmer
That looks really nice, I love the way it's coming together.


