Page 3 of 5
Posted: Aug 17, 2012 5:20 PM
by jakeb
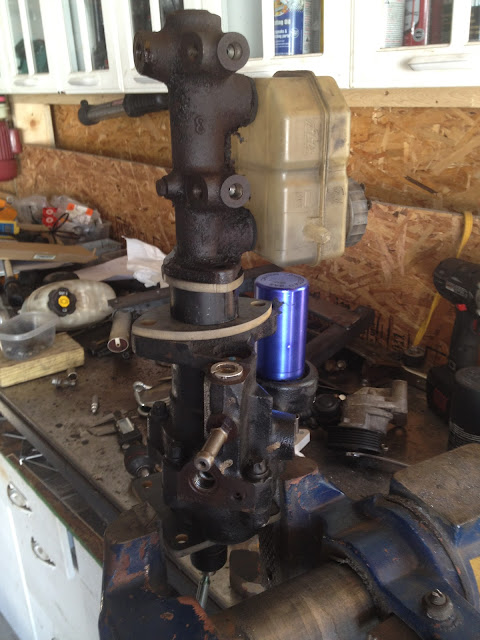
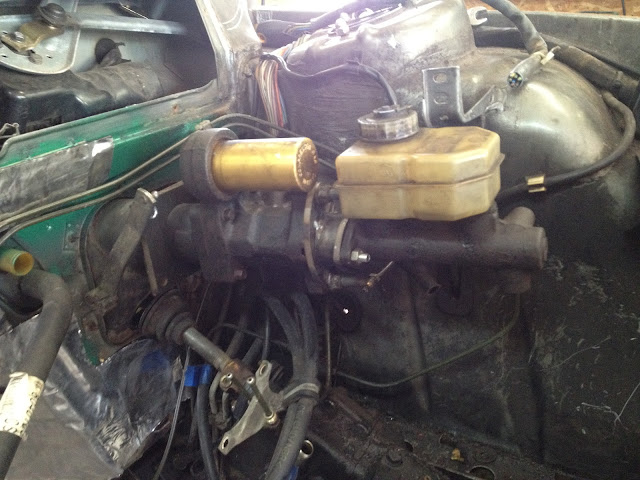
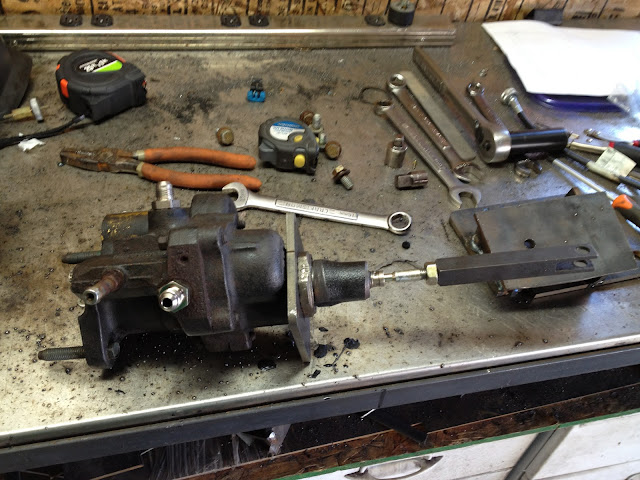
Here is how the BMW master cylinder will bolt up to the GM hydro boost...
From top to bottom....BMW master cylinder, plate to bolt to MC, adapter pin, short piece of pipe, plate to bolt to hydro boost, hydro booster, plate to bolt to firewall.
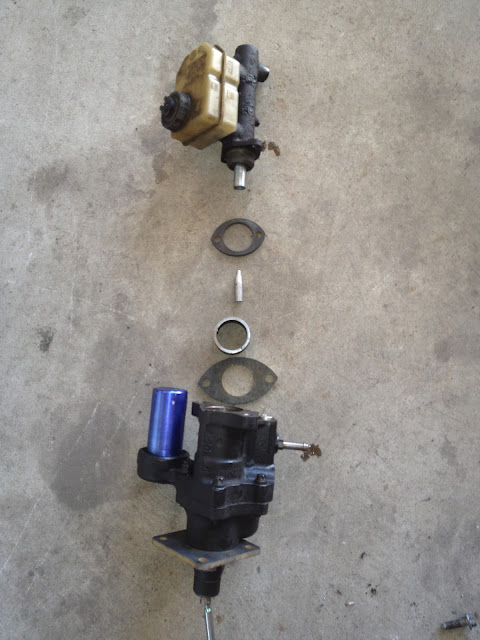
Plate to bolt to firewall...this one is centered but the one currently on the hydro boost is offset some.

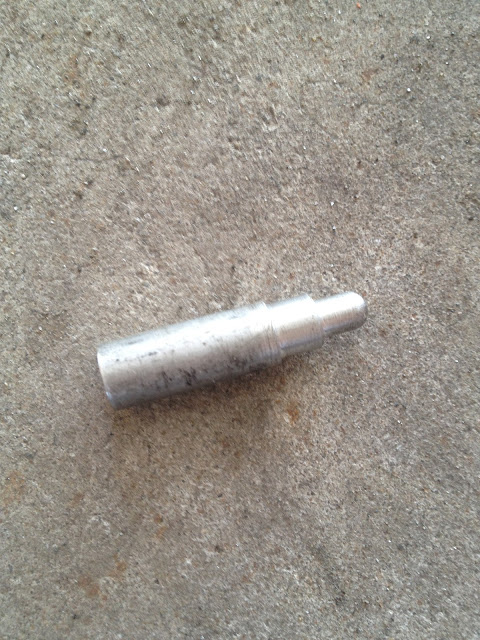
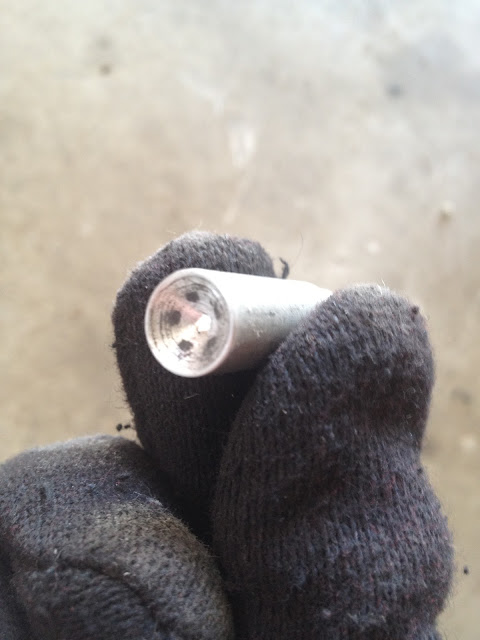
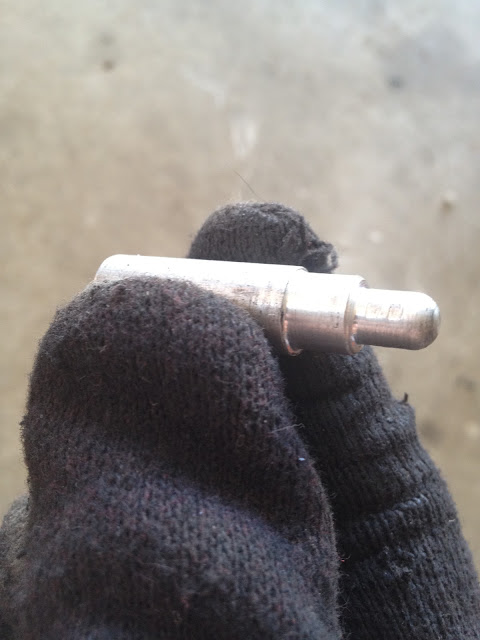
Pin to go inside the MC plunger....nice to have friends with CNC lathes.
All stacked up...plates will be welded to the pipe.
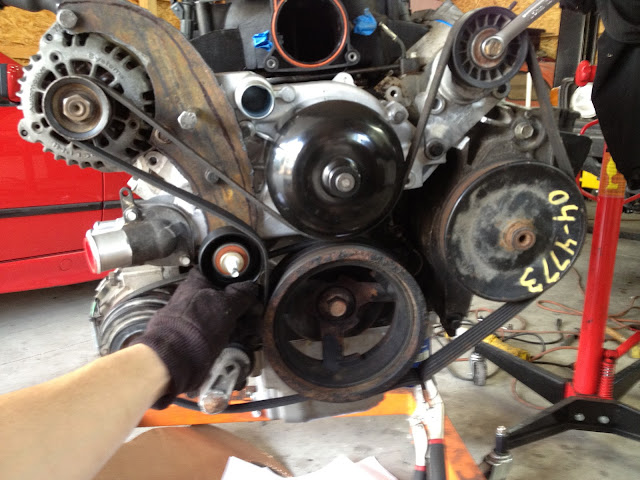
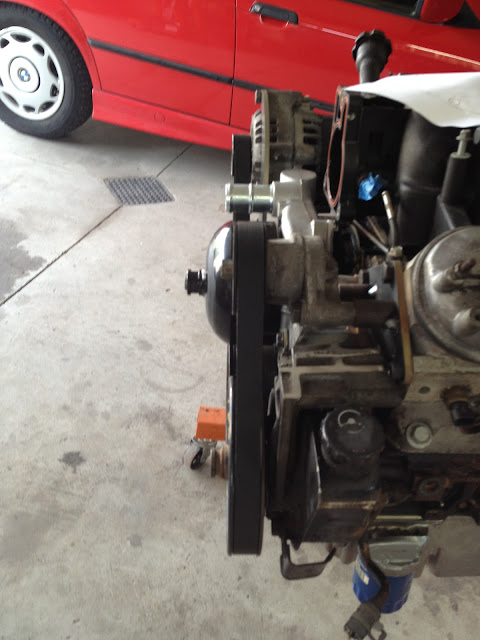
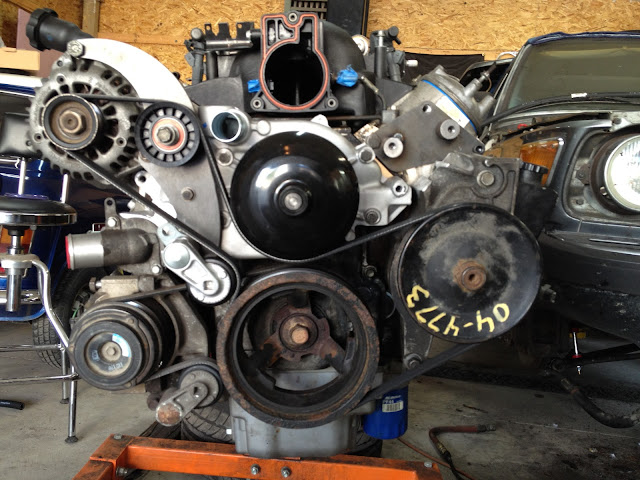
I am using as many of the truck accessories and have to move some things around. There will be a bracket that bolts off the head and two spots on the water pump to hold the alternator. Also need to make a new bracket for the tensioner.
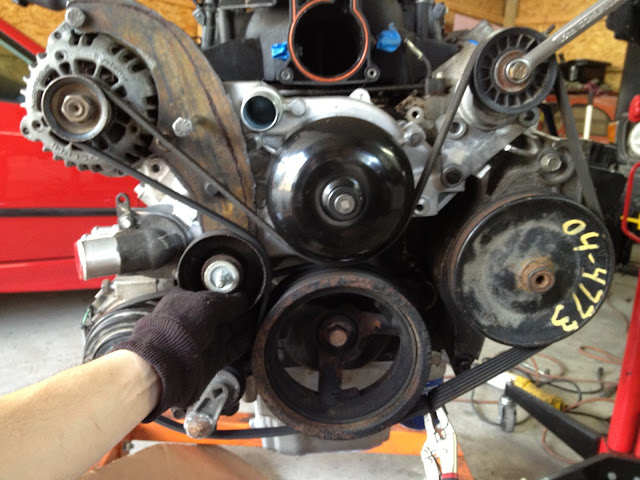
Debating adding another idler to allow a bit more belt wrap on the crank pulley. Leaning towards using the idler rather than not.
with...
without
Posted: Aug 17, 2012 7:25 PM
by mooseheadm5
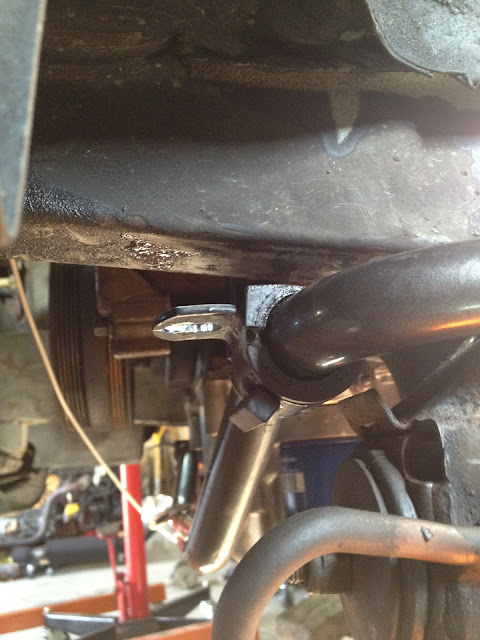
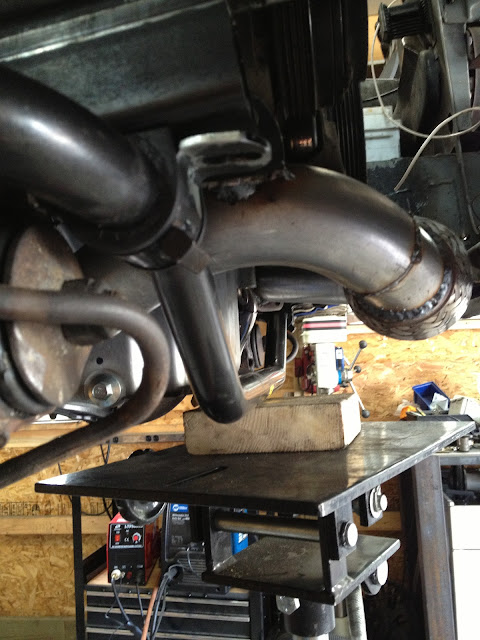
Nice exhaust work, but...

DAMHIK.
Posted: Aug 17, 2012 7:41 PM
by jakeb
Mine hasn't scraped and this one is tighter up than mine. But his car is also a little lower than mine.
I guess time will tell.... It is maybe 1/4"-1/2" off the bottom of the floor so it couldn't be any closer.
Posted: Aug 17, 2012 9:10 PM
by mooseheadm5
When I had a similar setup on my M5 (but 3" all the way) it would high center on the center muffler, and would occasionally touch down near the rear subframe. Once or twice I dragged the rear muffler on a steep incline, and mine was tucked in much tighter than that.
Posted: Aug 17, 2012 10:12 PM
by Kyle in NO
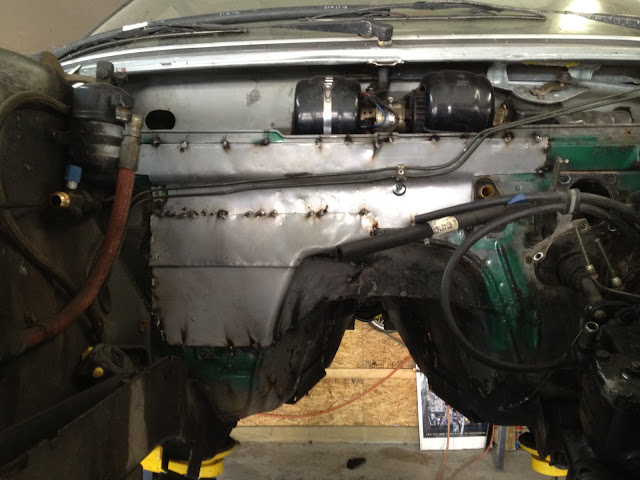
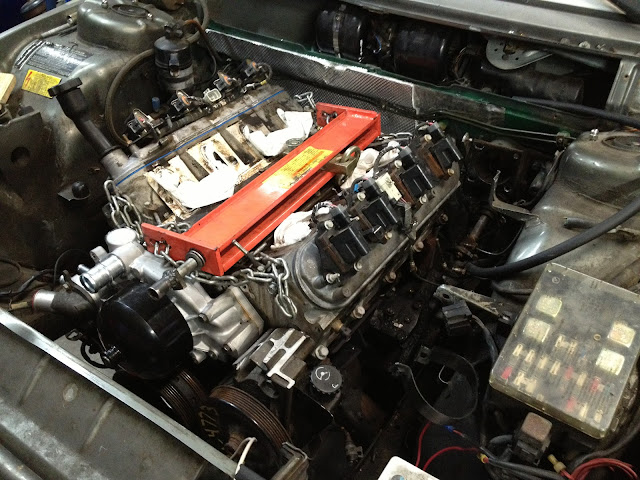
Is it me, or does this pic show a completely rotted out firewall??

Posted: Aug 17, 2012 10:27 PM
by wkohler
Very common on E12s.
Posted: Aug 21, 2012 5:16 PM
by jakeb
yeah the firewall is pretty thin....the bad part is going to get cut out and new welded in in the next few days.
A bit more progress today....the list is getting shorter.
ST Front sway bar in
Blunttech SS brake lines in
Suspension all tightened up
255lph fuel pump is in
TSP 224R cam, pac springs, and upgraded push rods installed. This was the first time I did this so it was a bit of a learning process and went a bit slow. By the last set of springs things were going quicker.
I didn't take many pictures through all of this as it isn't that exciting really...
parts laid all out
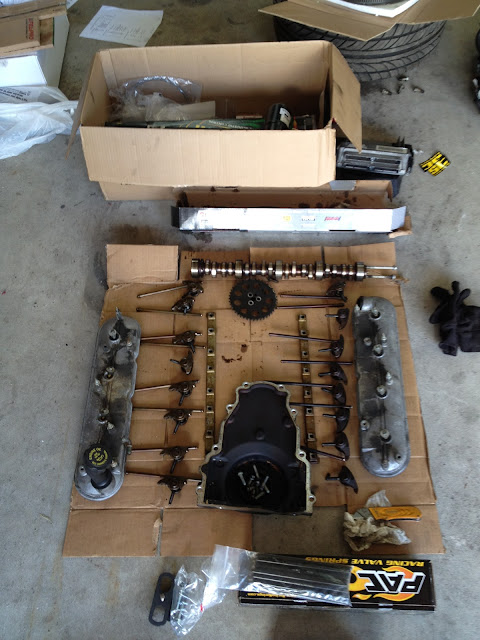
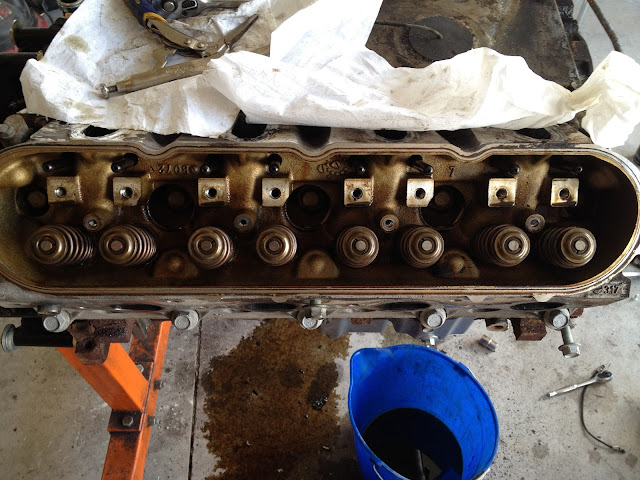
Old springs...
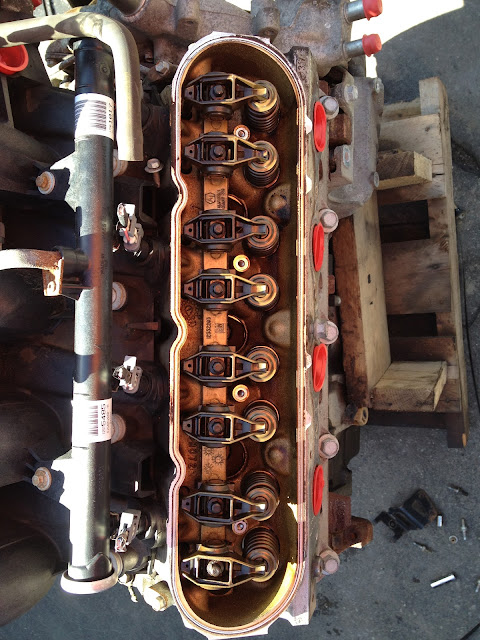
New springs...really doesn't look very different
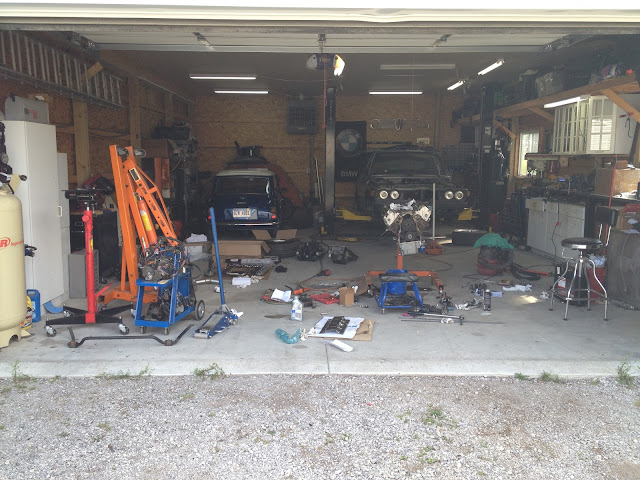
Taking up the entire garage today....wife has to park outside. I really need more space!
Posted: Aug 21, 2012 5:19 PM
by wkohler
What kind of lift do you have and how high is your ceiling?
Posted: Aug 21, 2012 5:23 PM
by jakeb
My ceiling is 10' and I have a baseplate lift from greg smith. It is a little pain with the bump on the floor but more than ok to overcome to have a lift. The lift was a GREAT purchase and was only $1600. More than paid for itself, saves my back, and I can work soooo much faster.
We are going to build a new house in the next 5 years (we have a wooded lot around an acre) and I will have a dedicated 30x50 (at least) shop with 12' ceilings and a second floor. But for now what I have works out well. 24x36...10' ceilings
Posted: Aug 21, 2012 5:23 PM
by unt0uchable
wkohler wrote:What kind of lift do you have and how high is your ceiling?
Ditto.
EDIT: Posted at the same time....thanks for the info.
Posted: Aug 21, 2012 5:29 PM
by wkohler
Thanks for the info. Bit of a bummer as my ceiling is just shy of 9'. 8'8" or so. Sorry to take it off track. Nice work so far.
Posted: Aug 21, 2012 5:31 PM
by jakeb
it's no problem. You could put the posts up into the attic a little bit. You wouldn't be able to fully walk under the car but nor car I. I roll around on a little seat.
Posted: Aug 21, 2012 5:34 PM
by wkohler
Like Winston Churchill used to say...Why stand when you can sit?

Posted: Aug 23, 2012 10:36 PM
by shagrath
Subscribed. I love this stuff!
Posted: Aug 26, 2012 10:59 AM
by jakeb
Just a small update...
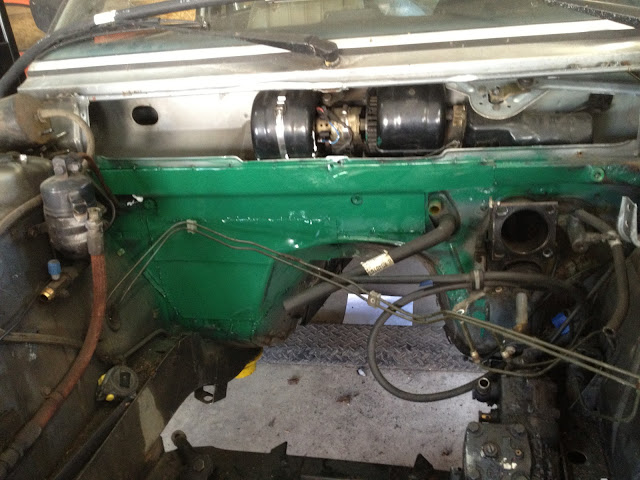
Fixed the hole in the firewall. Blunt wanted functional over looking good. It's nothing fancy but it will stop it from rusting more and fill the hole.
You can see the hole in the firewall here....

Some paint just to cover the bare metal...back side also was painted. This will all get covered up anyway with new insulation.
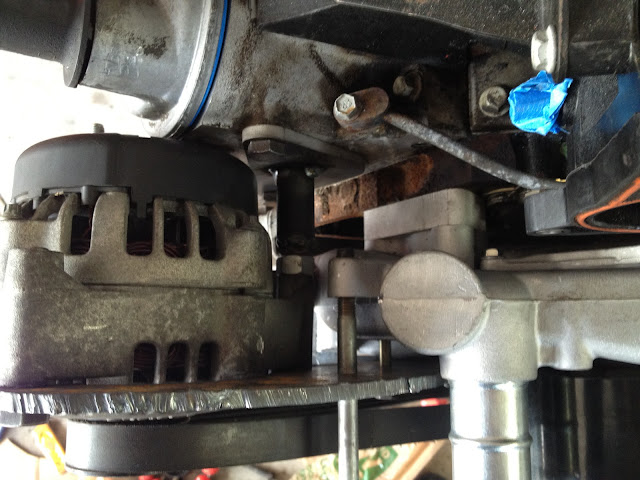
Relocating the alternator to make room....
Made a bracket, love my new plasma cutter. This will get drawn into cad and cut on a water jet for the final version.
Also mounts to the head. This may or may not stay.... There will also be spacers between the water pump and new bracket.
I'm not sure which idler I like better yet. I have another one coming to try too. Plate will be drilled and tapped for the idler pulley.
Posted: Aug 27, 2012 7:40 PM
by jakeb
I'll pull a bunch of them from the local place and see which fits the best.
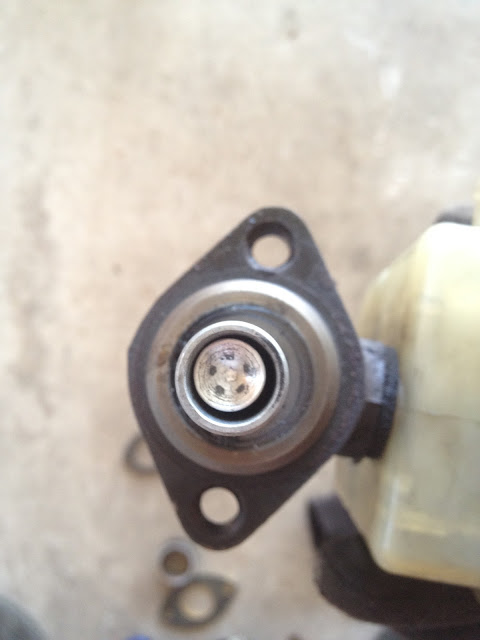
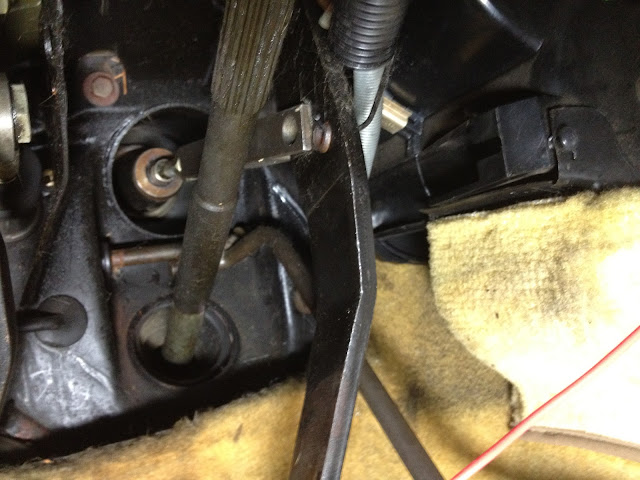
Cut and threaded the rod on the hydroboost...testing it all in there.
Fitting up to the pedal...pin is in but not pushed in all the way as it will have to come back out.

sound deadening on the firewall
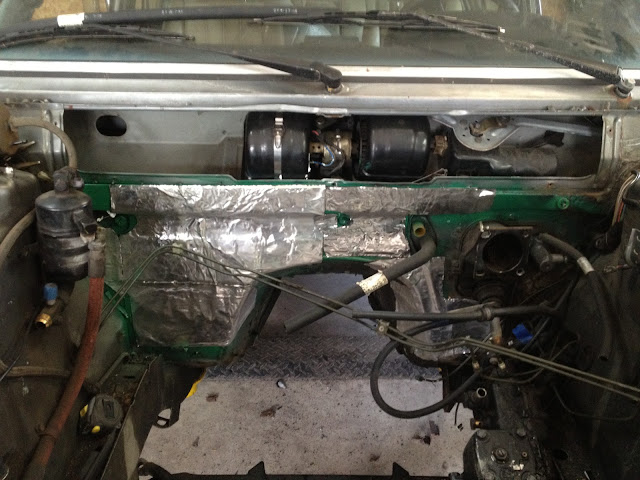
covered with some heat reflection stuff
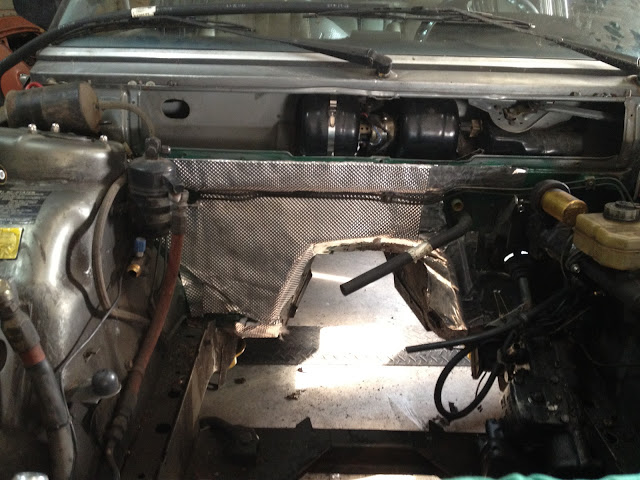
Still need to add a little bit over on the drivers side.
The list is getting pretty short. Engine can go back in soon.
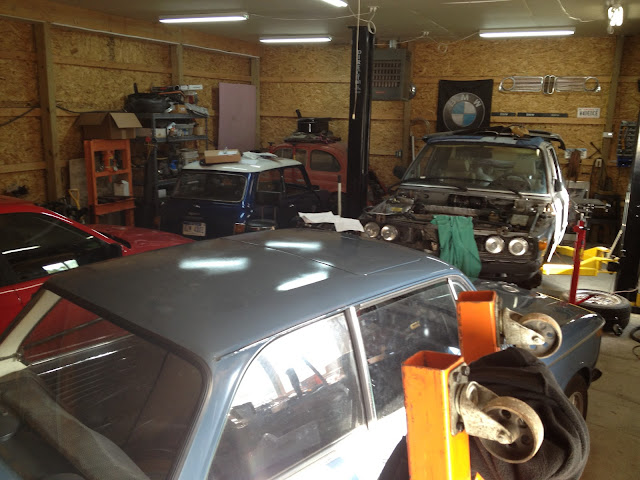
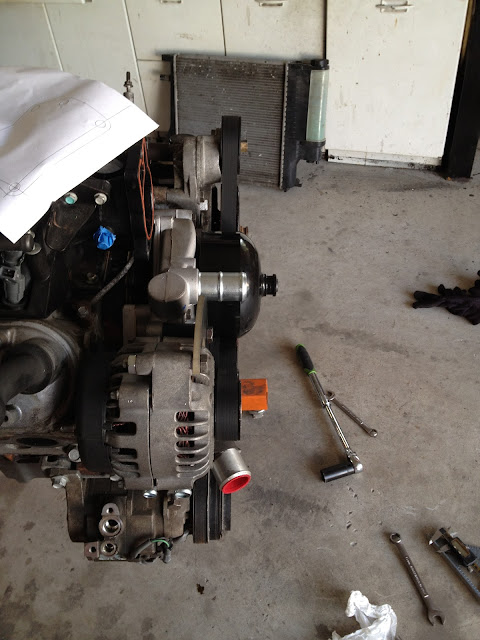
How I left the garage today...
Brought my 2002 home today...been in storage sense last fall...who knows why. Driving it home made me remember how fun it is. I like driving it the most during the fall anyway.
Posted: Aug 31, 2012 3:06 PM
by jakeb
Waiting on a couple things before the engine can go back in....also went back to my day job this past week...well sorta. K-12 band teacher...kids start next Tuesday. Hard to go back every year.
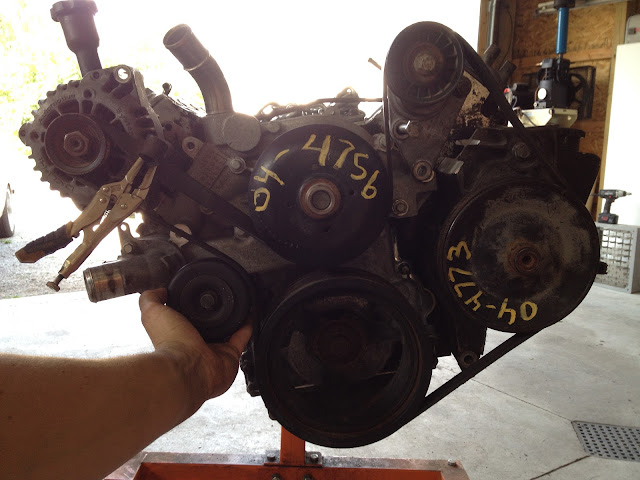
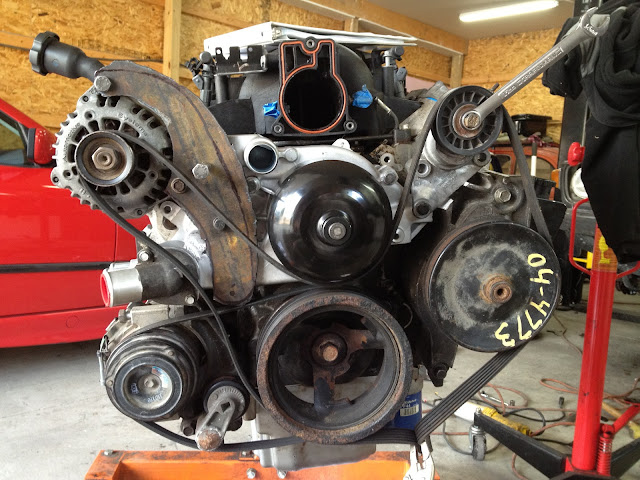
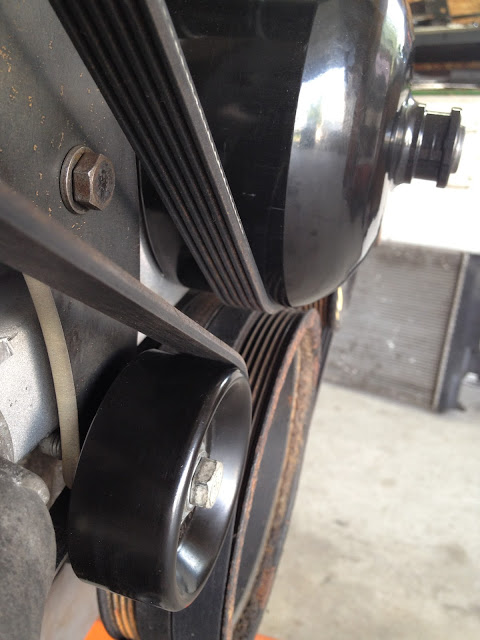
Got a belt for the new belt routing...and I only got one belt at the auto store and it was right the first time around. Tensioner still have a lot of adjustment if the belt stretches a bit.
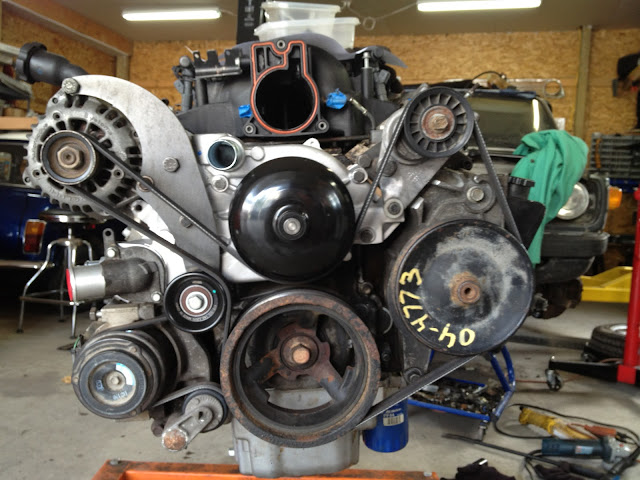
Alignment of the belt. I rolled the engine over about 5 times and it seems to track straight.
Tensioner bolts to the waterpump and then two threaded standoffs that are welded to a plate that bolts to the drivers side head.
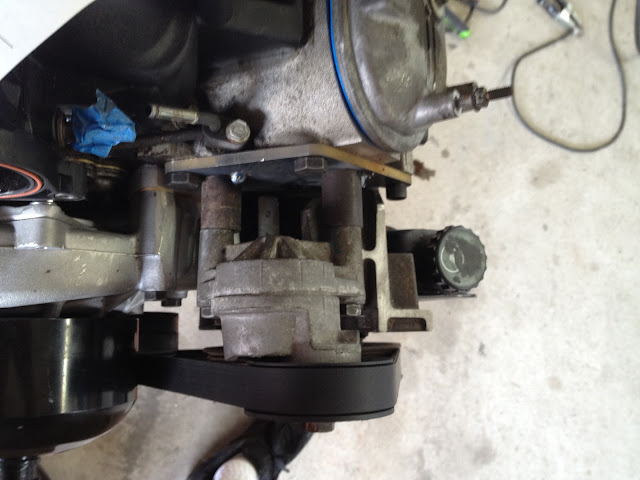
idler
The mount off the head will be replaced with a threaded stand off. What is there was just to mock this. You can see the two spacers that go from the plate to the waterpump.


The reason for moving the alternator was a couple reasons. One to be able to gain space down low for exhaust on the drivers side and second to be able to reuse the truck accessories.
Posted: Sep 02, 2012 6:23 PM
by jakeb
Btw this will have AC....AC fittings and new crossflow condenser came this week.
The e12 uses flare fittings on everything so I had to get adapters to go from flare to the new O-ring style.
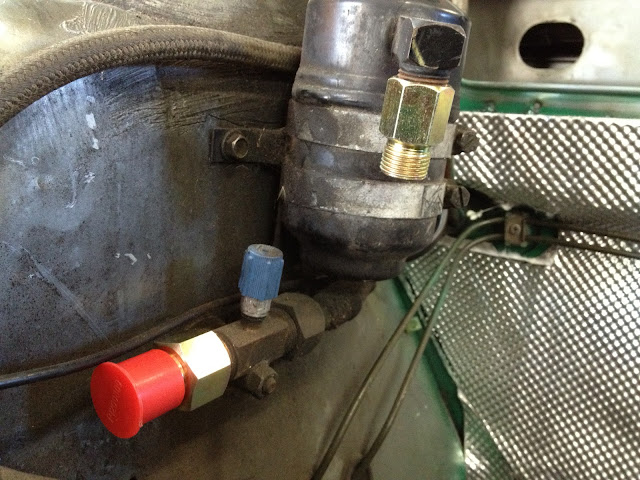
Coming off the drier (new one waiting) will be the GM AC pressure switch and the high side port.
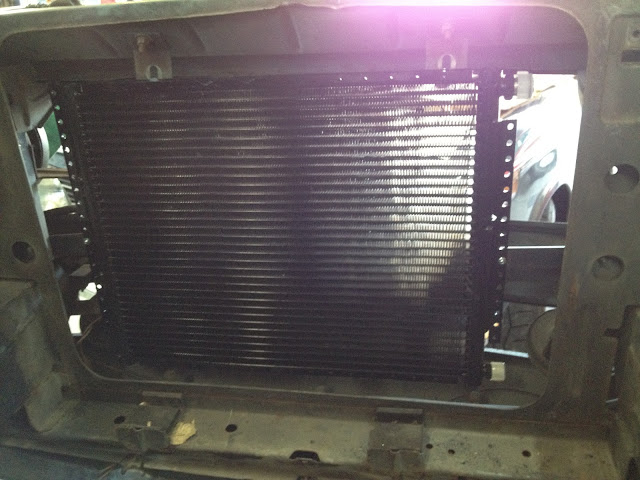
Condenser mounted using the stock e12 mounts up top and a couple small brackets on each side near the bottom. You can sorta see the brackets down low.
Started on the engine harness.
I took all the split loom off a couple weeks ago...looks like this.
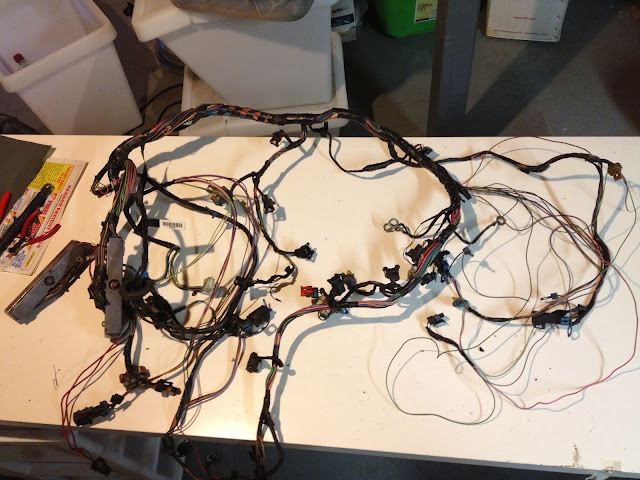
Then go through and take off most of the tape so everything can be split apart.
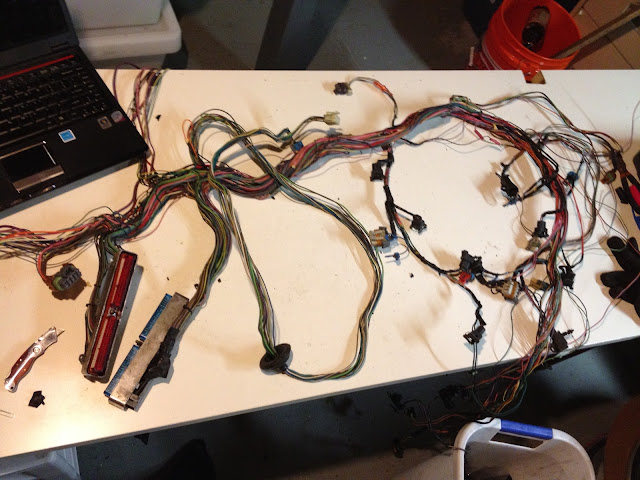
Then I de-pin both PCM connectors.
First the blue.
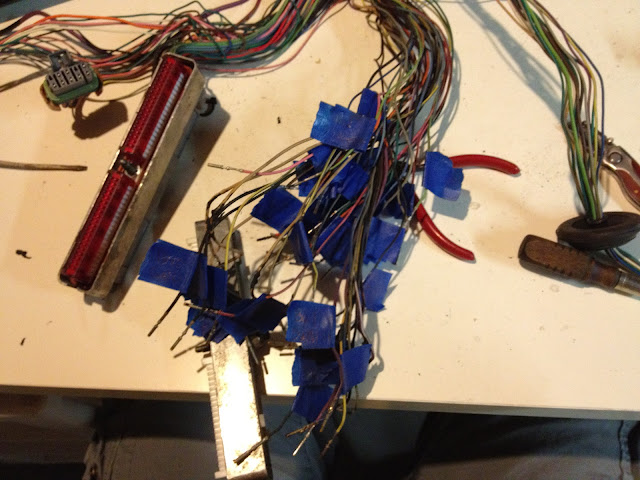
Then the red
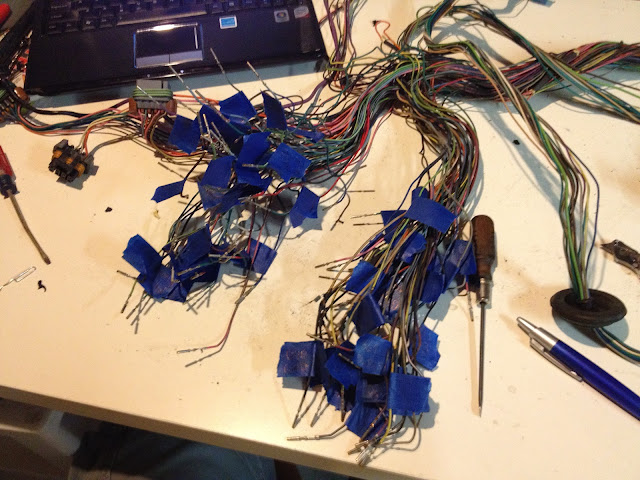
All the wires that will get rehooked to the connectors are labeled with the connector color, pin number, and function. Removed wires are just pulled out.
Next step is to pull all the wires apart...remove unneeded circuits. Reroute it...on and on. More pics and details to come.
Posted: Sep 03, 2012 2:56 AM
by 1st 5er
jakeb wrote:
Started on the engine harness.
I took all the split loom off a couple weeks ago...looks like this.
Then go through and take off most of the tape so everything can be split apart.
Then I de-pin both PCM connectors.
First the blue.
Then the red
All the wires that will get rehooked to the connectors are labeled with the connector color, pin number, and function. Removed wires are just pulled out.
Next step is to pull all the wires apart...remove unneeded circuits. Reroute it...on and on. More pics and details to come.

Now I remember why I don't take on these kind of projects.
Posted: Sep 03, 2012 8:17 AM
by jakeb
haha it's a few wires. But really I like the wiring stage..it is pretty relaxing for me actually.
Posted: Sep 04, 2012 9:39 AM
by 1st 5er
jakeb wrote:haha it's a few wires. But really I like the wiring stage..it is pretty relaxing for me actually.
For me it would be rewarding,
if I could complete it, but I'm sure not relaxing.
Posted: Sep 04, 2012 11:20 AM
by slimdevil27
jakeb wrote:haha it's a few wires. But really I like the wiring stage..it is pretty relaxing for me actually.
I thought I was the only weird one that enjoyed wiring.

I'll post up a thread on the current rewiring project....a 52 Packard 200...a new harness was hacked in, half the stuff doesn't work, there's a parasitic draw, an electric fuel pump

, and a battery cutoff switch mounted to the floor
. I pushed on a few wires to move them slightly and one came out of the poorly crimped terminal

The belt routing seems a bit off to me though. I think the original routing had the belt wrapping around 2/3 of the crank, 1/2 of the water pump and then onto the P/S. Your solution should be adequate, my only "maybe" scenario would be P/S related belt squeal, doubtful, but just a maybe. Doesn't look like there's much choice either way, would the belt interfere with anything if it went from the tensioner straight over to the alternator? Regardless, millions of vehicles with vbelts ran the accessories with far less contact area. When comparing the contact surface area between a 1 inch section of vbelt versus a 6 rib serpentine, you have roughly twice the surface area making contact.
How is the tensioner sprung? Is the index mark on the arm between the marks on the base? I like the idea of the idler pulley to increase the belt wrap on the crank.
Love the work so far....

Posted: Sep 04, 2012 8:18 PM
by jakeb
Thanks guys...not sure why I like wiring so much. I think it still gives me that puzzle research part but is a lot less dirty.
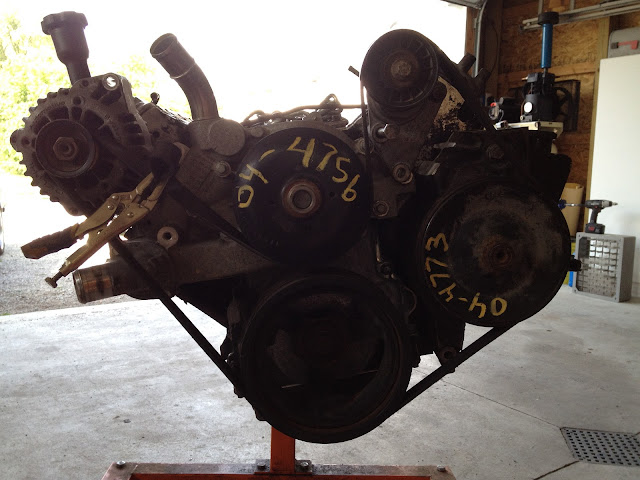
After some discussion over at BF.c I changed the belt routing a bit. Some guys over there said that the tensioner should be the last thing in the line of accessories. After looking at a bunch of other setups I couldn't find any with the tensioner not at the end of the line.
Also the tensioner was sprung in a way that the engine could actually possibly un tension it.
So....new routing it was. Belt is a lot shorter. The bracket on the alternator is just temporary as the tension is only held with one bolt right now. Waiting on a new one from the waterjet.
Also worked a bit more on the wiring...I pull the harness all apart to reroute it. Pull out circuits I do not need and also make sure all the wires are in good shape.
So after labeling all the pins as I did before. Next step is to just start pulling out each circuit. Putting ones I keep in one pile and ones not needed in another pile...
Keep pile...the rats nest over to the right is the injector and coil harness. No reason to pull that all apart
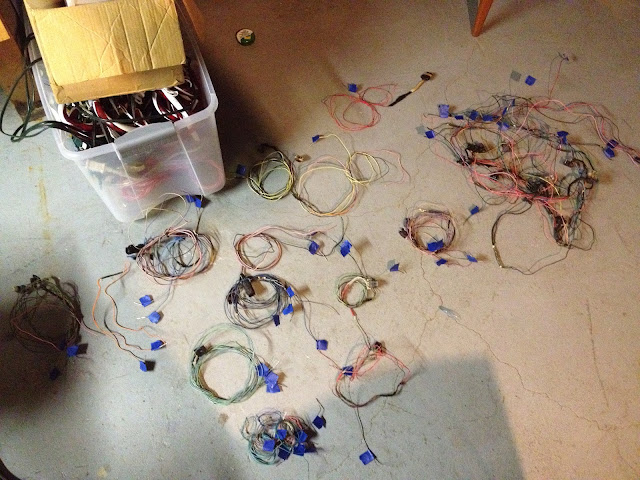
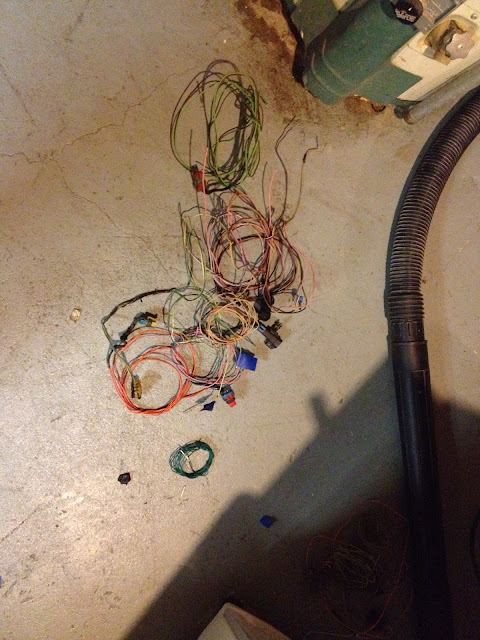
The unneeded pile...there are a few other stray wires not needed but this is most of them.
Posted: Sep 08, 2012 9:21 PM
by jakeb
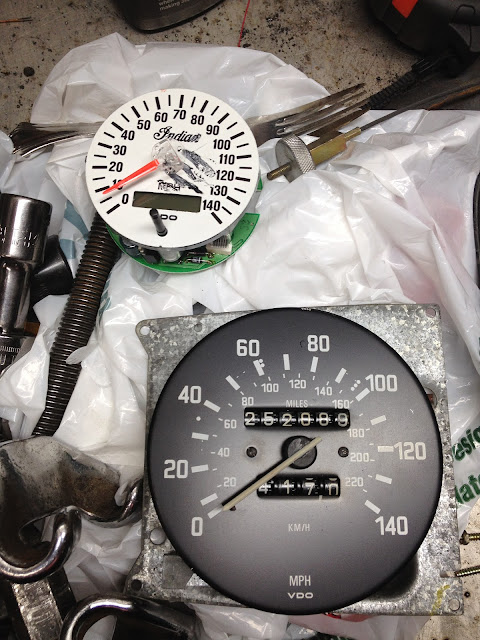
The e12 uses a mechanical speedometer where the t56 trans does not. I was going back and forth of either getting a electric to mechanical speedo driver or converting to an electric speedo.
Going with the electric speedo....better accuracy...and a odo that can't stop working because of old gears.
VDO speedo and e12 speedo/ VDO speedo has already been pulled out of its housing and the glass has been removed.
Remove both needles of the gauges
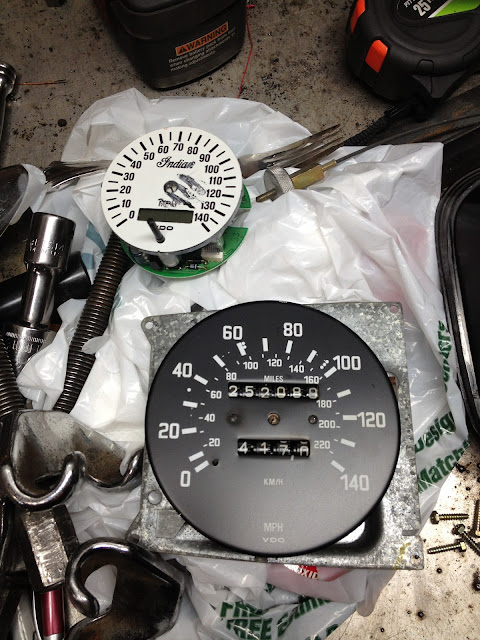
The needle on the e12 happens to be the same size shaft as on the new electric vdo
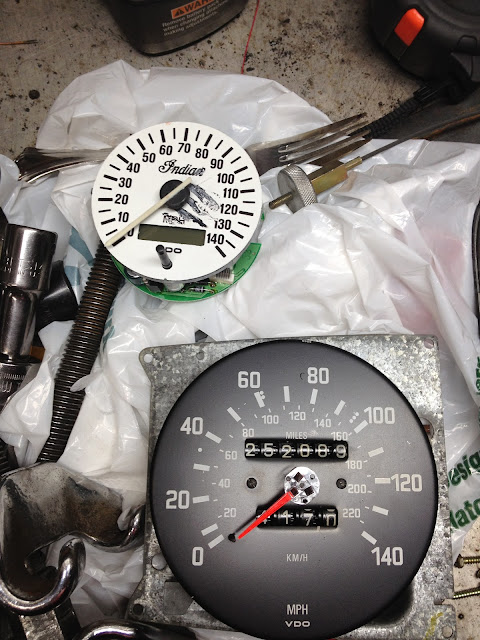
I will scan both faces into the computer and edit the e12 face to match the swing on the new vdo gauge.
I know Blunt is at vintagefest in Chicago...wish I was there as well but other commitments wouldn't allow this year.
Posted: Sep 15, 2012 11:48 AM
by jakeb
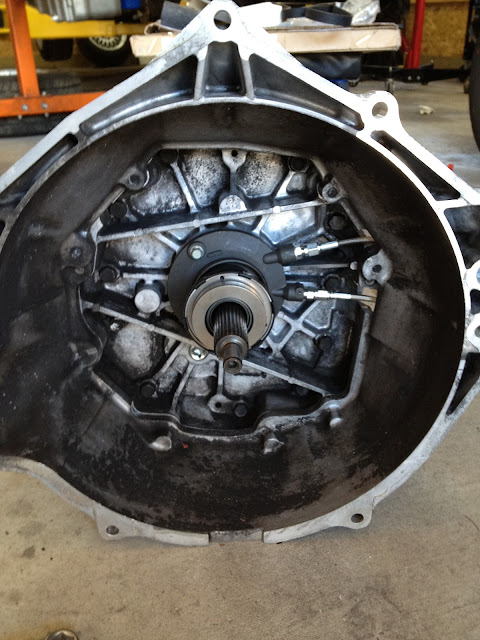
Haven't had an update in a bit...I am back to my day job now so time is a little limited. We were also waiting for the trans to be gone through. New syncos, fork pads, keys, realigned, and a steel 3-4 shift fork.
Engine should be going back in in the next couple days...
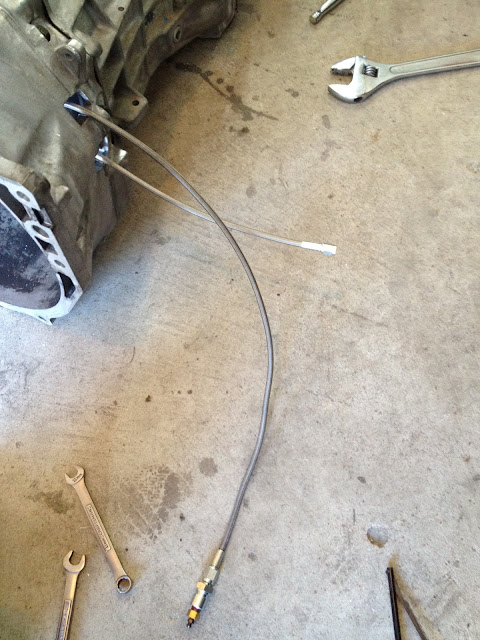
a few pictures of little things getting done
New slave cylinder/release bearing with remote bleeder and hydro line

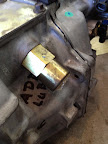
Removed the wire connector off the skip shift solenoid. The skip shift gets shut off in the software, connector was close to the trans tunnel. It needs to stay now just as a plug.
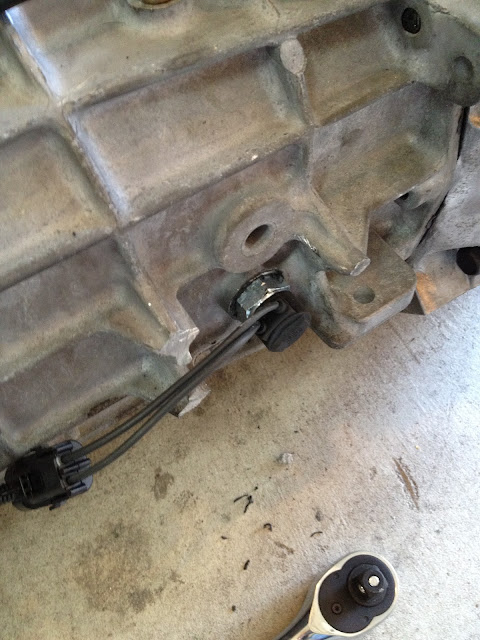
Ford t56 backup light switch...again for tunnel clearance
Modified hydro boost....also now with an6 fittings
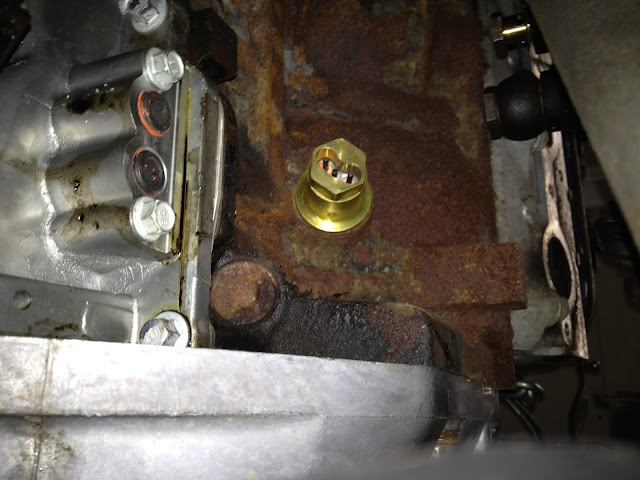
e12 temp sensor rethreaded from m14 to m12 to fit in the passenger side head

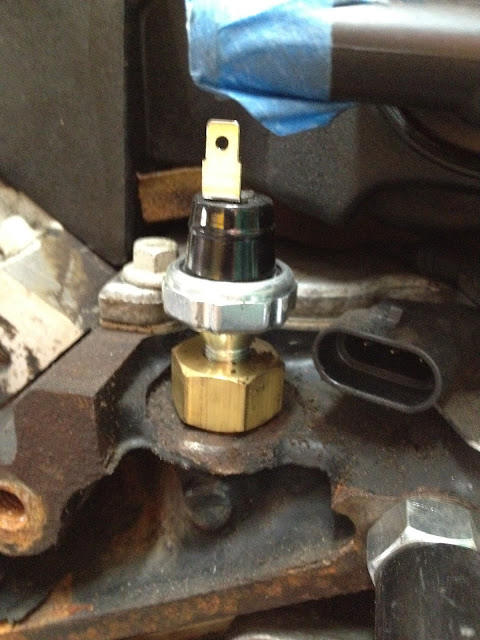
Oil dummy light sensor...adapter from m16 to npt and then a sensor from a 89 s10
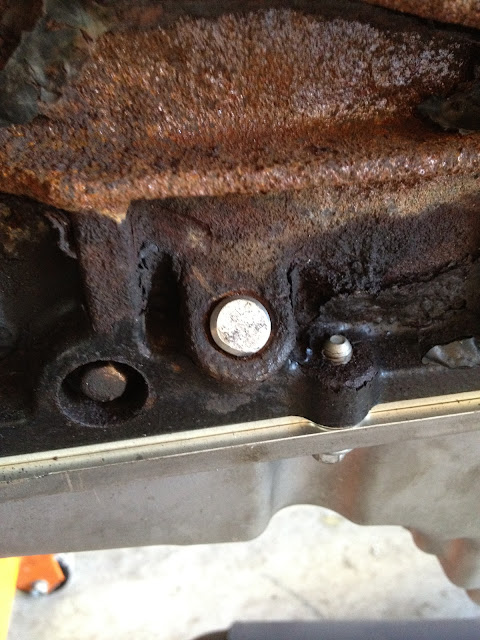
truck dipstick location plug
Debating if I should jig up the mounts to reproduce.....Keep going back and forth. if anyone is even remotely thinking of wanting a set of mounts for an lsx e12 please let me know....
[img]
Posted: Sep 15, 2012 3:08 PM
by jakeb
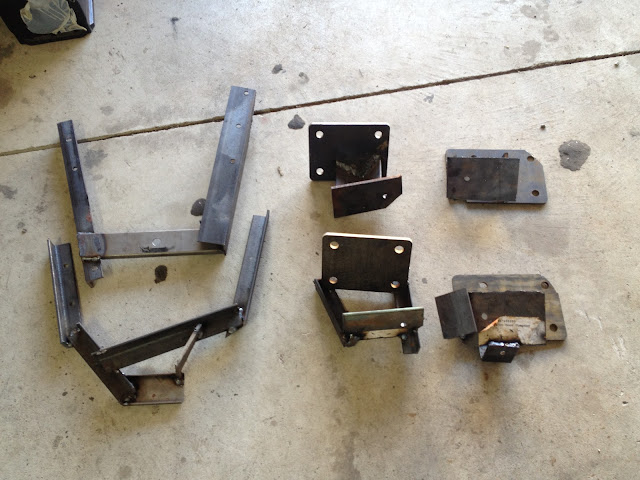
Ended up making jigs for engine mounts, trans mount, and drivers side exhaust manifold.

Posted: Sep 20, 2012 9:11 PM
by jakeb
Engine is back in....
A couple close spots in the trans tunnel that had to be opened up.
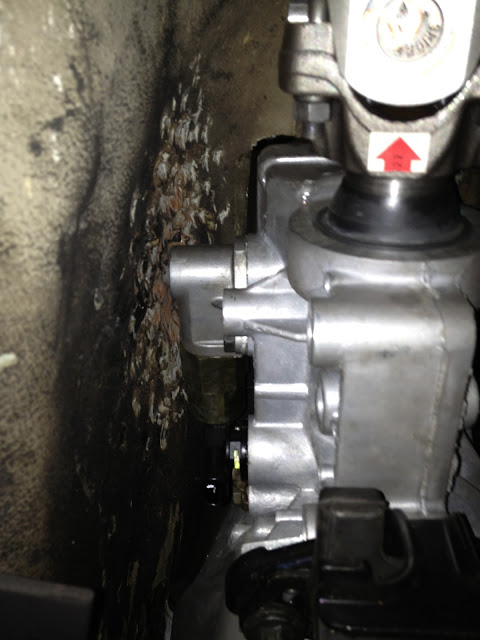
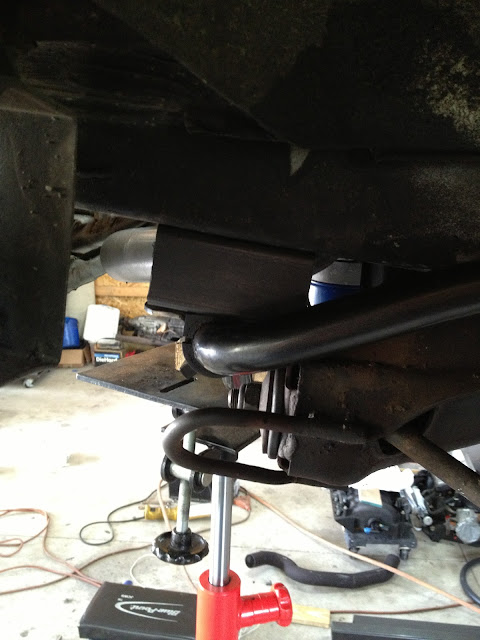
I did run into one issue...I mocked up the motor mounts with the stock sway bars. We upgraded to ST bars and the ST bar has a slightly different path than the stock bar. So the bar is hitting the oil pan. The engine really couldn't go back any further anyway so we either have to go back to the stock bar or move the ST bar.
The two bars stacked...
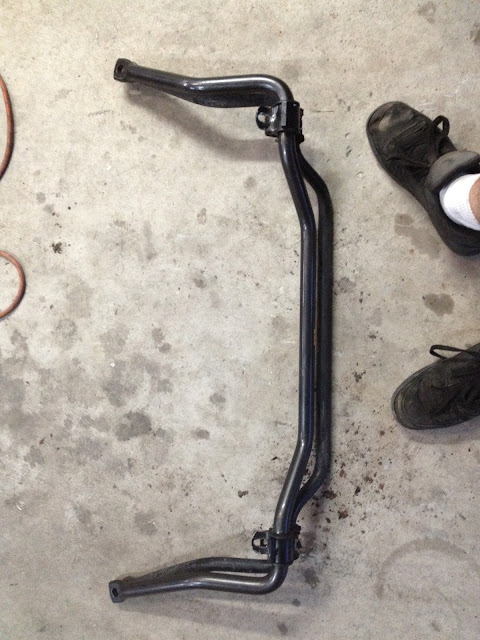
So if I push the bar forward just a bit everything will clear the pan. I will make some mounts sorta like the e28 m5 off the frame rail.
I may have to get some different end links to keep everything lined up correctly.
Cut open the hole in the trans tunnel for the shifter. I will make an adapter to allow the screw on BMW knob to go back on and be centered in the surround.
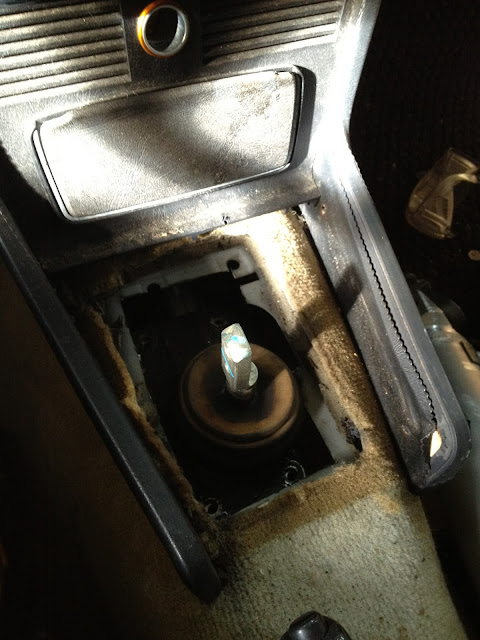
Can anyone guess what this is? It's new...
The list is getting shorter
Posted: Sep 23, 2012 9:02 PM
by jakeb
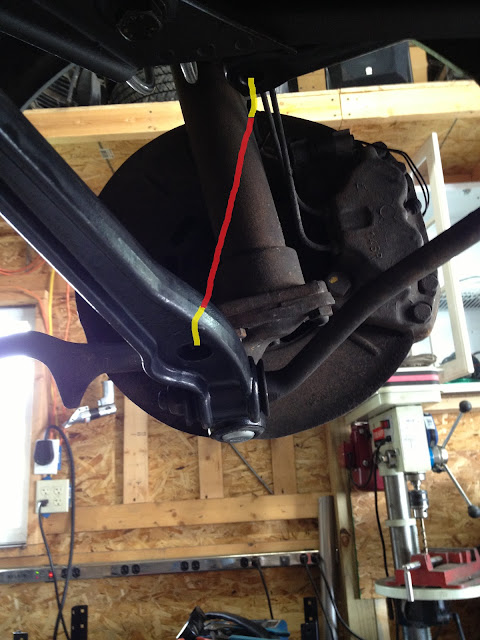
So because of the sway bar situation I have been working on moving it so it clears the oil pan and exhaust. Here are some pictures and I have a couple questions if anyone has suggestions....
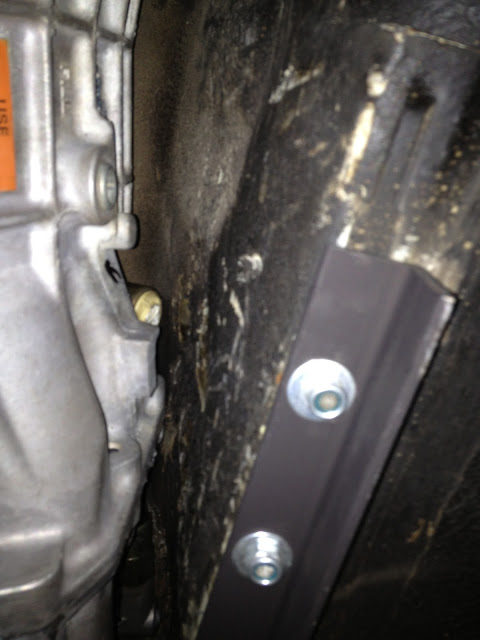
Ok so here is what I am thinking for the new mount. It is a 2" square that will get welded to the frame rail.
So becasue I have to push the bar forward about 3" from the stock location the bar arms and end link mounting holes are not lined up with the holes in the control arm.

So I am trying to figure out how to connect everything. I have a few different ideas/options. If anyone has another idea let me know or if one over the other would be better again let me know.
First idea is to use some heavy duty swing fittings on both the sway bar and the control arm with a rod in between.
The swivel would be like this...

and then setup like this...
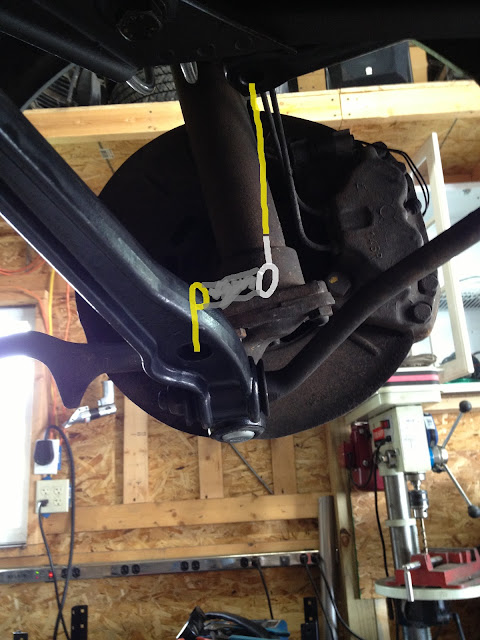
The second idea is to put a solid rod end in the control arm, a spacer, and then a swivel heim joint with a bolt and spacer up to the control arm.
Solid rod end like this.

Setup like this...
Or finally extend the bar with some steel and use a straight connection down to the control arm.
like this...
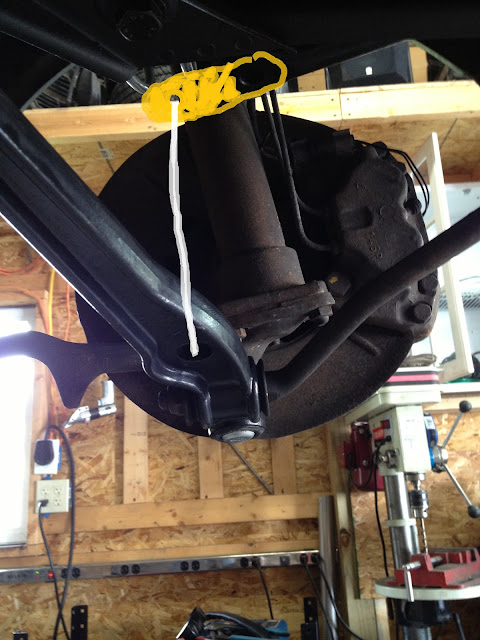
I know if the arm length is longer that the stiffness of the bar goes down.
I found a calculator and the stock bar is around 216 in/lbs rate, new bar is 443 in/lbs
If I were to extend the arm length by about 3" the rate goes down to 310 in/lbs
Any suggestions / help would be great
Posted: Sep 23, 2012 11:41 PM
by slimdevil27
It looks like rotating the bar ends down toward the lower control arm would also gain you some room in the center section and allow you to move the bar back/up. They don't need to be that far away from the control arm, in fact some cars mount the ends directly to the lower arm. You might try that...just flip the bar over and the ends would be mounted under the control arms. Either way a universal sway bar link kit (bolt, spacer, washers and bushings) could make the connection. Be sure to check any planned installation at ride height and compressed for clearance.
Posted: Sep 24, 2012 8:47 AM
by jakeb
I will give that a try...I think it might run into the exhaust then though....