Page 2 of 5
Posted: Jul 16, 2012 5:20 PM
by slimdevil27
What's your location? The reason I ask is...if it's a dry state then quite a few tire and repair shops use water mist in front of a fan.....the guys at the junk yard would rig their own personal units from scrap parts....washer pump, blower fan, five gallon bucket...cheap and easy. If you know what a swamp cooler is, then it'll work amazingly well.
Depending on your garage the best thing to keep things cool is evacuating the hot air from the peak of the roof through the dormer vent with a fan and open whatever window or just crack the garage door on whichever side is shaded.
Quit whining and get back to work, we want more pics

Posted: Jul 16, 2012 5:23 PM
by jakeb
hahaha
I am in Michigan...the humidity is just as bad as the heat actually probably makes it worse.
I have a HUGE ass fan pulling air in which makes it better but the temp in the garage is still hotter than outside.
Posted: Jul 16, 2012 6:07 PM
by mooseheadm5
Check out
http://bmwengineswap.info/viewtopic.php ... b91f86b412
That is bmw4aaron's M60 V8 swap. You can see a little of what he did for the exhaust. That may help. Also, post your builds there.
Posted: Jul 16, 2012 6:14 PM
by jakeb
Thanks for the link. I will have to see if I could do something like that.
I have never seen that site. I'll post my builds there too. As well as read a bunch of them.
Posted: Jul 17, 2012 4:06 PM
by jakeb
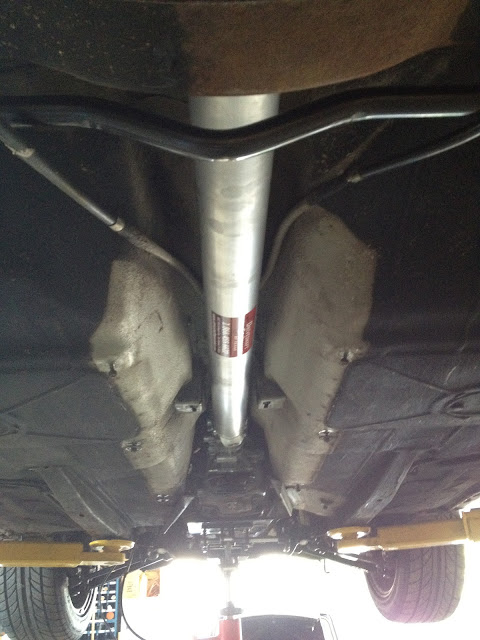
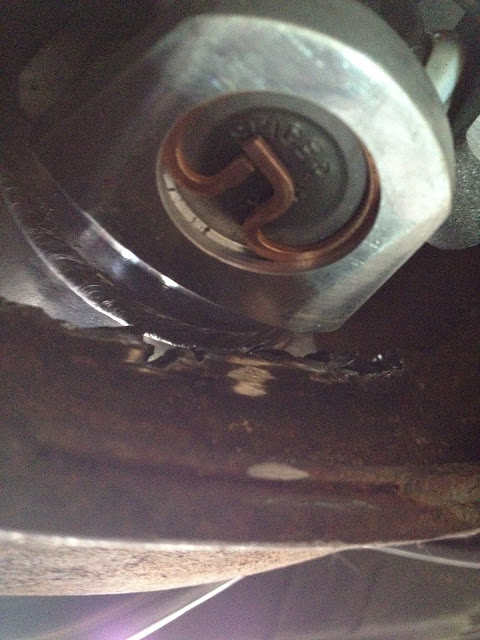
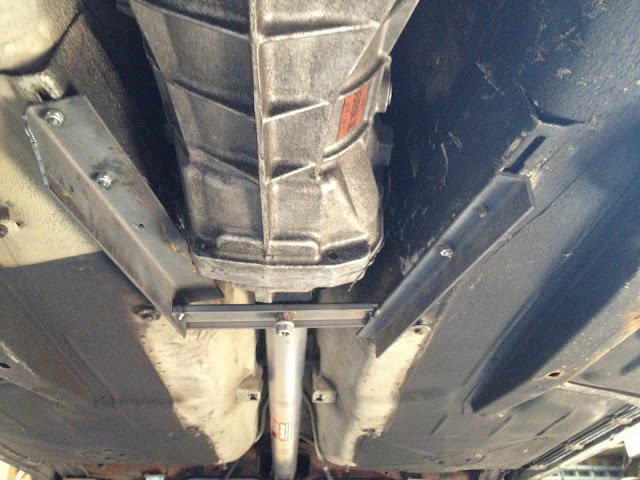
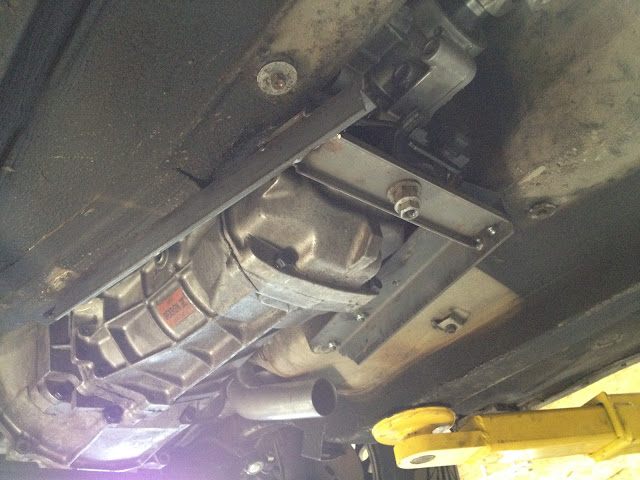
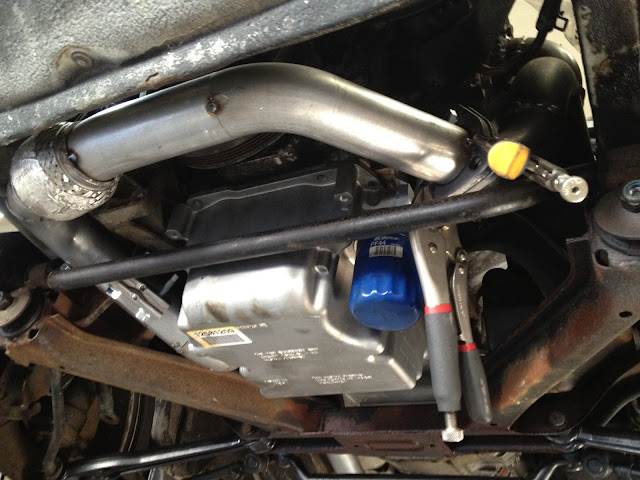
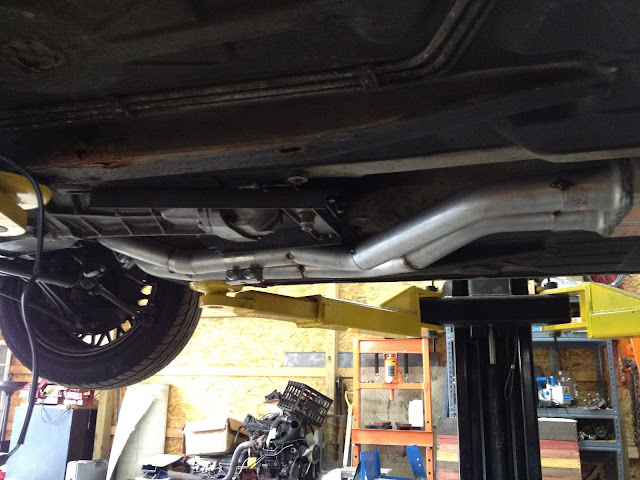
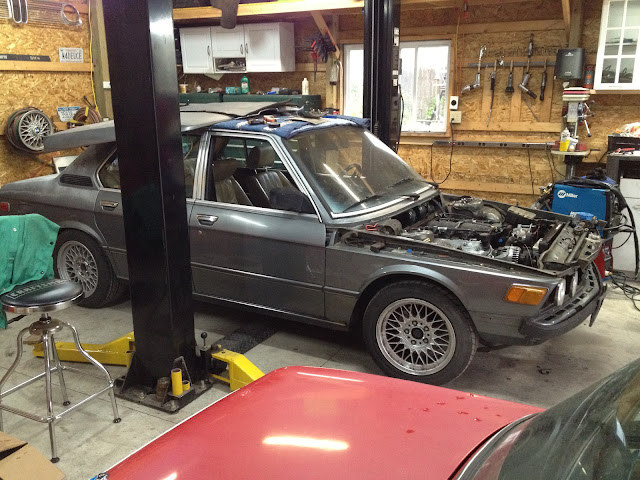
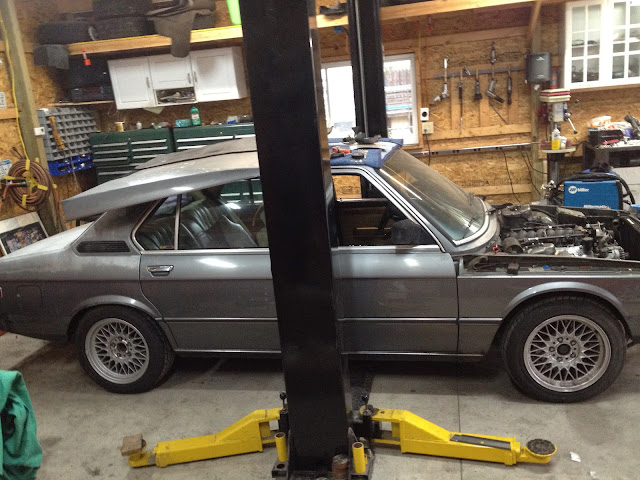
Not much work in the garage today...it's 100degrees outside.
Started to make the trans mount and at least the engine is supported on it's own now.
Starting to make lists of parts. Driveshaft is measured and can be ordered now.
Also able to lift it up and check under it a lot easier. One more spot in the tunnel that I need to pound out and then there will be around 1/2" all the way around the trans.
some pictures
Posted: Jul 19, 2012 8:00 PM
by jakeb
Posted: Jul 19, 2012 10:22 PM
by mooseheadm5
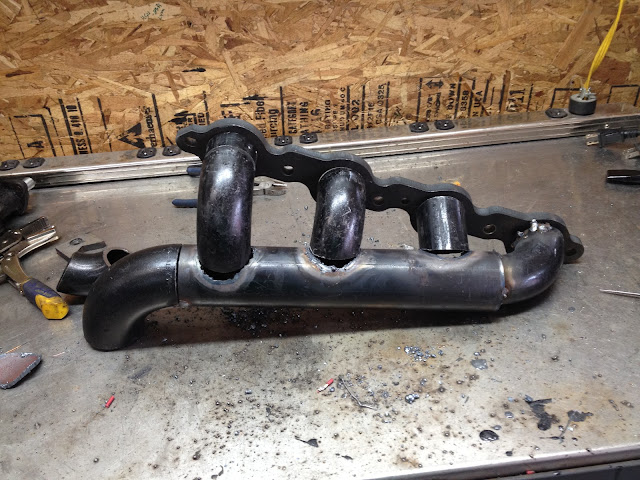
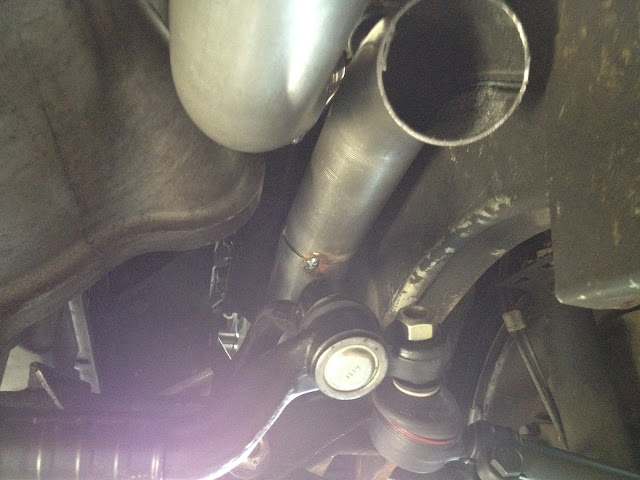
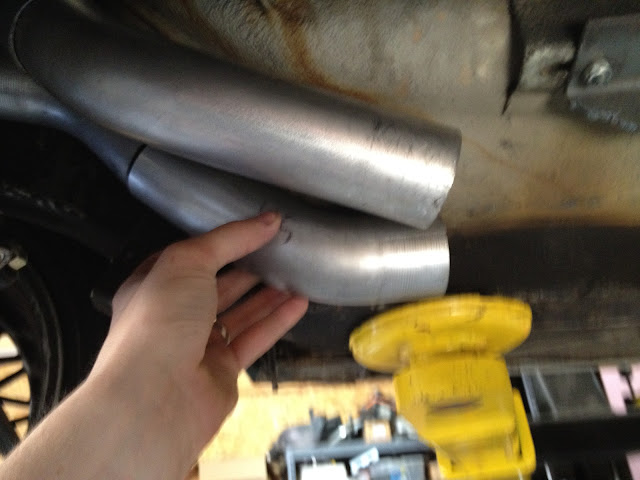
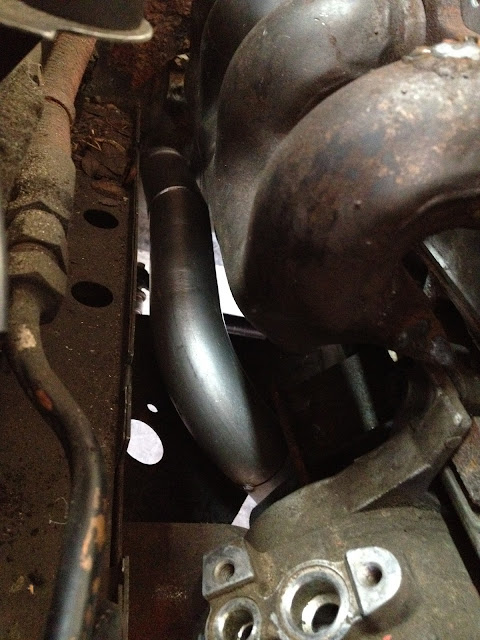
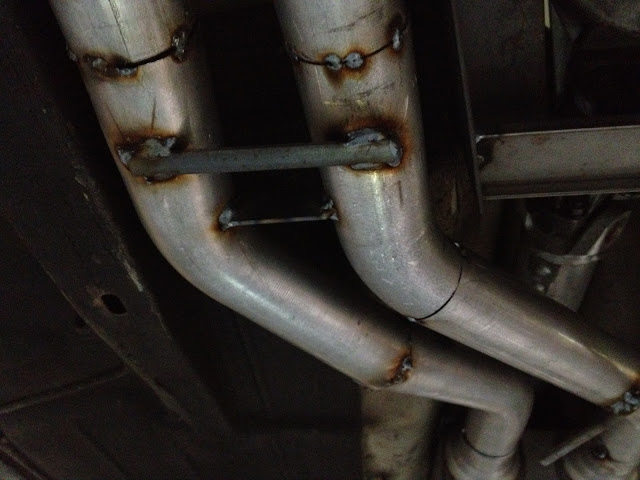
Not bad. Do you think it would be beneficial to have them merge with the main pipe using bends instead of straight dumps?
Posted: Jul 20, 2012 9:36 AM
by jakeb
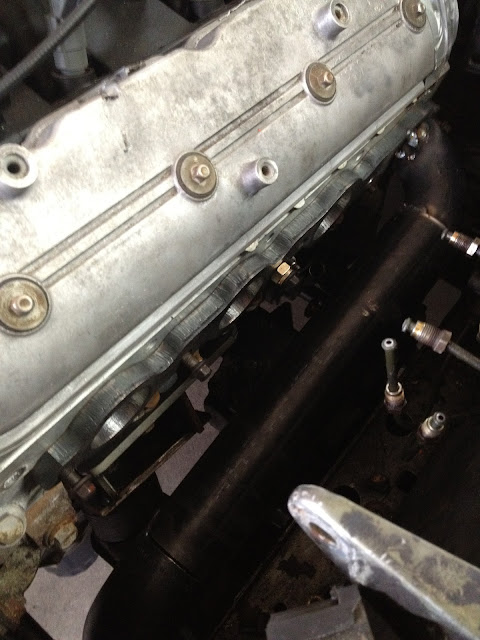
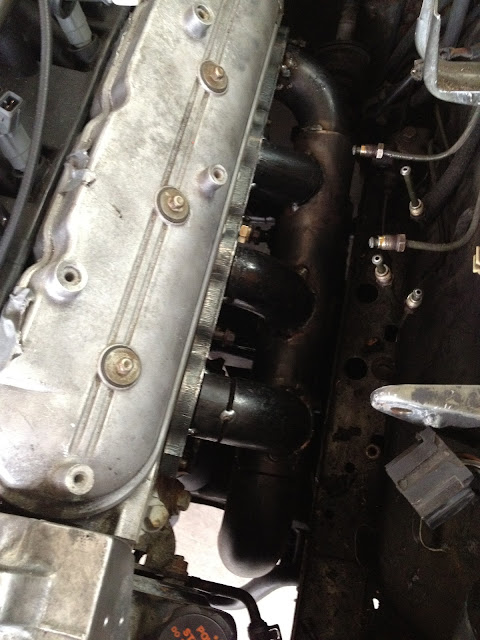
There is a bend coming off the port and I would have liked to have them directed toward the output but I had to have room for the plug wire too. The one that is just straight pipe is about 1" off the main runner. I would have liked for it to be smoother but only so much space to work with.
Posted: Jul 20, 2012 12:21 PM
by scarey013
Jake, I was wondering how the E28 track bar and tie rod swap worked. I had been contemplating doing that for a while, myself, for another swap I was planning. Do you think it affected geometry at all and how much clearance did it give you?
Thanks.
Posted: Jul 20, 2012 12:39 PM
by jakeb
I would say I have gained at least 2" of clearance. Maybe a little bit more. Everything lines up as it did with the e12 stuff. I might have to end up using 2002 tie rods because the e28 ones are a little long. Hard to tell forsure without having it aligned but it looks like it is still toed in with them wound all the way in. The 2002 tie tod center threaded part is about 3/4" shorter. I have a set in route to try to also see if the ball joints are the same.
Posted: Jul 25, 2012 10:05 PM
by jakeb
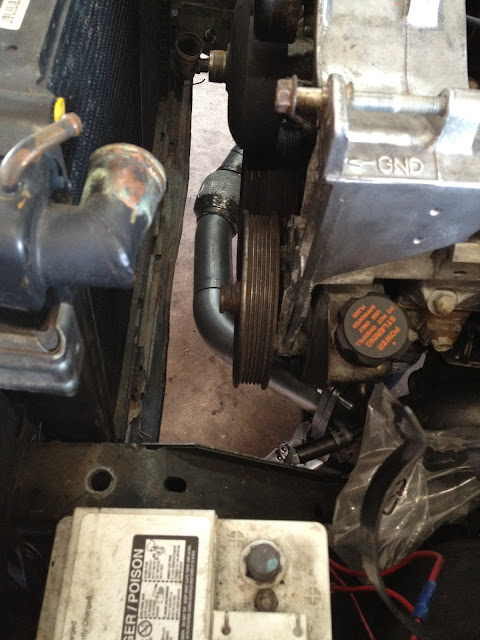
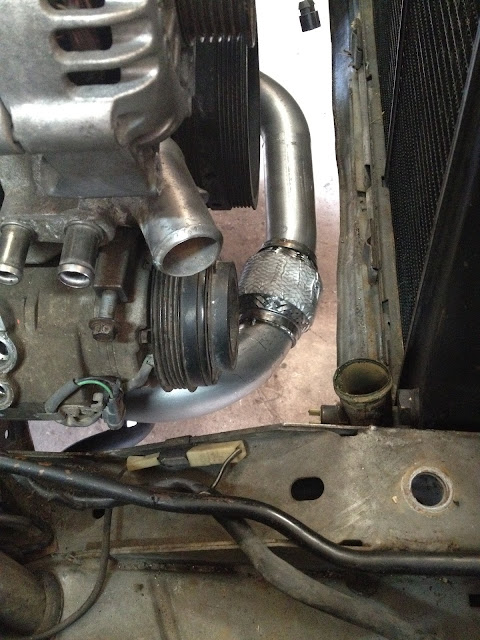
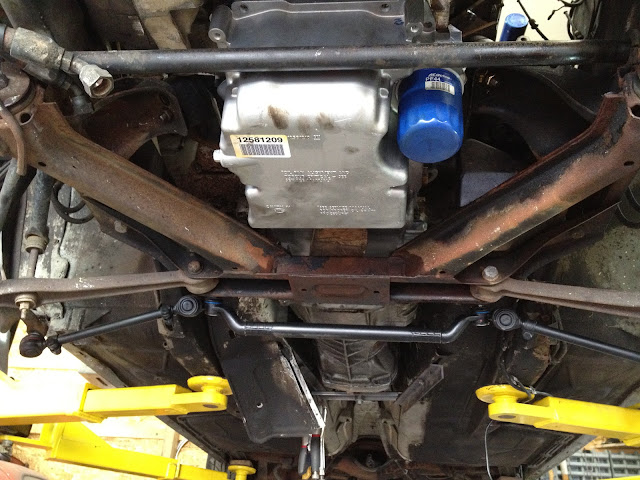
Been ordering parts and working on the suspension. I need the driveshaft to finish the trans mount and then I can make the exhaust...and move ahead with things.
Front suspension is all apart..springs should be here tomorrow so I can get all that put back together. No pics really...pretty boring stuff to see there.
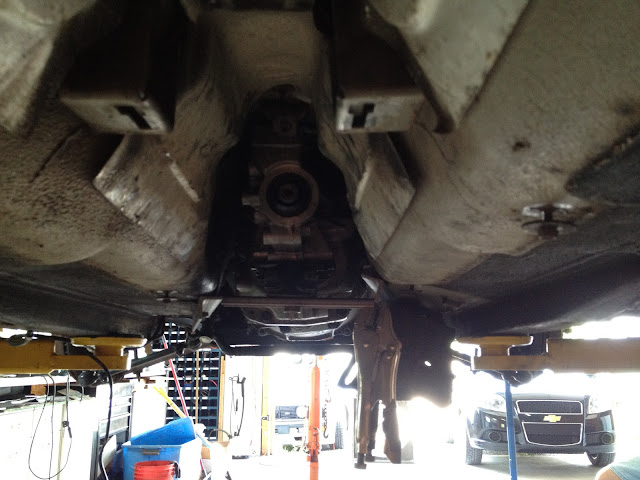
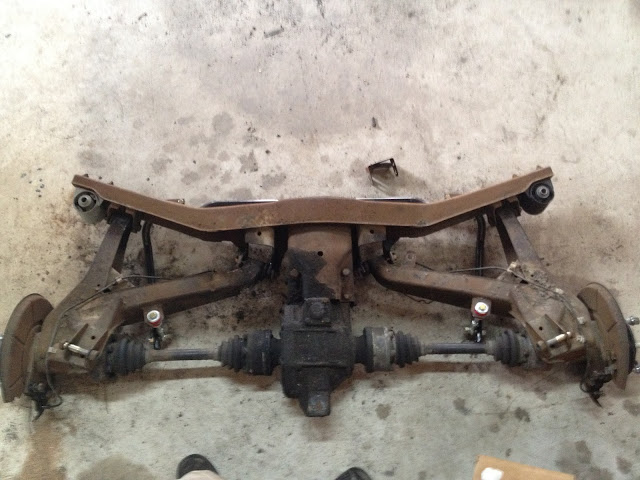
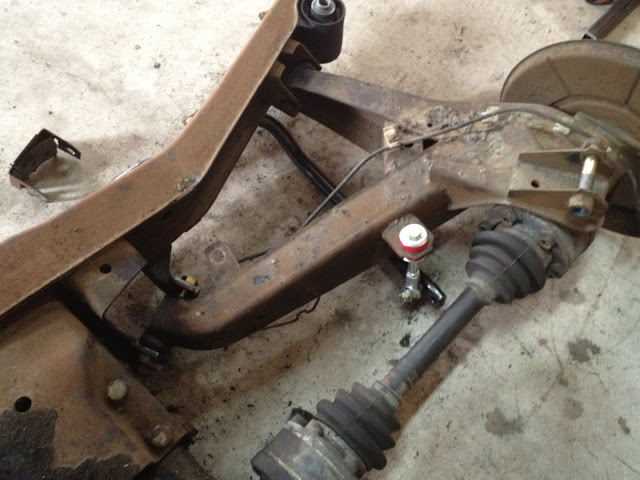
Dropped the rear subframe....a lift really makes it a quick and easy job.
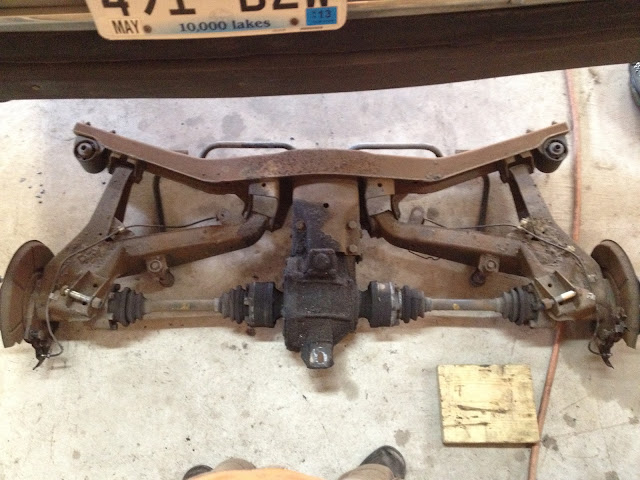
Camber adjusters installed
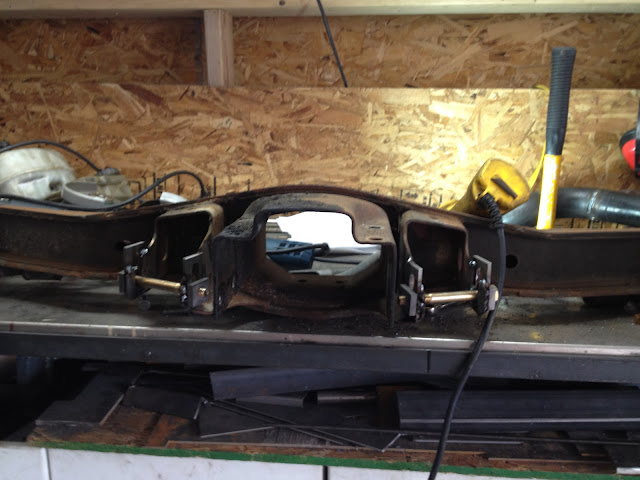

Subframe ready to go back in...new trailing arm bushings, subframe bushings, ST sway bar, diff mount, and the adjustable camber.
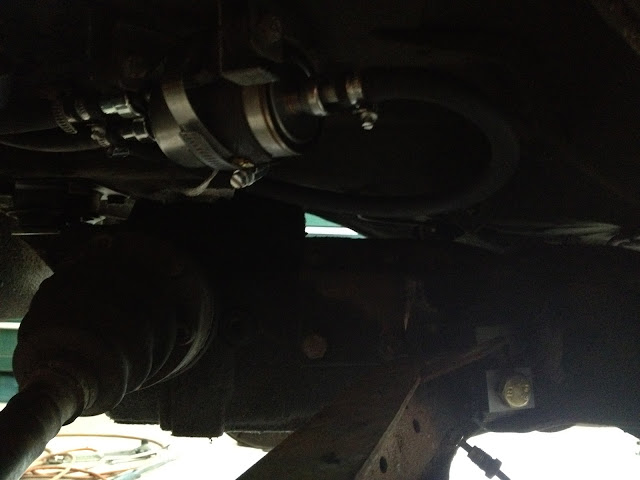
Also got the filter/regulator in place. Will swap out the intank pump tomorrow more than likely.
Posted: Jul 26, 2012 1:15 AM
by S38Mike
Subscribed
Posted: Jul 26, 2012 2:10 AM
by willis
I'm watching this closely. It's so awesome. Good luck!
Posted: Jul 26, 2012 3:47 AM
by Jelmer538i
Looks good!
I've put a E28 subframe under my '80 E12. It was a bolt in.
Posted: Jul 26, 2012 9:19 AM
by unt0uchable
I love the grungieness of this whole build. The fact that he's not touching anything cosmetic is awesome. (Not that your meticulously powdercoated/refreshed swap in your 528 wasn't awesome, but this just makes us really look like HP junkies, lol) I am mostly referring to the rear sub-frame and how the diff has the same amount of grease going back in that it had coming out, lol. Nice work! Keep it up! Can't wait to see the finished product.
Posted: Jul 26, 2012 11:07 AM
by L_N_Love
unt0uchable wrote:I love the grungieness of this whole build. The fact that he's not touching anything cosmetic is awesome. (Not that your meticulously powdercoated/refreshed swap in your 528 wasn't awesome, but this just makes us really look like HP junkies, lol) I am mostly referring to the rear sub-frame and how the diff has the same amount of grease going back in that it had coming out, lol. Nice work! Keep it up! Can't wait to see the finished product.
I was thinking the same thing.
Posted: Jul 26, 2012 1:27 PM
by BluntTech
unt0uchable wrote:I love the grungieness of this whole build. The fact that he's not touching anything cosmetic is awesome. (Not that your meticulously powdercoated/refreshed swap in your 528 wasn't awesome, but this just makes us really look like HP junkies, lol) I am mostly referring to the rear sub-frame and how the diff has the same amount of grease going back in that it had coming out, lol. Nice work! Keep it up! Can't wait to see the finished product.
Thanks guys Jake is meticulous and while he didnt push me to detail this thing out i know thats the way he would do it.
Ive got several other cars that are nut and bolt type restos and I just want something I dont have to care about and just thrash on.. Knowing its mechanically 100%
Posted: Jul 26, 2012 6:51 PM
by 1st 5er
BluntTech wrote:unt0uchable wrote:I love the grungieness of this whole build. The fact that he's not touching anything cosmetic is awesome. (Not that your meticulously powdercoated/refreshed swap in your 528 wasn't awesome, but this just makes us really look like HP junkies, lol) I am mostly referring to the rear sub-frame and how the diff has the same amount of grease going back in that it had coming out, lol. Nice work! Keep it up! Can't wait to see the finished product.
Thanks guys Jake is meticulous and while he didnt push me to detail this thing out i know thats the way he would do it.
Ive got several other cars that are nut and bolt type restos and I just want something I dont have to care about and just thrash on.. Knowing its mechanically 100%
Sounds a lot like my car's destinations.

Posted: Jul 27, 2012 8:30 PM
by jakeb
Suspension is just about done. Car is sitting down on all 4 again.
Billy sports and Spax springs
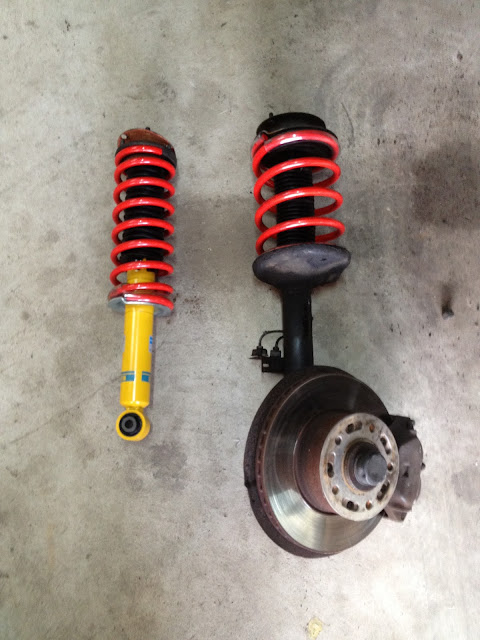
Back on the ground. The old suspension was a combo of blown shocks, cut springs, and __________.
Just to compare a little bit....
with m30
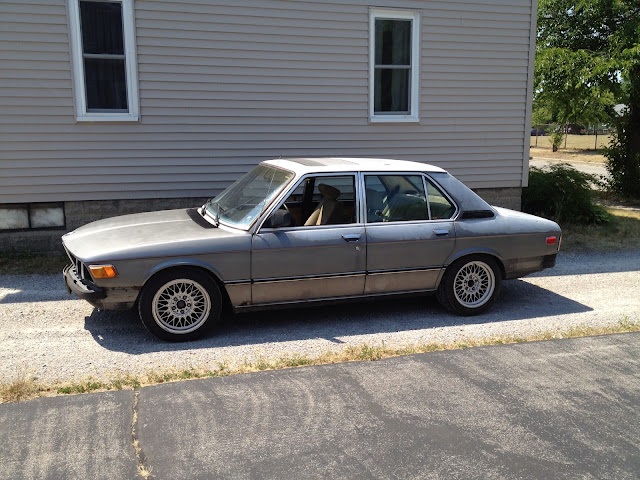
old suspension and LSx

New suspension and LSx
It should drop a bit more once everything is put together and it moves around to settle a bit.
Waiting on the driveshaft now and then I can move ahead with the exhaust, etc etc
Posted: Aug 07, 2012 4:28 PM
by jakeb
Posted: Aug 07, 2012 4:29 PM
by jakeb
Also picked this up last week for my wife...

Posted: Aug 07, 2012 5:49 PM
by davintosh
jakeb wrote:hahaha
I am in Michigan...the humidity is just as bad as the heat actually probably makes it worse.
I have a HUGE ass fan pulling air in which makes it better but the temp in the garage is still hotter than outside.
What part of MI? (I was just there for a week+. Muskegon area.)
jakeb wrote:Also picked this up last week for my wife...
Noice.
You are one lucky guy to have a wife that doesn't prefer to drive an appliance.
Posted: Aug 07, 2012 6:02 PM
by jakeb
I am in Bay City....east side of the state.
haha yeah I am lucky!! The mini will get a honda engine and a bunch of other custom bits
Posted: Aug 09, 2012 8:17 PM
by jakeb
Posted: Aug 10, 2012 12:08 PM
by jakeb
Posted: Aug 10, 2012 12:38 PM
by unt0uchable
Looking great Jake. Your work is always impressive.
Posted: Aug 10, 2012 12:41 PM
by oldskool
Posted: Aug 10, 2012 3:21 PM
by Mark 88/M5 Houston

I make all my cuts with a sawzall.
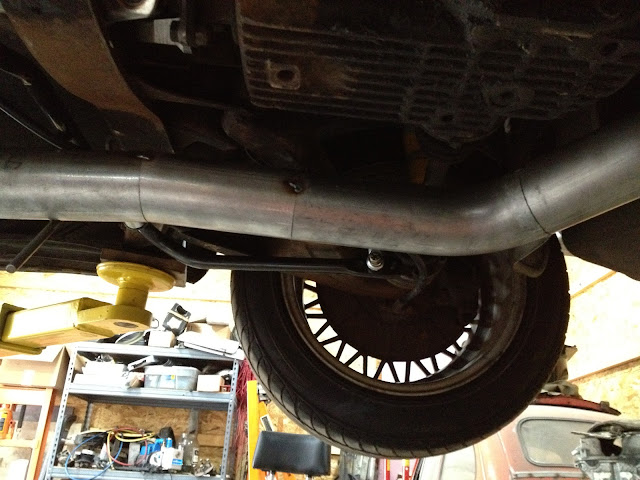
Great work on the exhaust!! Not that there is anything wrong with the rest of your "fab" work.
Posted: Aug 10, 2012 4:29 PM
by davintosh
Impressive work on that exhaust. Looks great, and cut with a flippin' SawsAll? Dude...

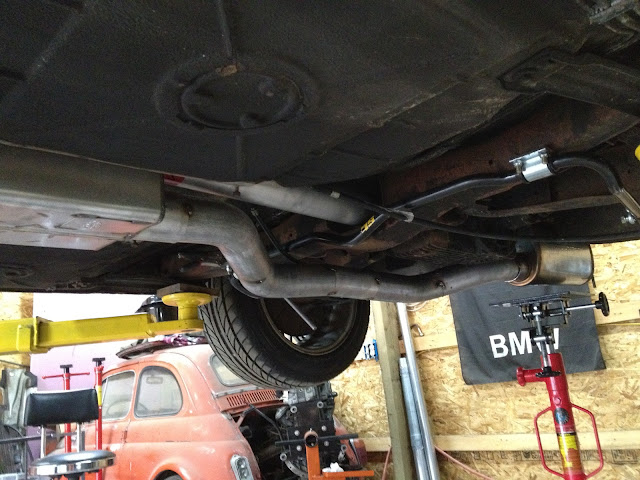
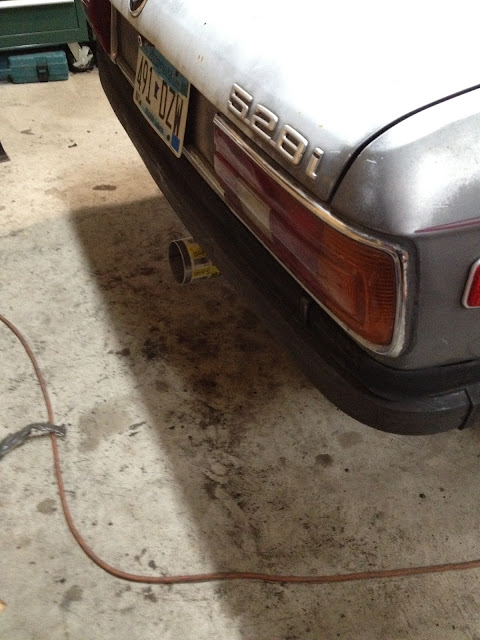
This pic is awesome; do you charge extra for the leaves & debris?

(actually, my cars look like that sometimes.

)
Posted: Aug 10, 2012 9:01 PM
by jakeb
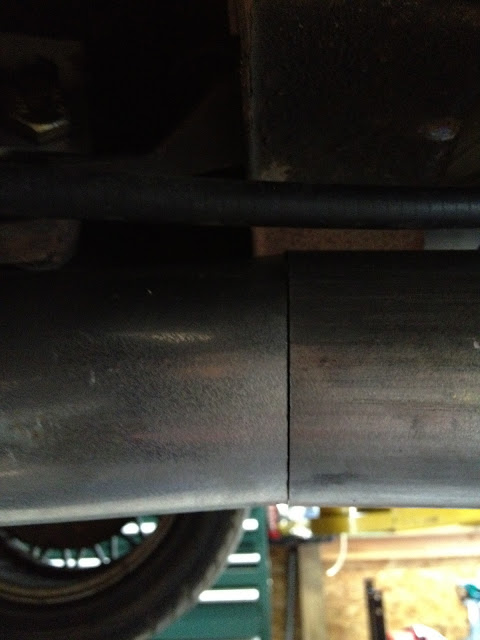
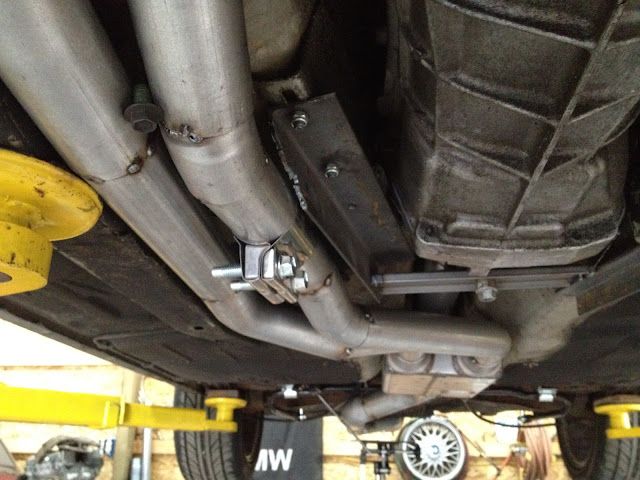
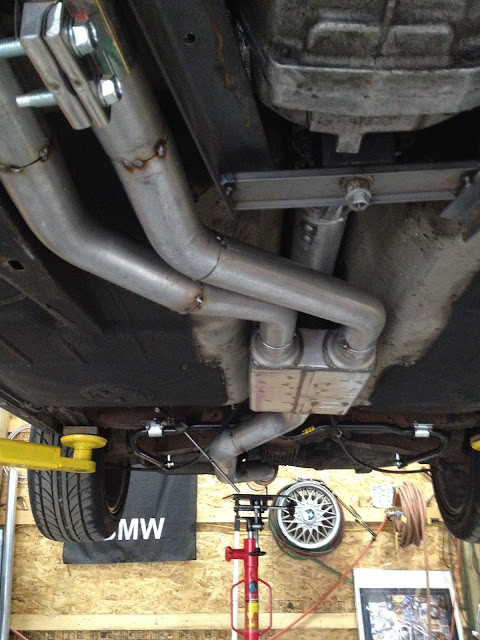
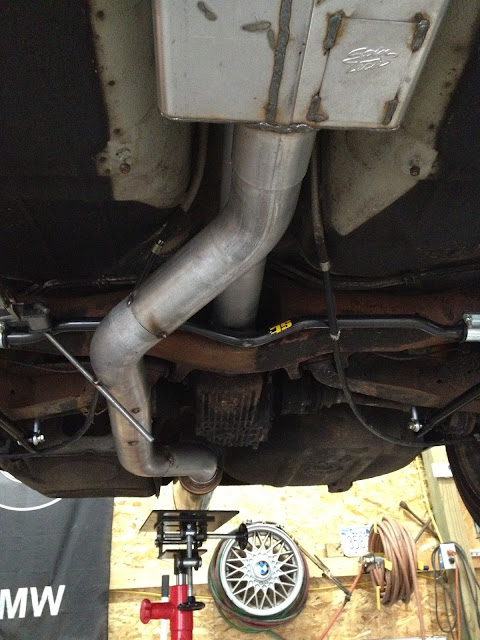
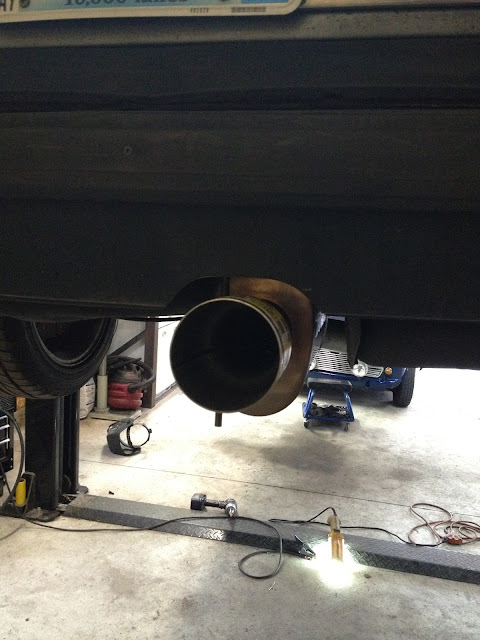
thanks guys!! I must say this exhaust was the trickiest I have made but I think it is also one of the best I have made too.
Yup...a sawzall. I have a chop saw and horrizontal band saw but for exhaust I really like the sawzall...it's quick, not as messy as the chop saw, and not as loud either.
Most of the leaves and such were hiding behind the old firewall insulation. It will get vacuumed up. Remember this build is about function more than looks.