

External links now open in a new browser tab - turn this off in your UCP - Read more here.
E28 Alpina B7 Turbo/1 #0083
Thanks for the comments. I'm feeling more comfortable, though I still am very concerned.
Today, I completely stripped down the original doors. Everything is out of them. It was somewhat therapeutic. So, next up is to clean everything that will go into the "new" doors.
I was very happy I didn't listen to people that suggested the old doors were "fine" or "fixable."
Today, I completely stripped down the original doors. Everything is out of them. It was somewhat therapeutic. So, next up is to clean everything that will go into the "new" doors.
I was very happy I didn't listen to people that suggested the old doors were "fine" or "fixable."
-
Ted in T.O.
- Posts: 3412
- Joined: Feb 12, 2006 12:00 PM
- Location: Mississauga,Ontario
A new year, a new update.
Since Mike said he'd have most of the bodywork done by the end of the week, I figured I'd do my regular Thursday visit.
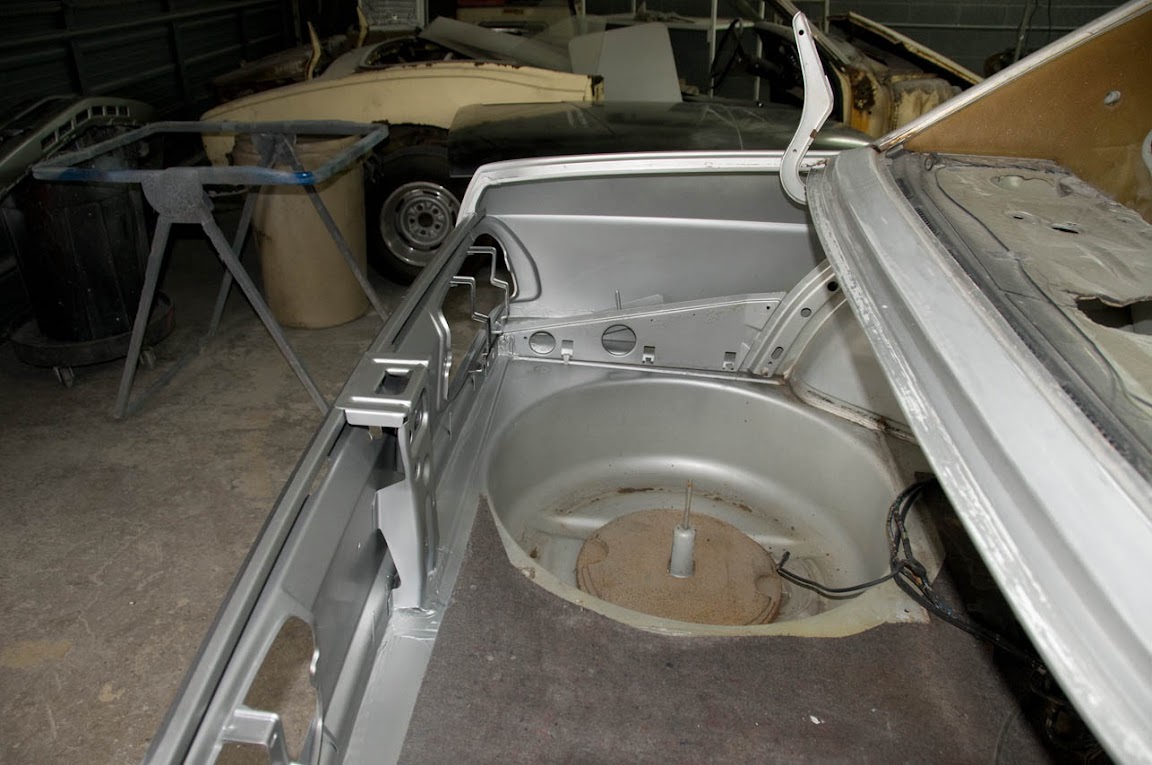
The rear panel is in and seam-sealed, primed, etc. Everything is in the right position. The panel sits behind the lower parts of the quarters, and everything inside the trunk is exactly as it was done by the factory. Aside from the slightly neater seam-seal, the replacement should be virtually undetectable.
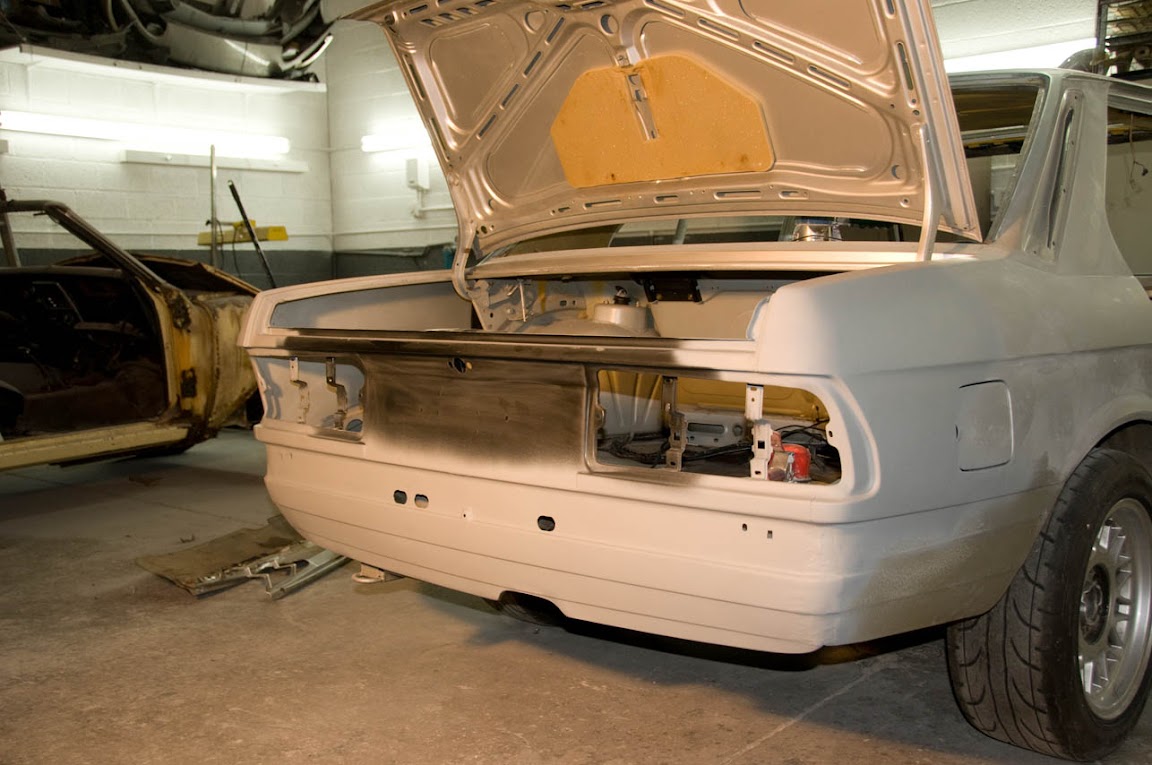
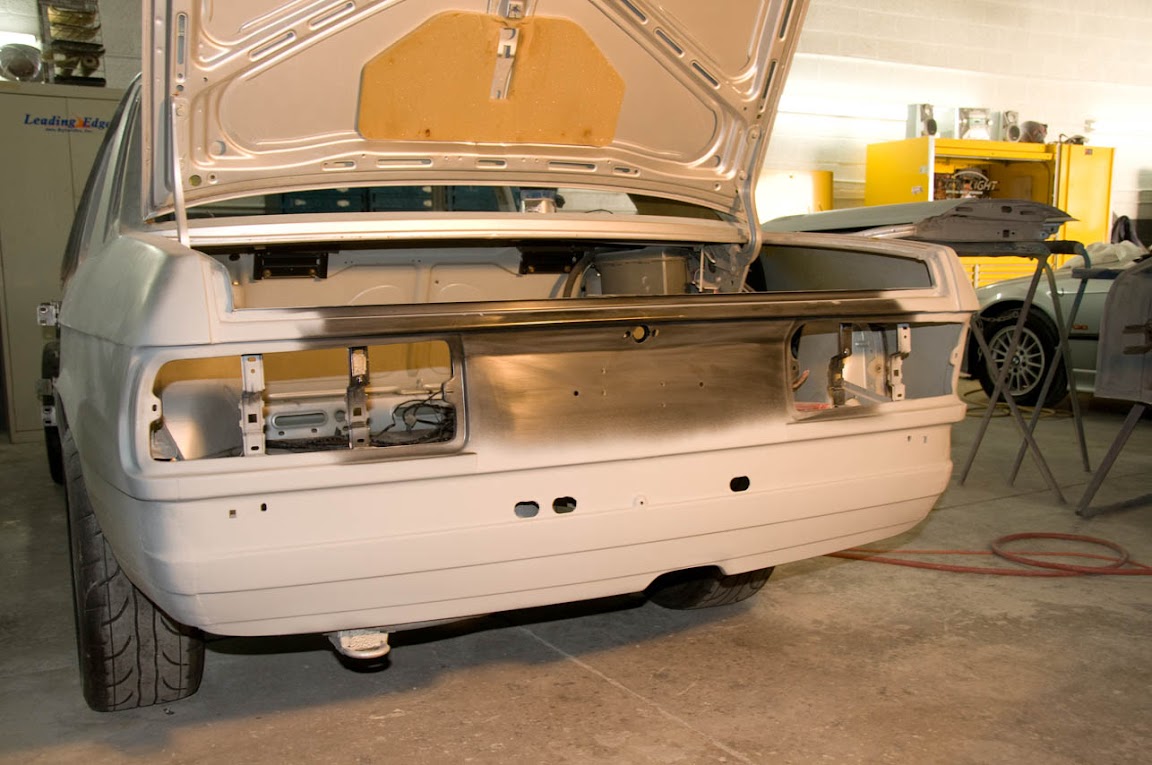
There's a couple more spots that need seam-sealer around the center of the panel on the trunk floor and the seams under the tail lamps aren't finished yet, but it came out damn nice. Close the trunk lid and there's a perfectly uniform gap all around and underneath. I'd have a photo of that, but it doesn't stay down.
Here's a couple shots of the seams:
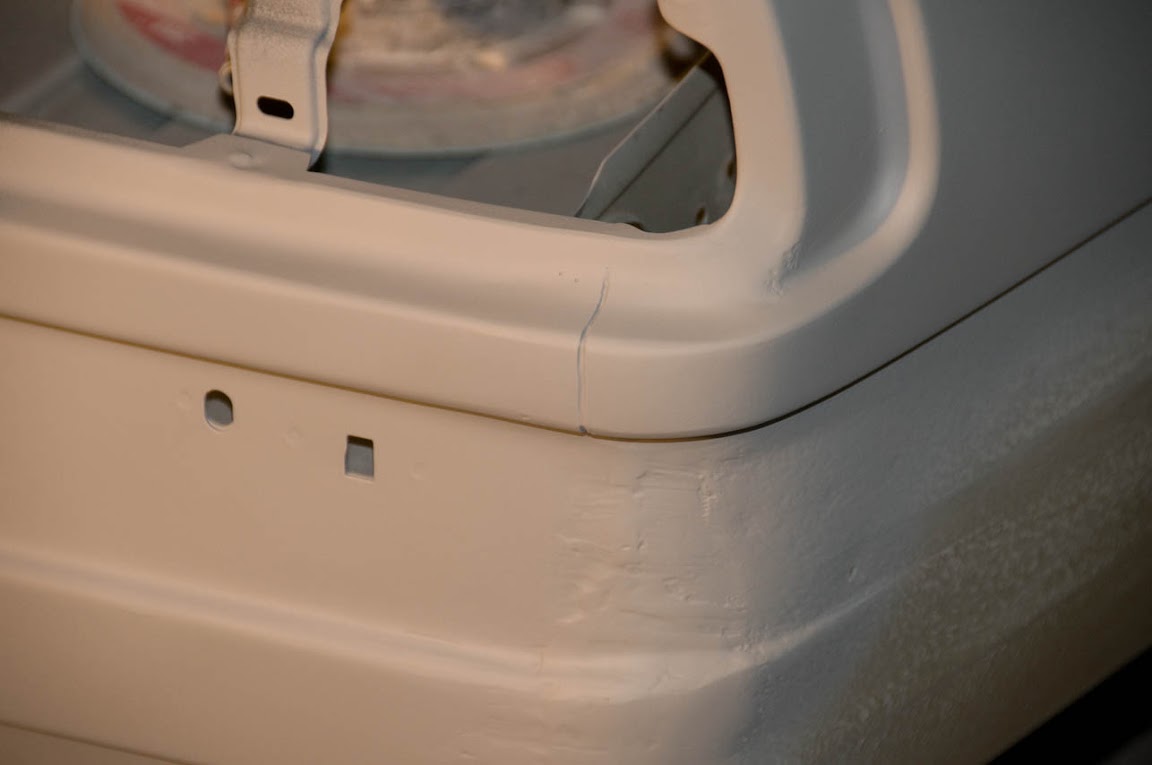
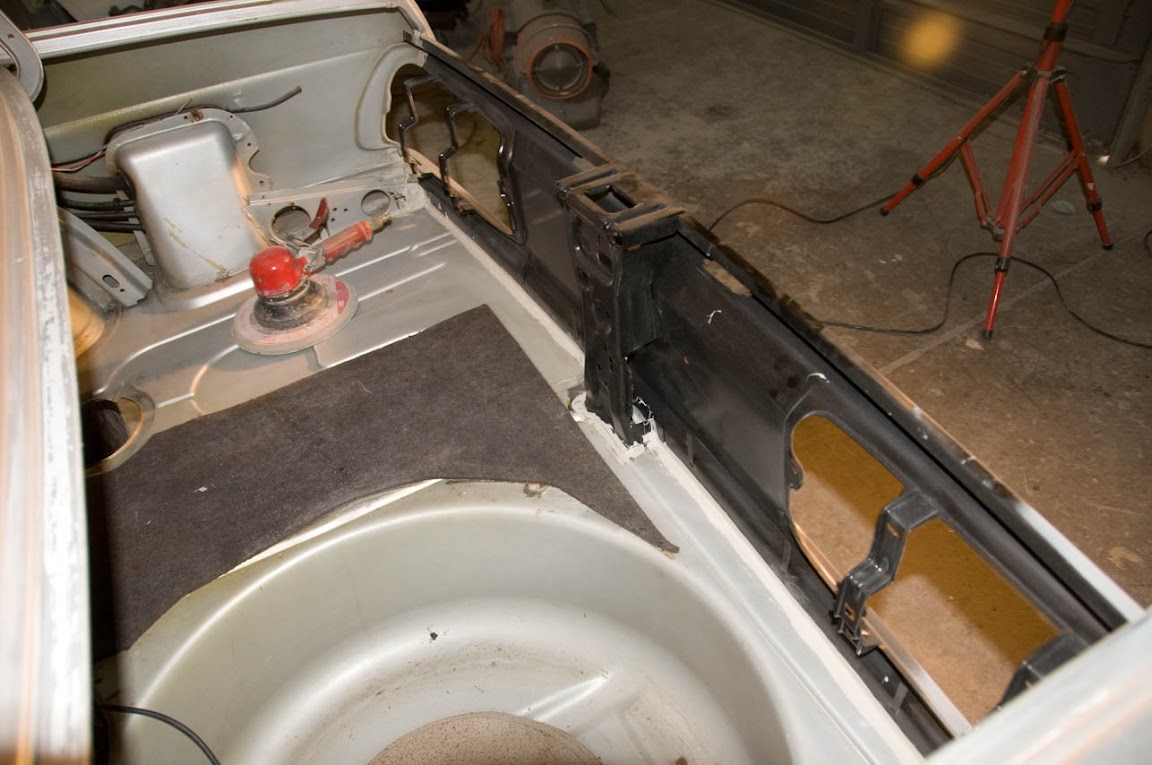
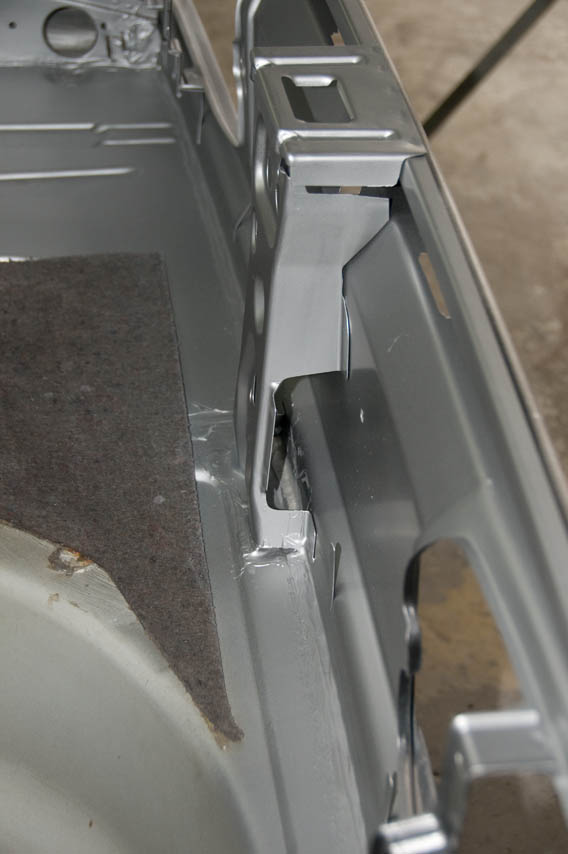
According to Mike, the factory seams were filled with brass, but they still cut the seam line into it. That's why he's doing it this way. He his hanging onto the old panel so he knows exactly where to end the texture (the rear valance is not entirely textured). Also, the roughness you see on the quarters in the trunk channel is factory. He didn't touch that.
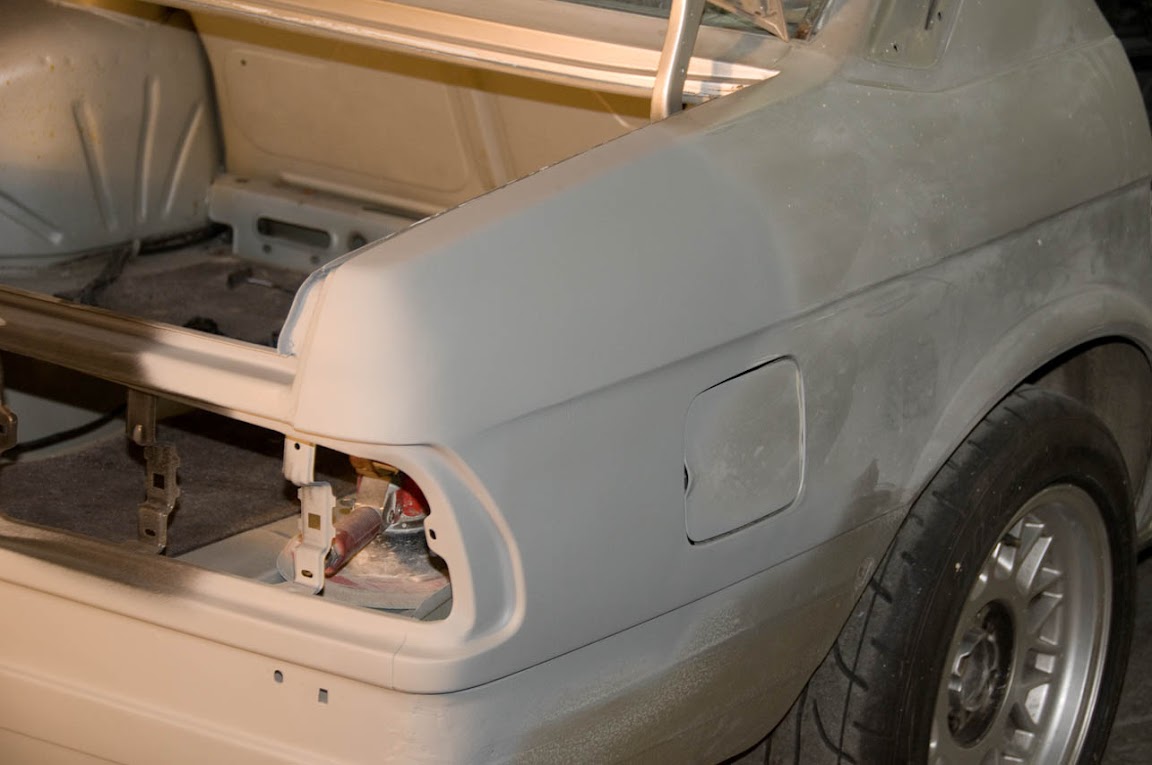
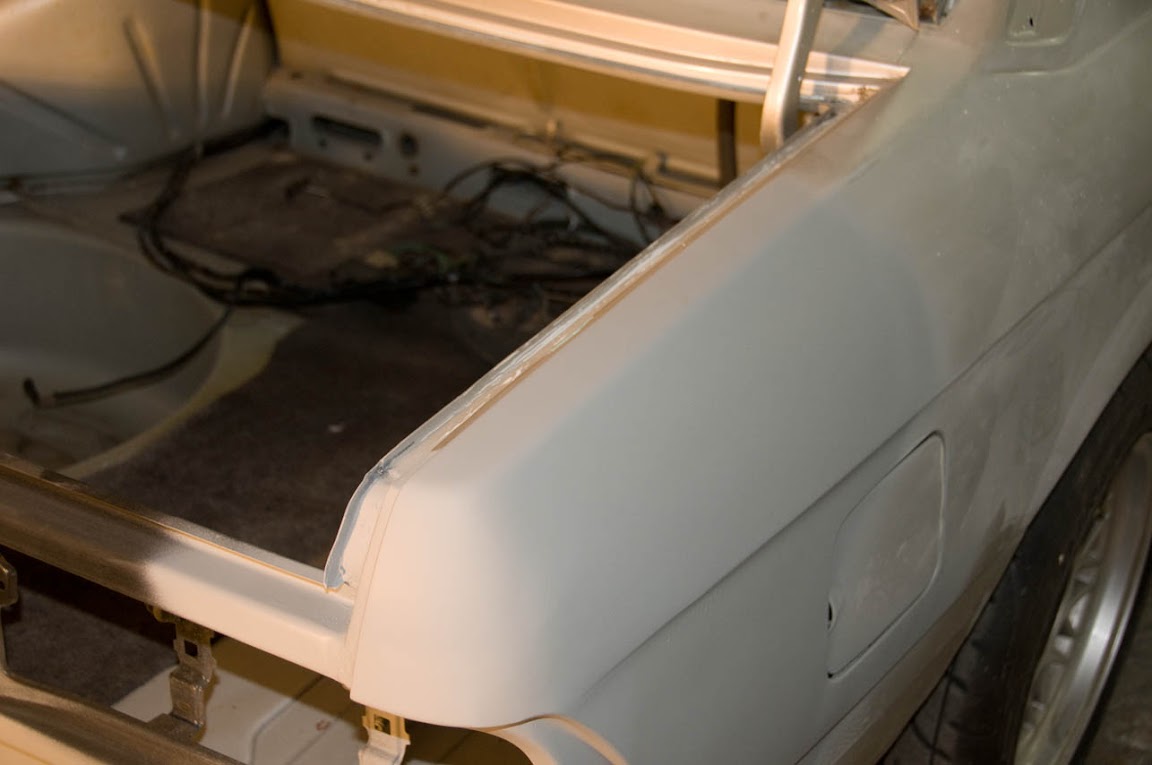
The dent from the RR quarter has been completely removed. No filler there. Shot from inside the trunk, of course.
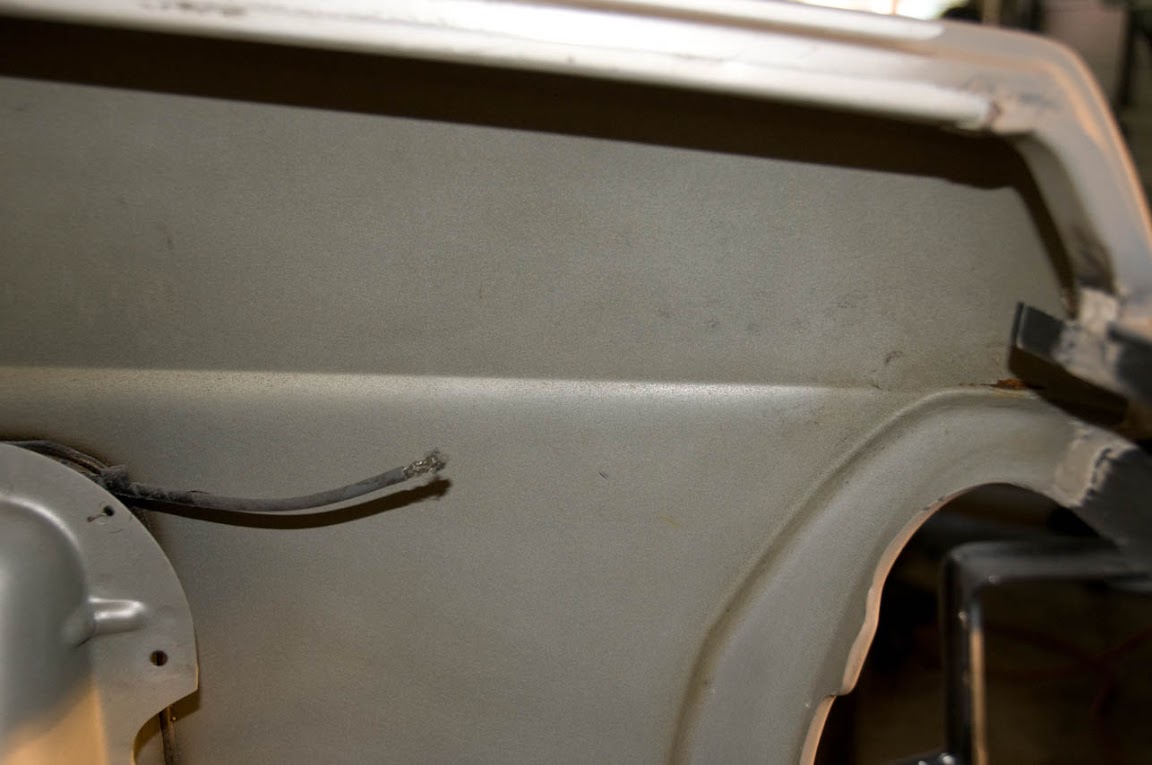
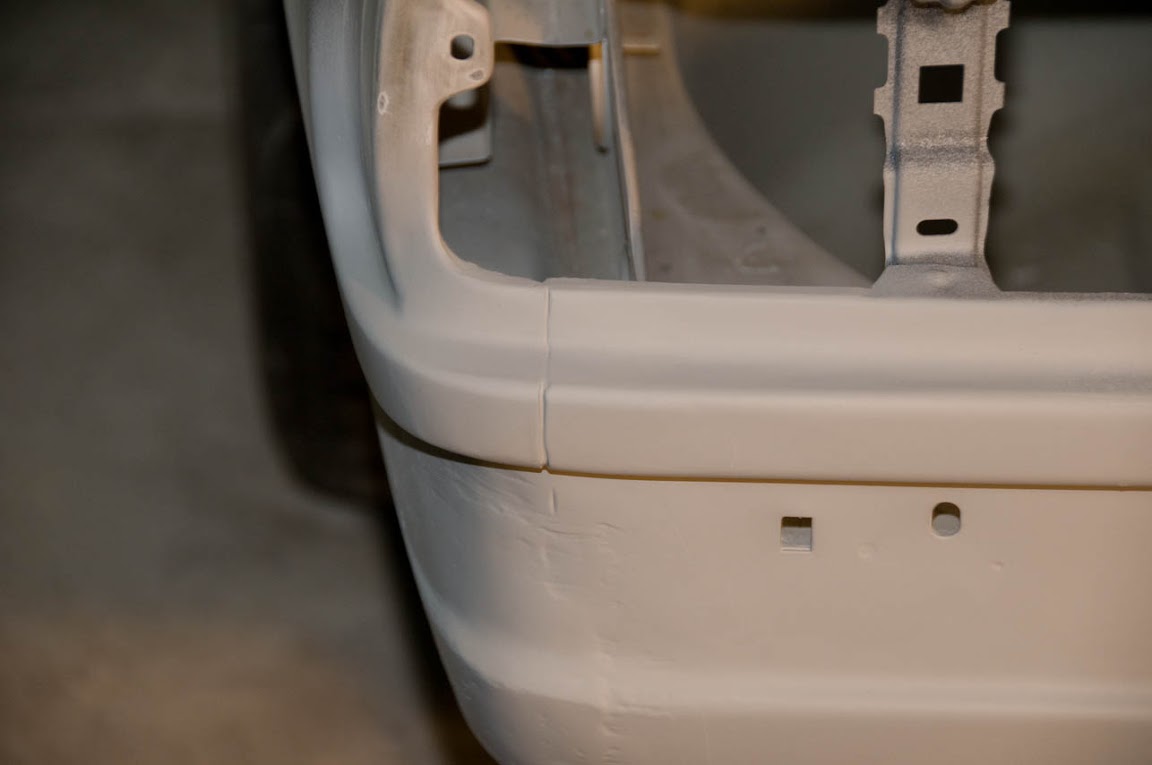
You may notice the hole for the antenna has also been filled, as was the hole for the antenna in the roof:

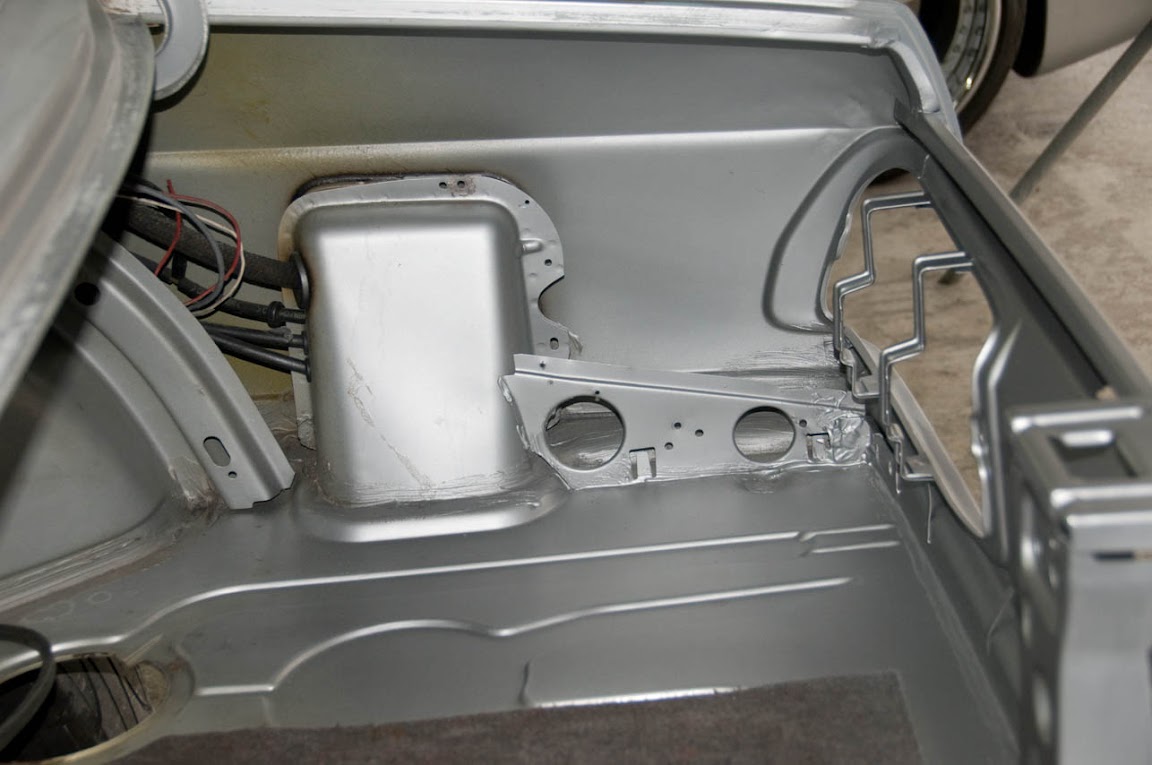
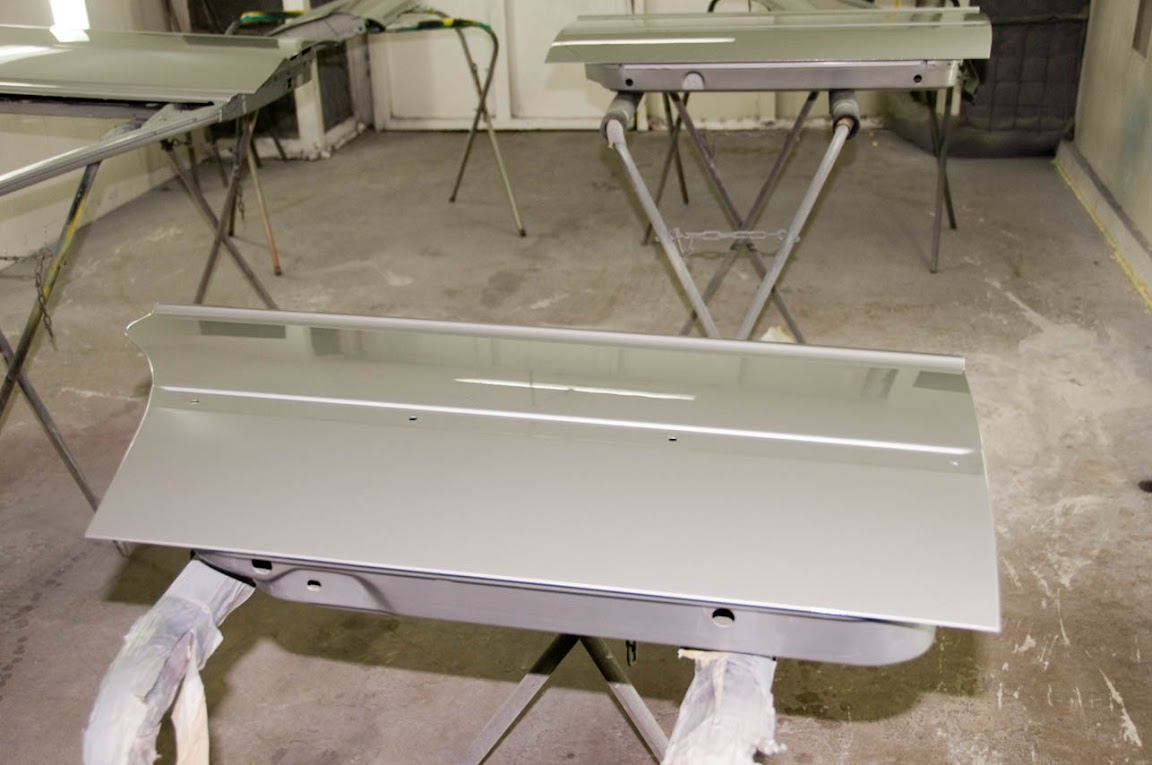
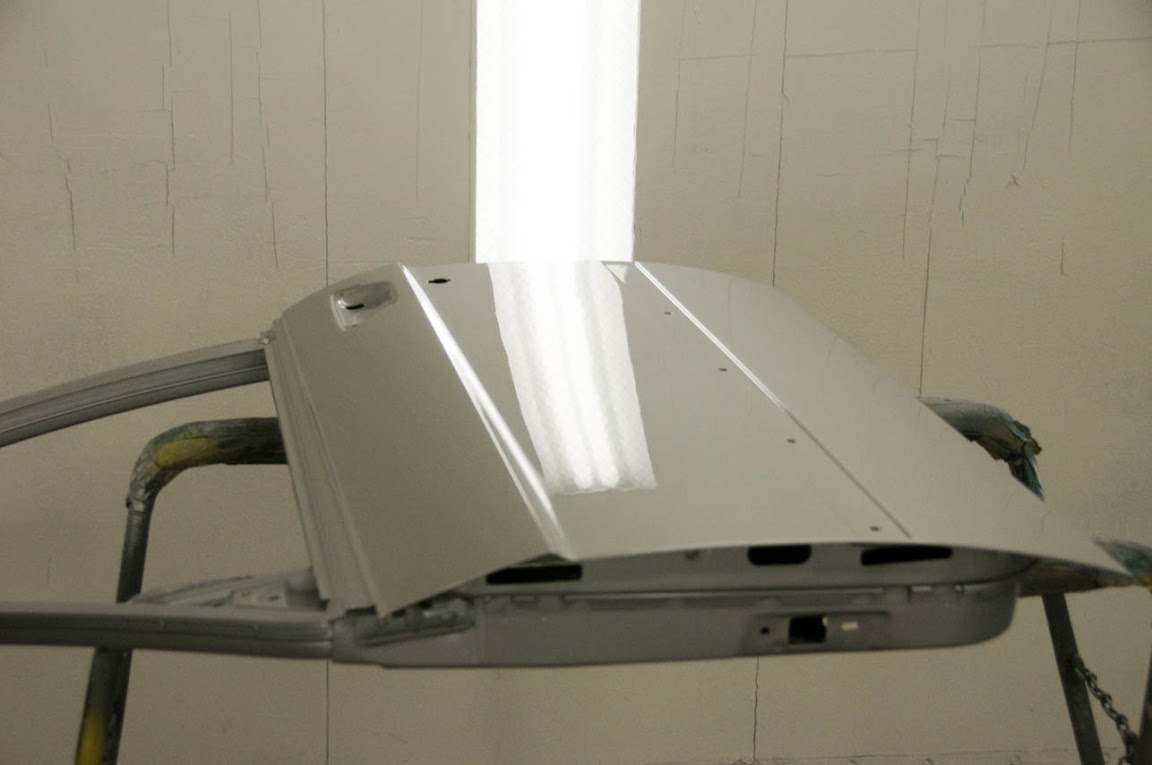
The left inner fender has received it's base coat and the style 8 has also been cleaned.
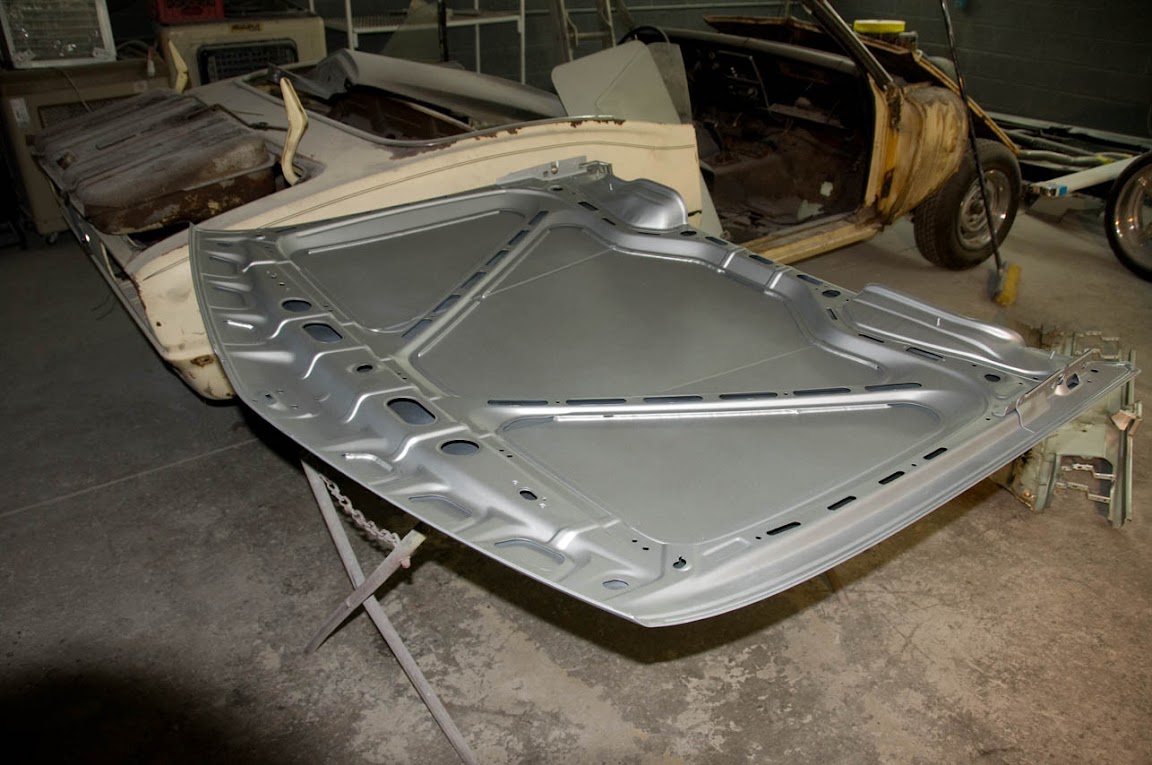
Here's the underside of the hood. It's been shot with the basecoat and cleared using a dulling agent, so it will stay protected, but look correct.
Not much left to do and then stuff will get painted, I guess. I think he's looking at the weekend to jamb all the doors. Wow.
That's all for now!
Since Mike said he'd have most of the bodywork done by the end of the week, I figured I'd do my regular Thursday visit.
The rear panel is in and seam-sealed, primed, etc. Everything is in the right position. The panel sits behind the lower parts of the quarters, and everything inside the trunk is exactly as it was done by the factory. Aside from the slightly neater seam-seal, the replacement should be virtually undetectable.
There's a couple more spots that need seam-sealer around the center of the panel on the trunk floor and the seams under the tail lamps aren't finished yet, but it came out damn nice. Close the trunk lid and there's a perfectly uniform gap all around and underneath. I'd have a photo of that, but it doesn't stay down.
Here's a couple shots of the seams:
According to Mike, the factory seams were filled with brass, but they still cut the seam line into it. That's why he's doing it this way. He his hanging onto the old panel so he knows exactly where to end the texture (the rear valance is not entirely textured). Also, the roughness you see on the quarters in the trunk channel is factory. He didn't touch that.
The dent from the RR quarter has been completely removed. No filler there. Shot from inside the trunk, of course.
You may notice the hole for the antenna has also been filled, as was the hole for the antenna in the roof:
The left inner fender has received it's base coat and the style 8 has also been cleaned.
Here's the underside of the hood. It's been shot with the basecoat and cleared using a dulling agent, so it will stay protected, but look correct.
Not much left to do and then stuff will get painted, I guess. I think he's looking at the weekend to jamb all the doors. Wow.
That's all for now!
The attention to detail here is fantastic. Making sure all of the finer details are done right is what will set this car apart. Things like the right seem sealer and making sure the texture coat on the tail panel are the details that get missed with many people. This is what you get when you spend the time, money, and put in the effort to do it right.
Wow, I wish my painter was like yours....
Well, he could have - but then the paintjob would cost between 12 and 15000 dollars. Norwegian labour are far more expensive that US labour. Here we pay $200 plus VAT per working hour. If you have two guys working on the car, you can ofcourse double it
Nice work, I enjoy this thread!
Well, he could have - but then the paintjob would cost between 12 and 15000 dollars. Norwegian labour are far more expensive that US labour. Here we pay $200 plus VAT per working hour. If you have two guys working on the car, you can ofcourse double it
Nice work, I enjoy this thread!
-
GaAlpinaOwner
- Posts: 1120
- Joined: Feb 12, 2006 12:00 PM
- Location: Atlanta Georgia USA
-
mooseheadm5
- Beamter

- Posts: 23035
- Joined: Apr 08, 2009 10:30 PM
- Location: Charlottesville, VA
- Contact:
-
Mark 88/M5 Houston
- Posts: 8548
- Joined: Feb 12, 2006 12:00 PM
- Location: Far North Houston
Thanks. I'm hoping the rest of the process continues to go smoothly.
So, given there is zero original wiring in the car, I'm trying to chase some down as it all has to go in before I can put the car together. If anyone has some non-premium sound stuff, please let me know!
David - The antenna was originally in the left front fender. At some point, that hole was filled in and a new one made in the right rear quarter at the stock position. While I have never had a working radio in the car (there used to be a "big" stereo in the car but it was all removed by the time I bought it), we all know that the spoiler would hit the antenna. Plus, its not correct, so the old hole will be remade. All stuff that takes time and makes the job more expensive. It's not just like drilling a hole. The old patch has to be removed, etc. All part of keeping the correct original fenders.GaAlpinaOwner wrote:Looking good Chris....
What are doing with the Radio and Antenna out of curiousity now that the hole is filled?
So, given there is zero original wiring in the car, I'm trying to chase some down as it all has to go in before I can put the car together. If anyone has some non-premium sound stuff, please let me know!
-
GaAlpinaOwner
- Posts: 1120
- Joined: Feb 12, 2006 12:00 PM
- Location: Atlanta Georgia USA
yes the left front fender....that is where mine is also...duh!wkohler wrote:Thanks. I'm hoping the rest of the process continues to go smoothly.
David - The antenna was originally in the left front fender. At some point, that hole was filled in and a new one made in the right rear quarter at the stock position. While I have never had a working radio in the car (there used to be a "big" stereo in the car but it was all removed by the time I bought it), we all know that the spoiler would hit the antenna. Plus, its not correct, so the old hole will be remade. All stuff that takes time and makes the job more expensive. It's not just like drilling a hole. The old patch has to be removed, etc. All part of keeping the correct original fenders.GaAlpinaOwner wrote:Looking good Chris....
What are doing with the Radio and Antenna out of curiousity now that the hole is filled?
So, given there is zero original wiring in the car, I'm trying to chase some down as it all has to go in before I can put the car together. If anyone has some non-premium sound stuff, please let me know!
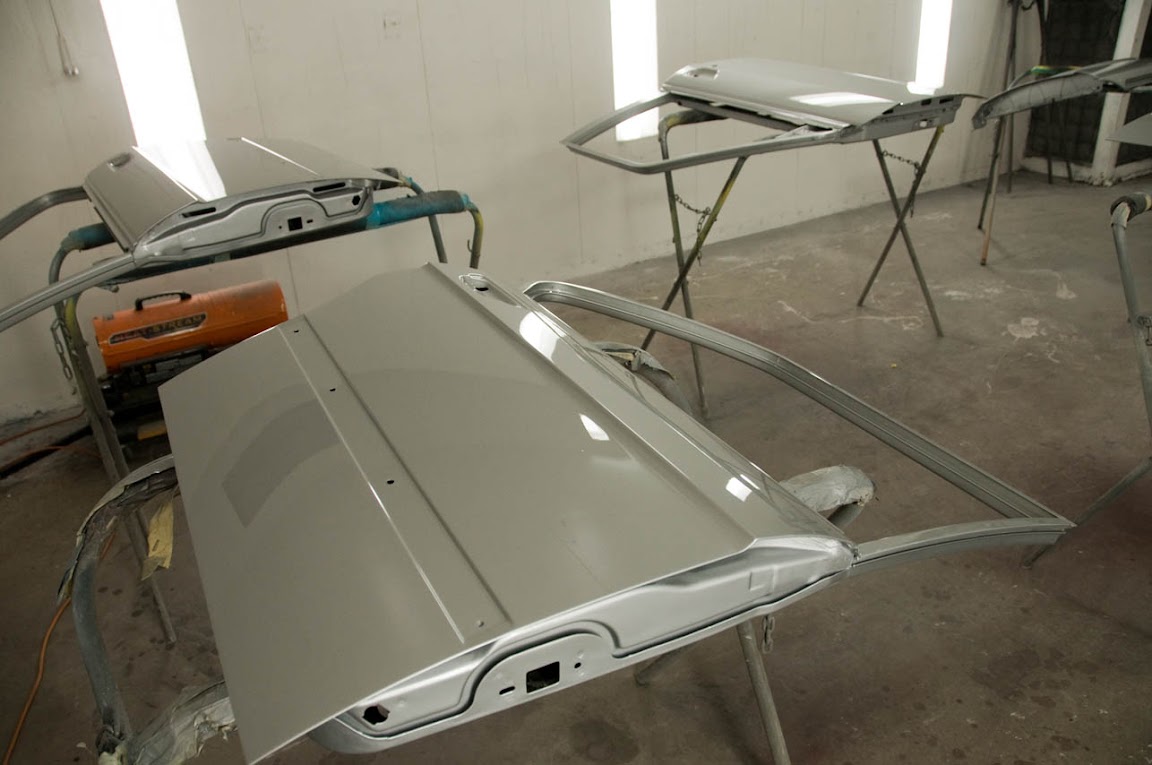
So, yesterday (01-09-13), I got a call from Mike around 5pm or so telling me that he had the doors jambed and was going to paint the outsides this morning. So, the first load would be the doors and fenders, then the second would be the hood, trunklid, sunroof. This way all of that stuff could get a jump on the curing process while he finished up the little things on the body and got it ready to paint.
I told him I could swing by Thursday in the mid afternoon, so we agreed on a time. He figured he'd have the doors done by then, so I could see those. So, I showed up at the shop around 2:30, as promised.
He had some $180k sports car of sorts in there getting some quick work done before it gets auctioned off at Russo and Steele:
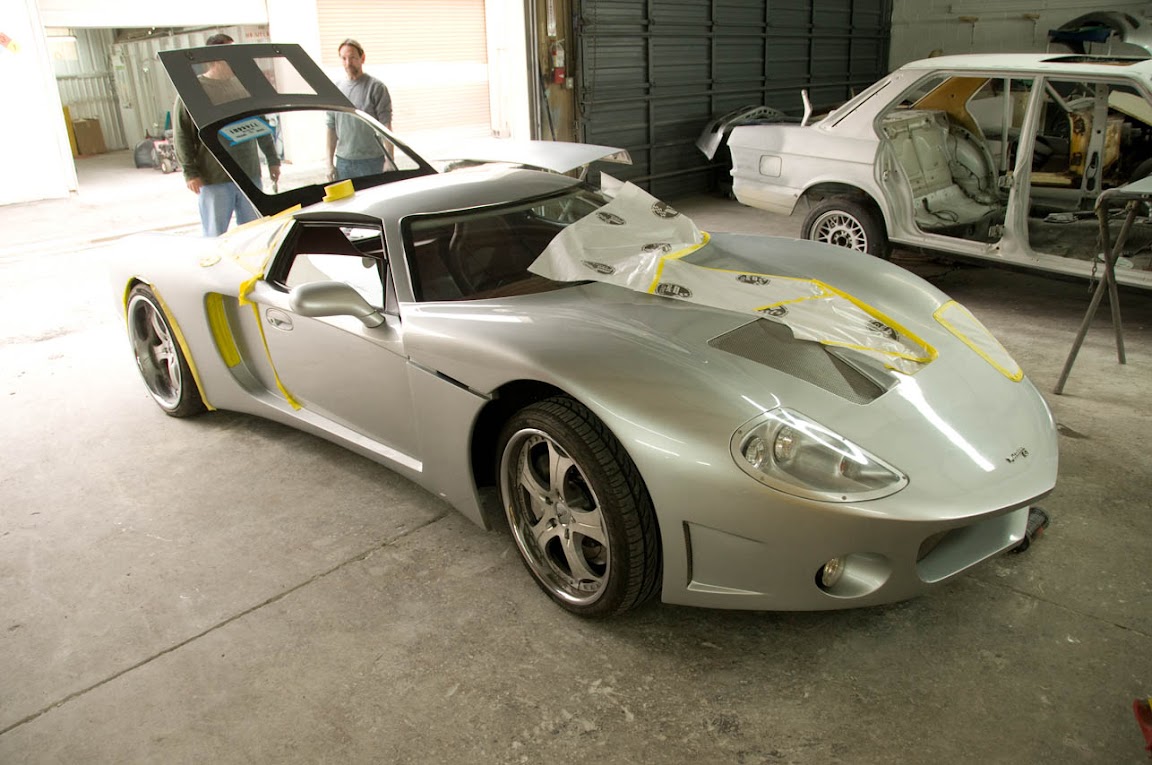
Here's some info I found on the car:
http://www.russoandsteele.com/collector ... -GTM/32472
So, on to my car. He painted the inside of the tail panel and such.
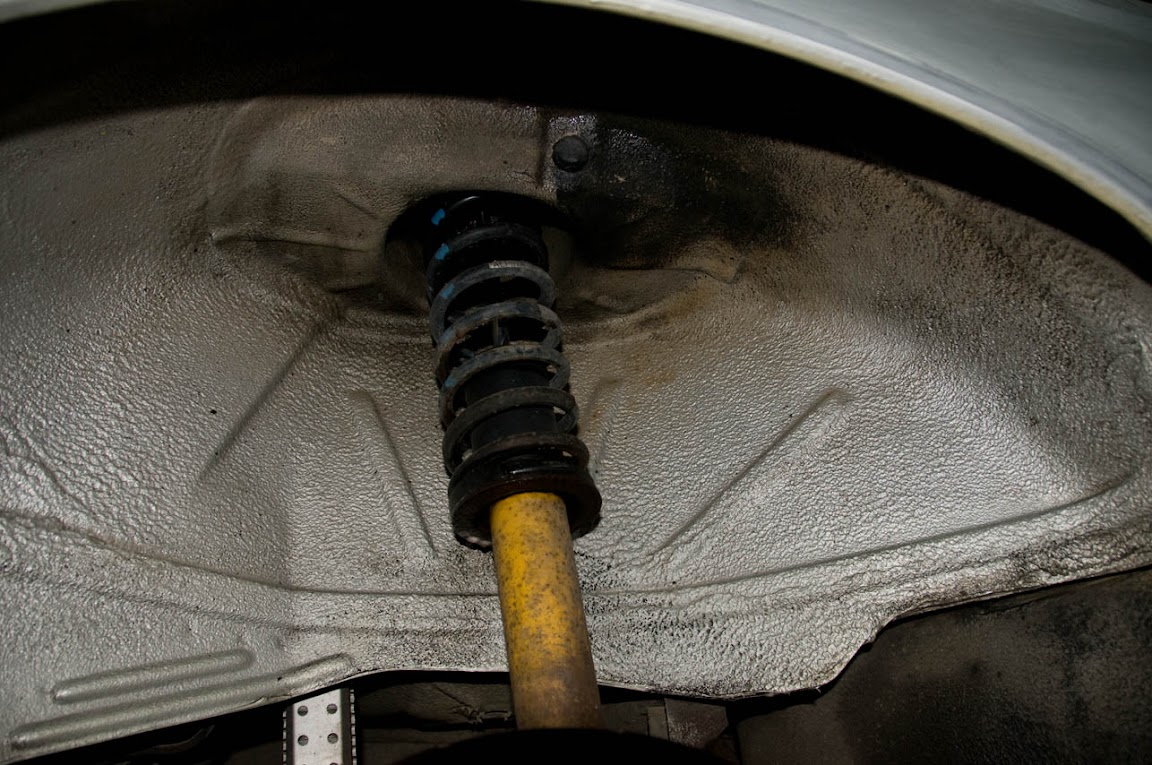
Here's the cleaned inner fender on the left rear. The shock/spring will get masked off and it will be painted with the base in here, too. The right side has been completed, but no photo of that as the wheel is back on.
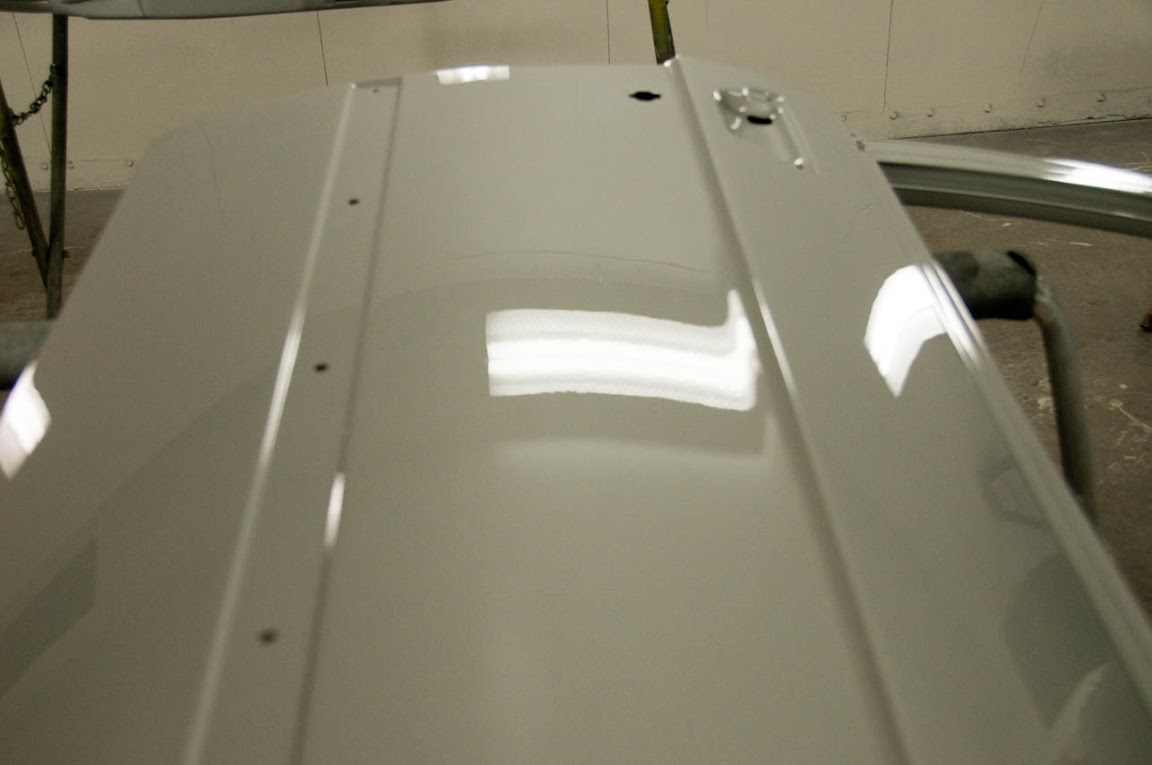
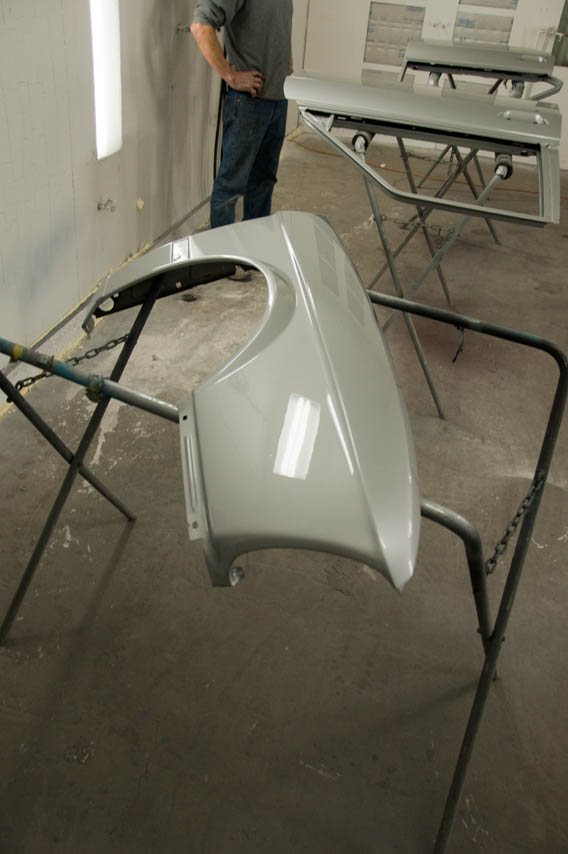
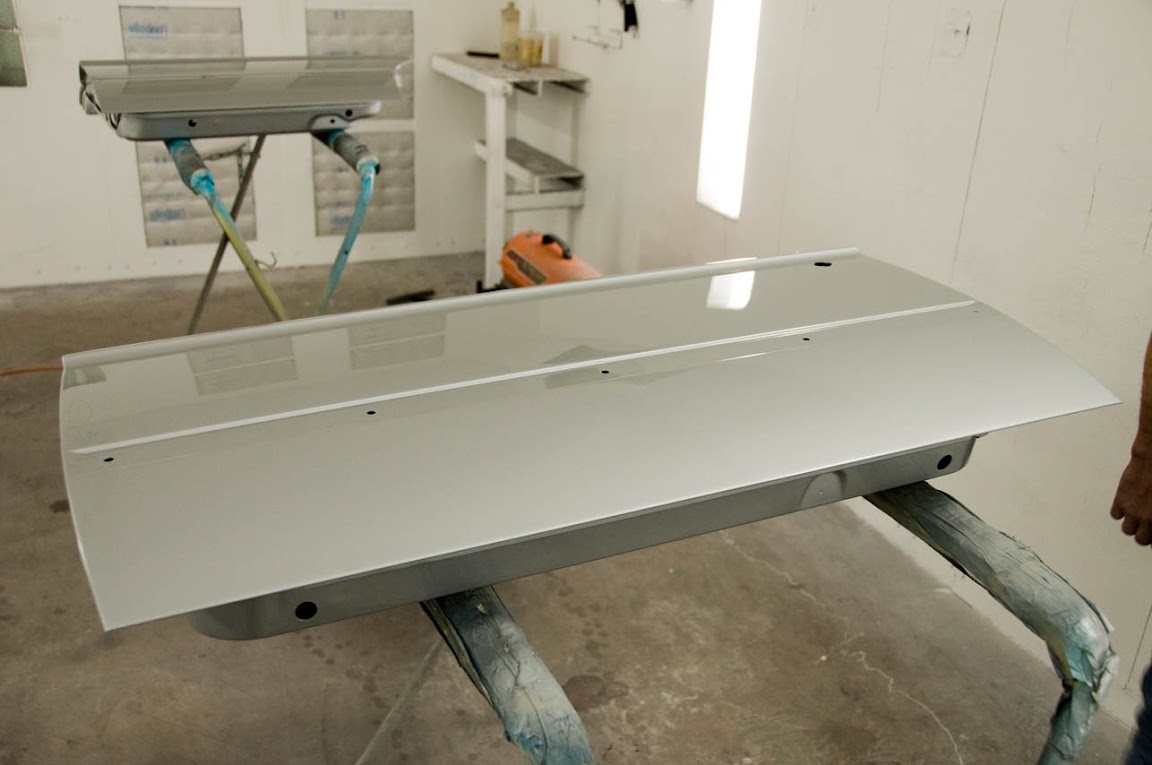
The valance is done, as is the front spoiler. The sunroof has been primed and blocked.
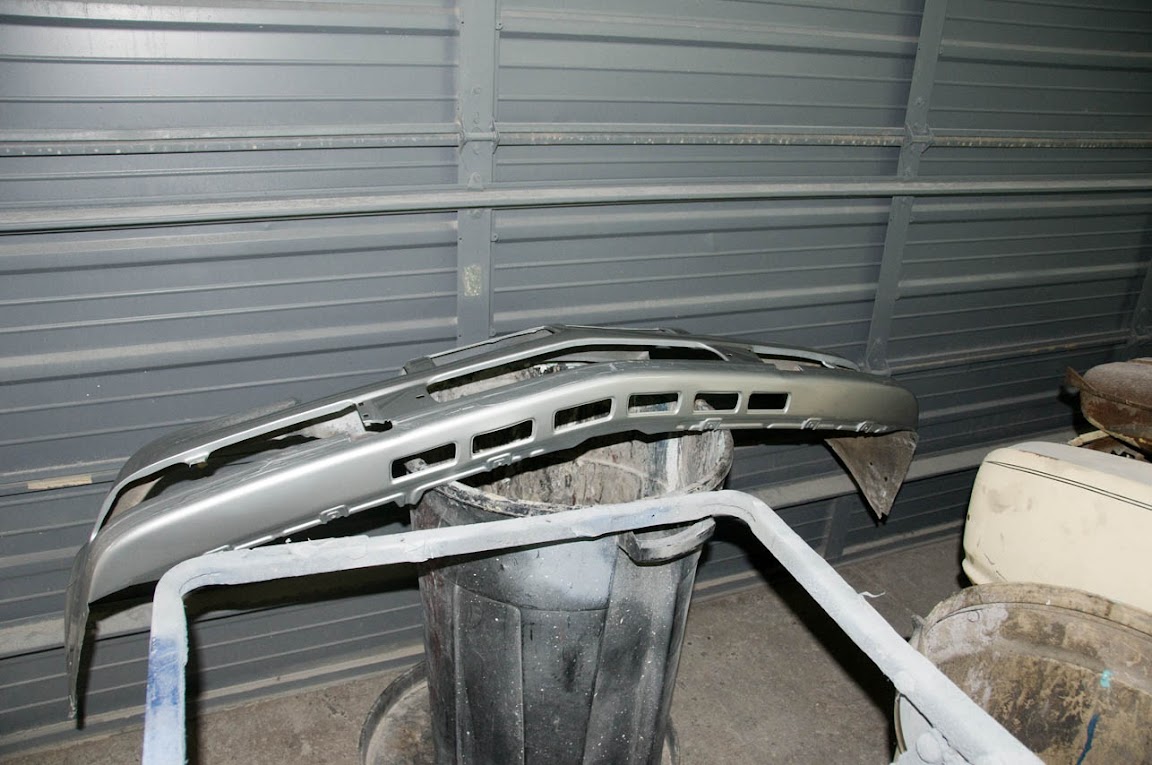
I was going to take the spoiler with me today, per our conversation, but he hadn't gotten to cutting and buffing it yet. The valance needs the black texture applied, too. Sure, it will be covered up with a spoiler, but it's supposed to be black.
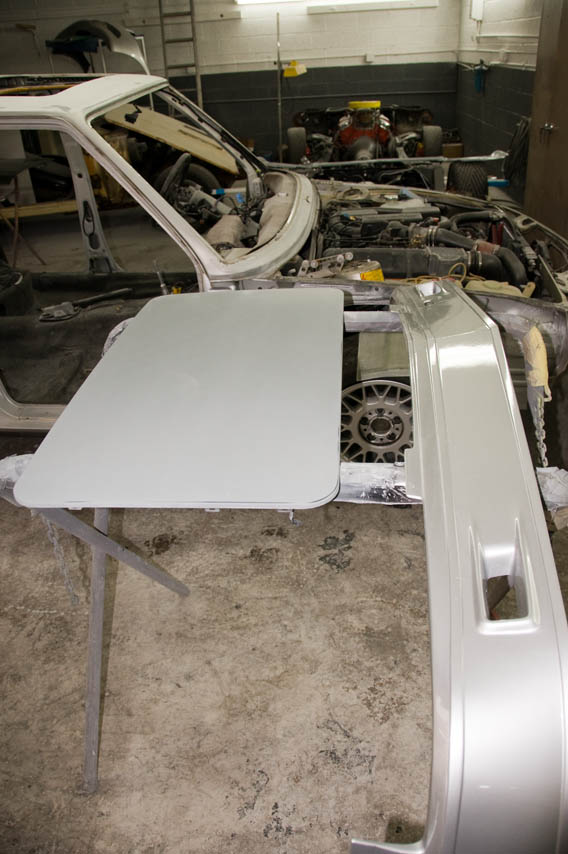
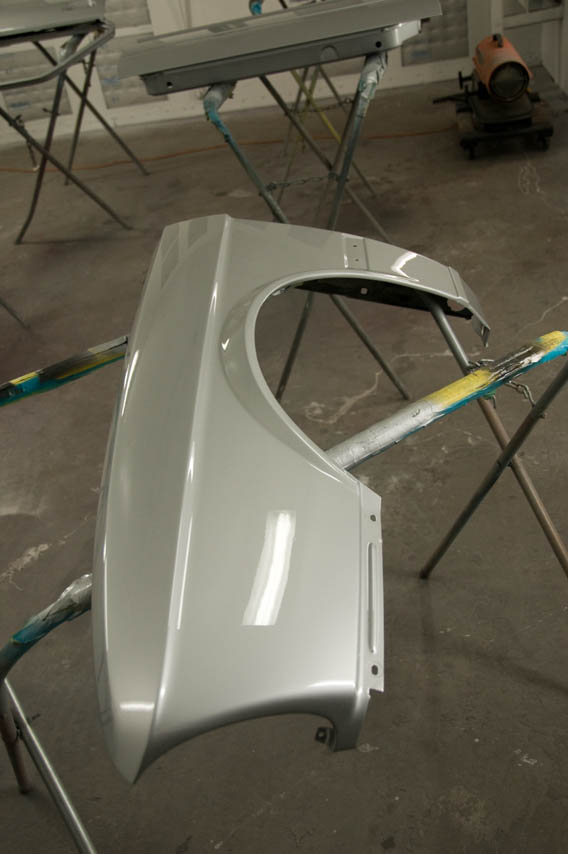
Next up, it was time to go into the booth to see the doors and fenders. The third coat of clear was about 60 minutes old. Dry, but no toque. This paint is right out of the gun, but everything will be cut and buffed. Mike asked me, "Have you ever seen silver glass?"
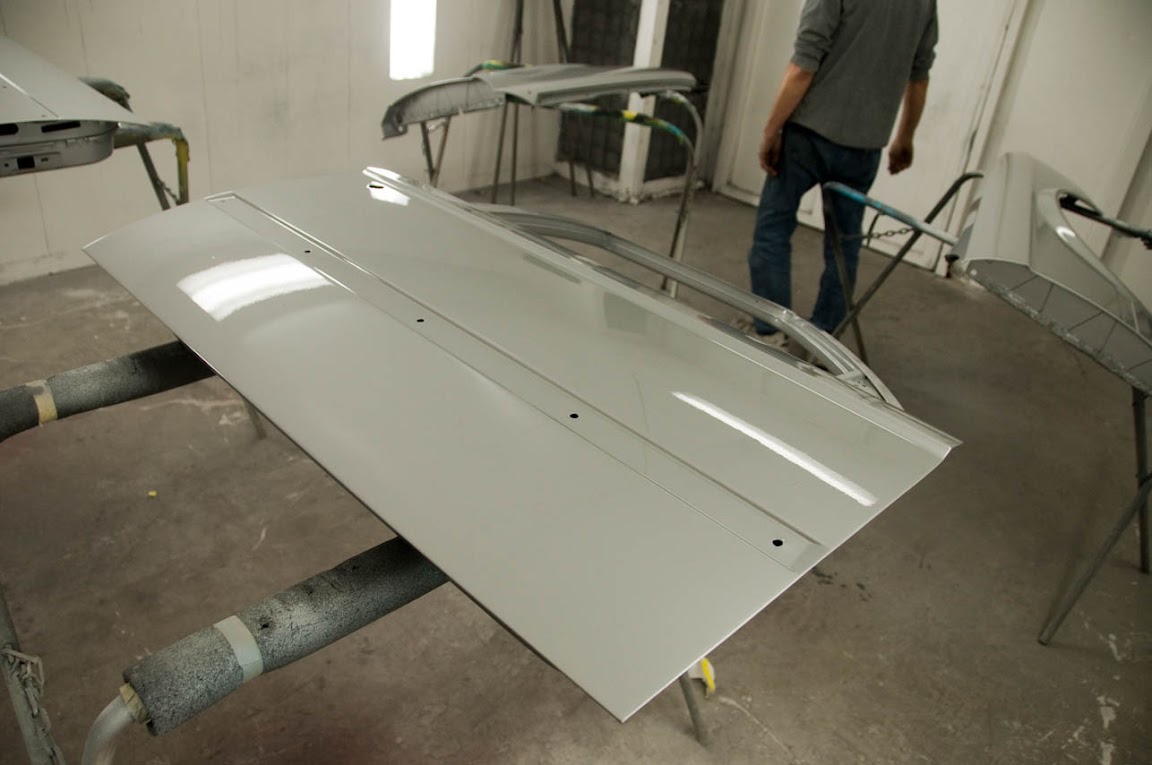
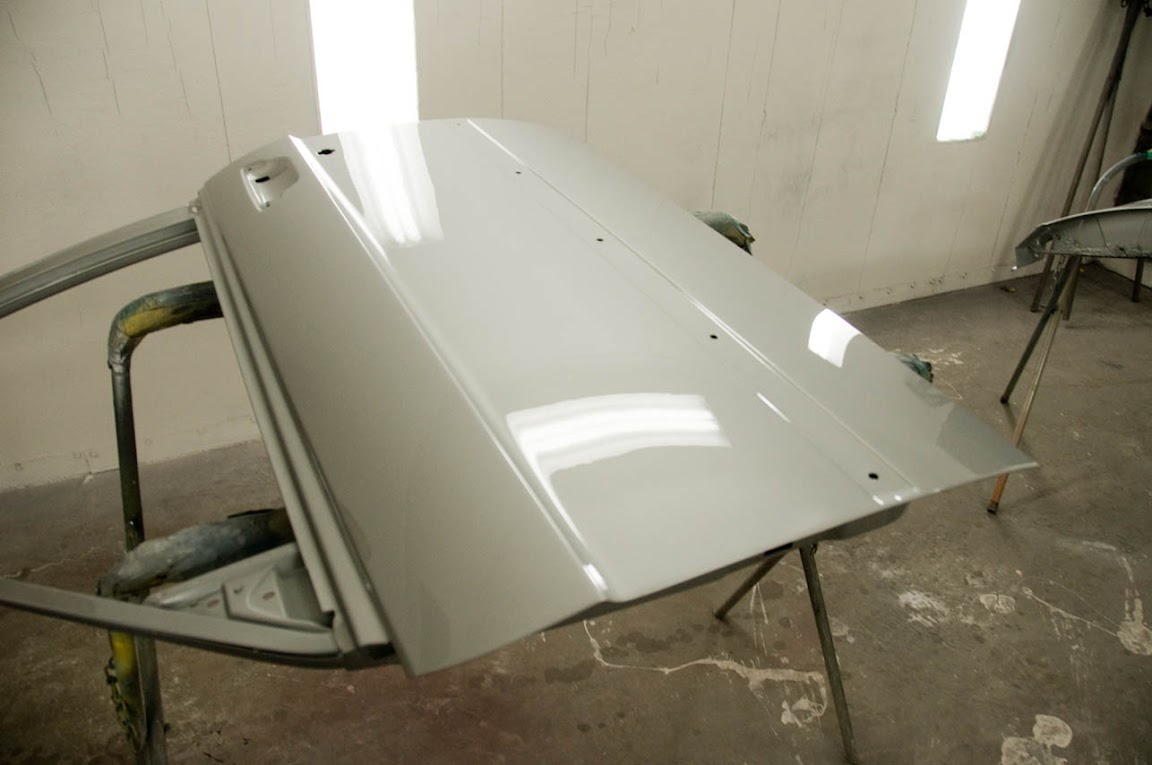
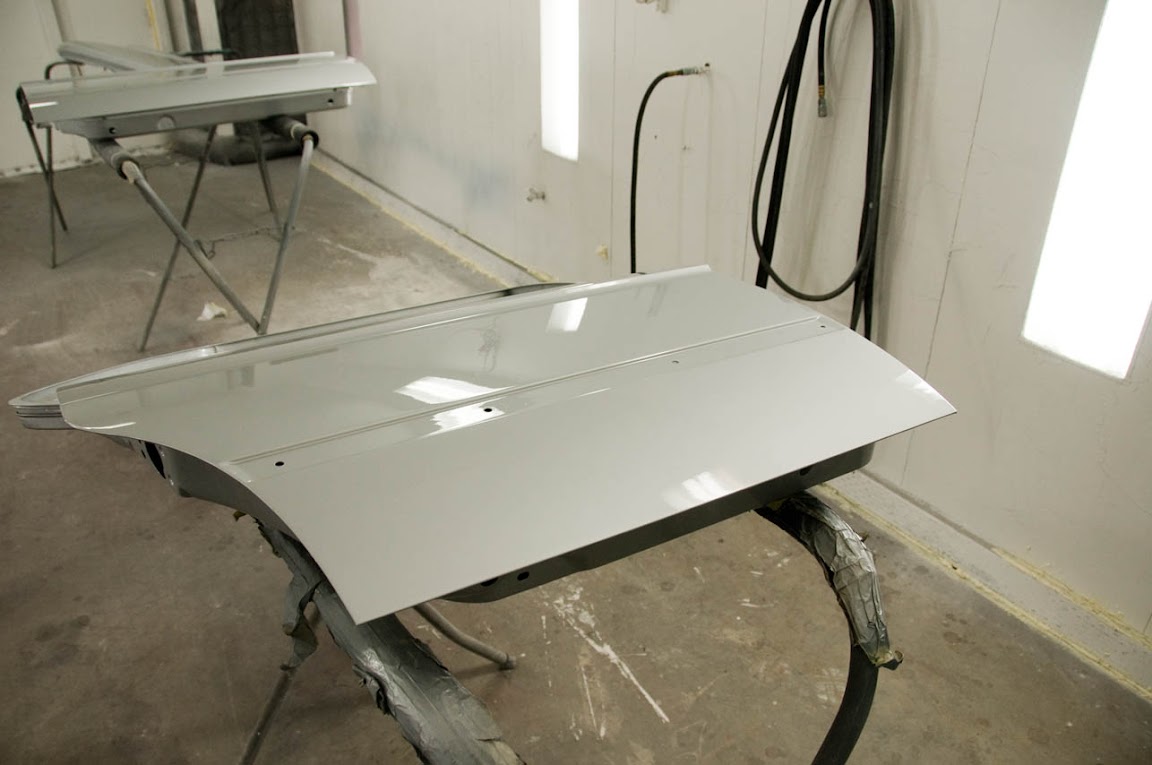
So, that's it for now. Hood, trunklid and sunroof are up next.
We discussed a few details pertaining to getting the headliner installed and it doesn't seem to be a problem to get it done there. He has a client that has an upholsterer that can come there and should be able to handle it.
I told him I could swing by Thursday in the mid afternoon, so we agreed on a time. He figured he'd have the doors done by then, so I could see those. So, I showed up at the shop around 2:30, as promised.
He had some $180k sports car of sorts in there getting some quick work done before it gets auctioned off at Russo and Steele:
Here's some info I found on the car:
http://www.russoandsteele.com/collector ... -GTM/32472
So, on to my car. He painted the inside of the tail panel and such.
Here's the cleaned inner fender on the left rear. The shock/spring will get masked off and it will be painted with the base in here, too. The right side has been completed, but no photo of that as the wheel is back on.
The valance is done, as is the front spoiler. The sunroof has been primed and blocked.
I was going to take the spoiler with me today, per our conversation, but he hadn't gotten to cutting and buffing it yet. The valance needs the black texture applied, too. Sure, it will be covered up with a spoiler, but it's supposed to be black.
Next up, it was time to go into the booth to see the doors and fenders. The third coat of clear was about 60 minutes old. Dry, but no toque. This paint is right out of the gun, but everything will be cut and buffed. Mike asked me, "Have you ever seen silver glass?"
So, that's it for now. Hood, trunklid and sunroof are up next.
We discussed a few details pertaining to getting the headliner installed and it doesn't seem to be a problem to get it done there. He has a client that has an upholsterer that can come there and should be able to handle it.
-
Kyle in NO
- Posts: 17638
- Joined: Feb 12, 2006 12:00 PM
- Location: Nasty Orleans------> Batten-Rooehjch------>More Souther LA
-
mooseheadm5
- Beamter
- Posts: 23035
- Joined: Apr 08, 2009 10:30 PM
- Location: Charlottesville, VA
- Contact:
-
Das_Prachtstrasse
- Posts: 5616
- Joined: Sep 10, 2006 7:06 AM
- Location: Melbourne, Doooown Under
-
Mark 88/M5 Houston
- Posts: 8548
- Joined: Feb 12, 2006 12:00 PM
- Location: Far North Houston
-
Rich in Tupelo
- Posts: 2917
- Joined: Feb 12, 2006 12:00 PM
- Location: Spring Hill, TN