External links now open in a new browser tab - turn this off in your UCP - Read more here.

Re: 1985 Arktisblau M535i Renovation - Progression

Post your photos and videos here!
vinceg101
Posts: 4982
Joined: Jun 20, 2007 2:40 AM
Location: Los Angeles, CA

Re: 1985 Arktisblau M535i Renovation - Progression

Post by vinceg101 »

2023:
M5 Sun Visors:
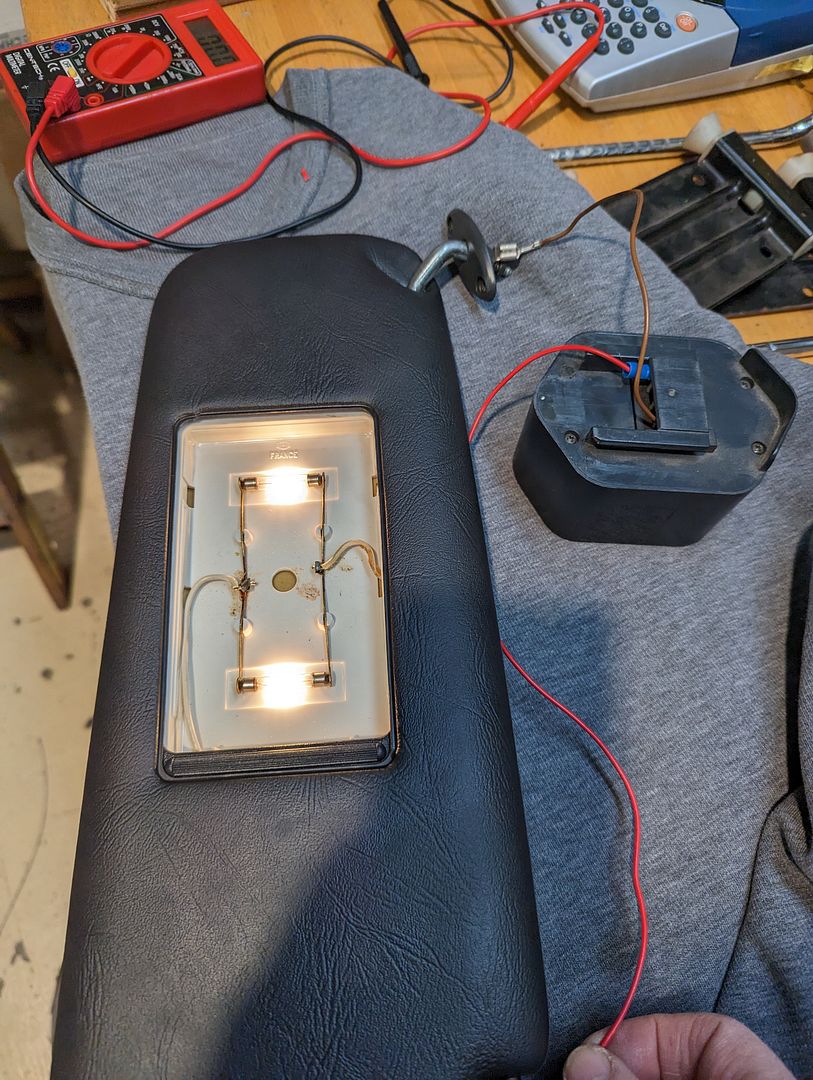
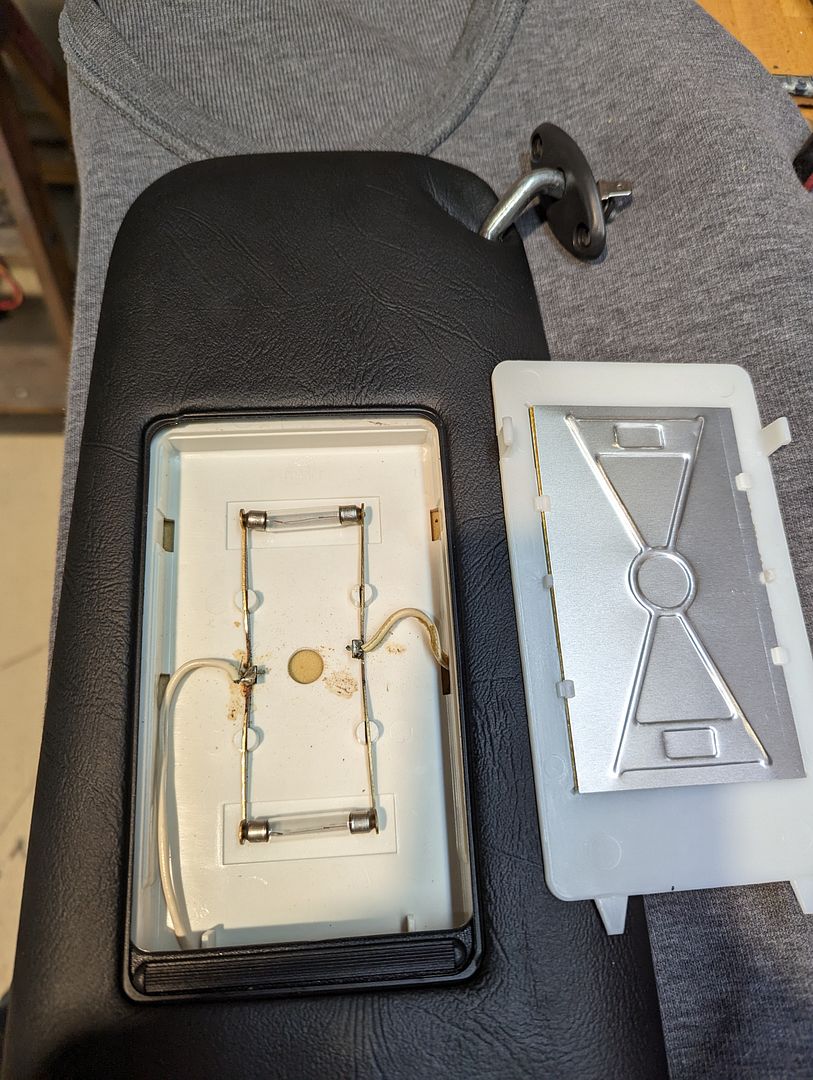
I put these in kind of at the last minute during the Interiors project simply because I had forgotten I had a set of these lighted M5 Sun Visors sitting in a box for nearly a decade. I hadn’t even bothered to test them before I installed them and given how they came along late in the process, I had to get creative with the wiring for them. So, when they didn’t work part of me wasn’t surprised and I put them on the punch list. I just got around a few weeks back to addressing this issue.
1) Stated by bench testing them wherein I found out they do indeed work
Image
Image

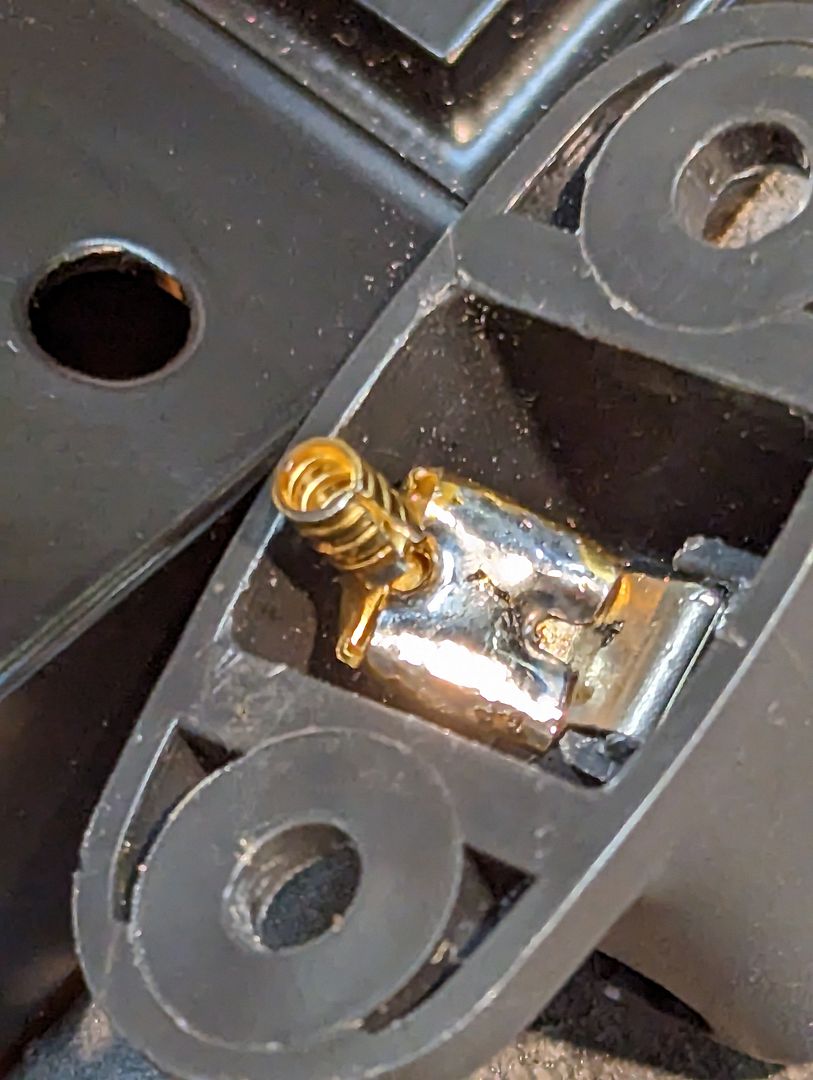
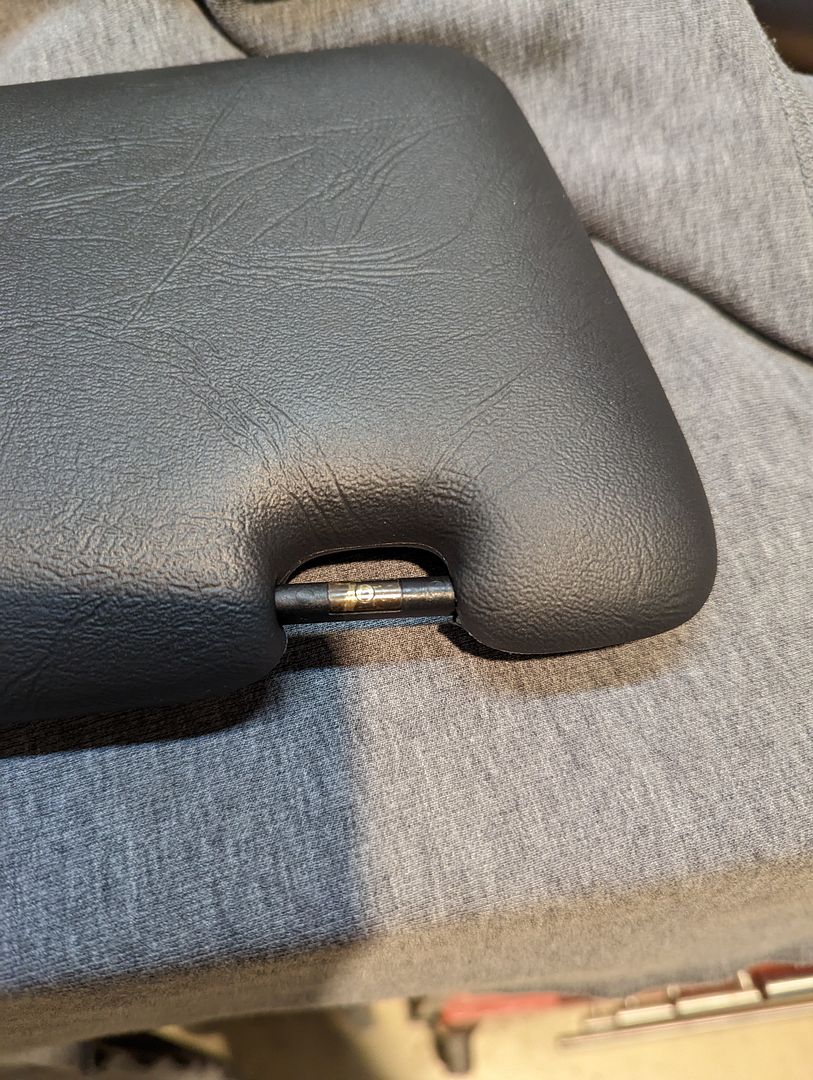
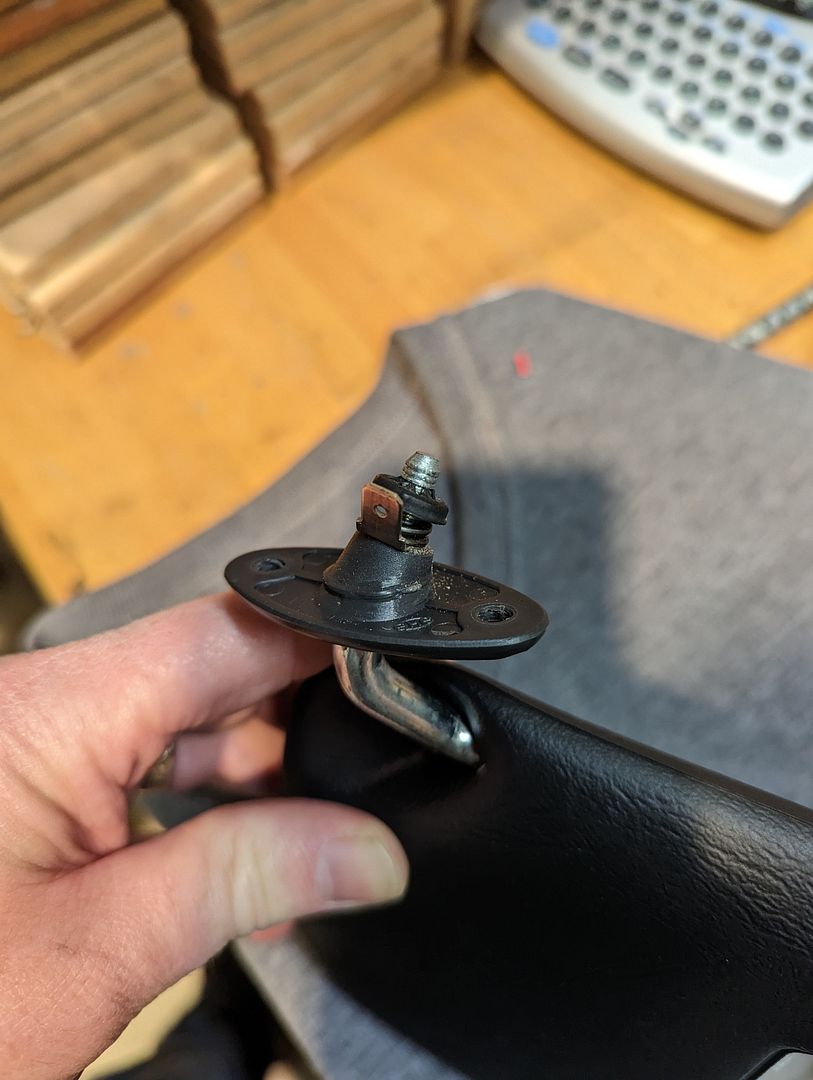
2) Turns out the contacts on the receiver clips and on the visor themselves needed some attention
Image
Image
Image

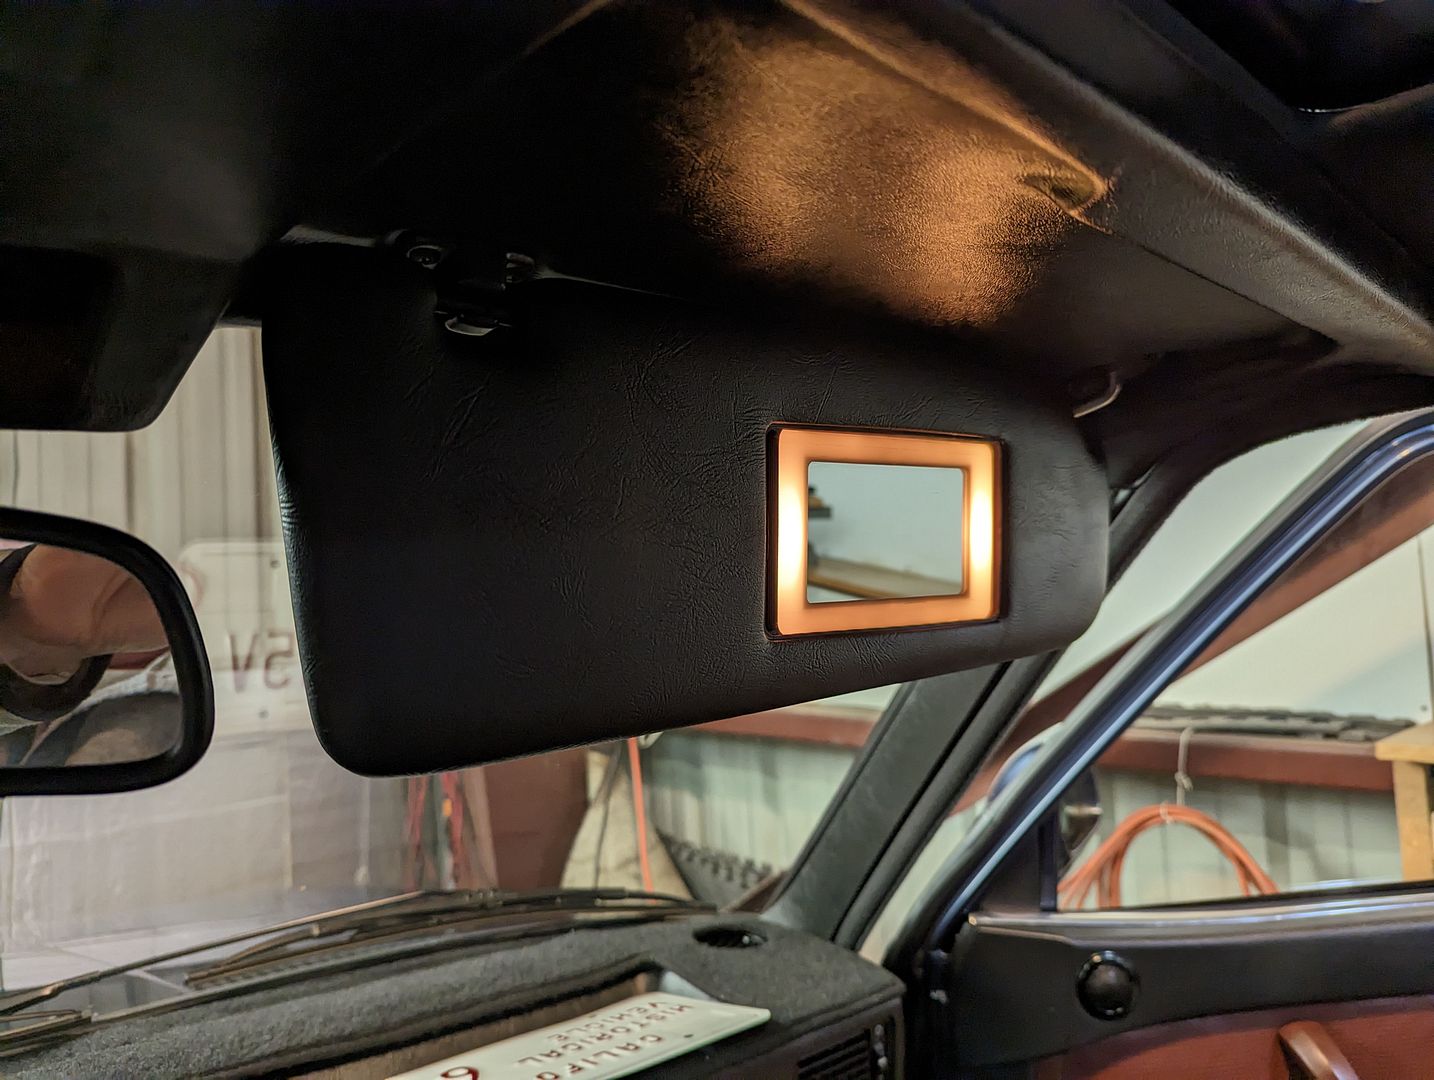
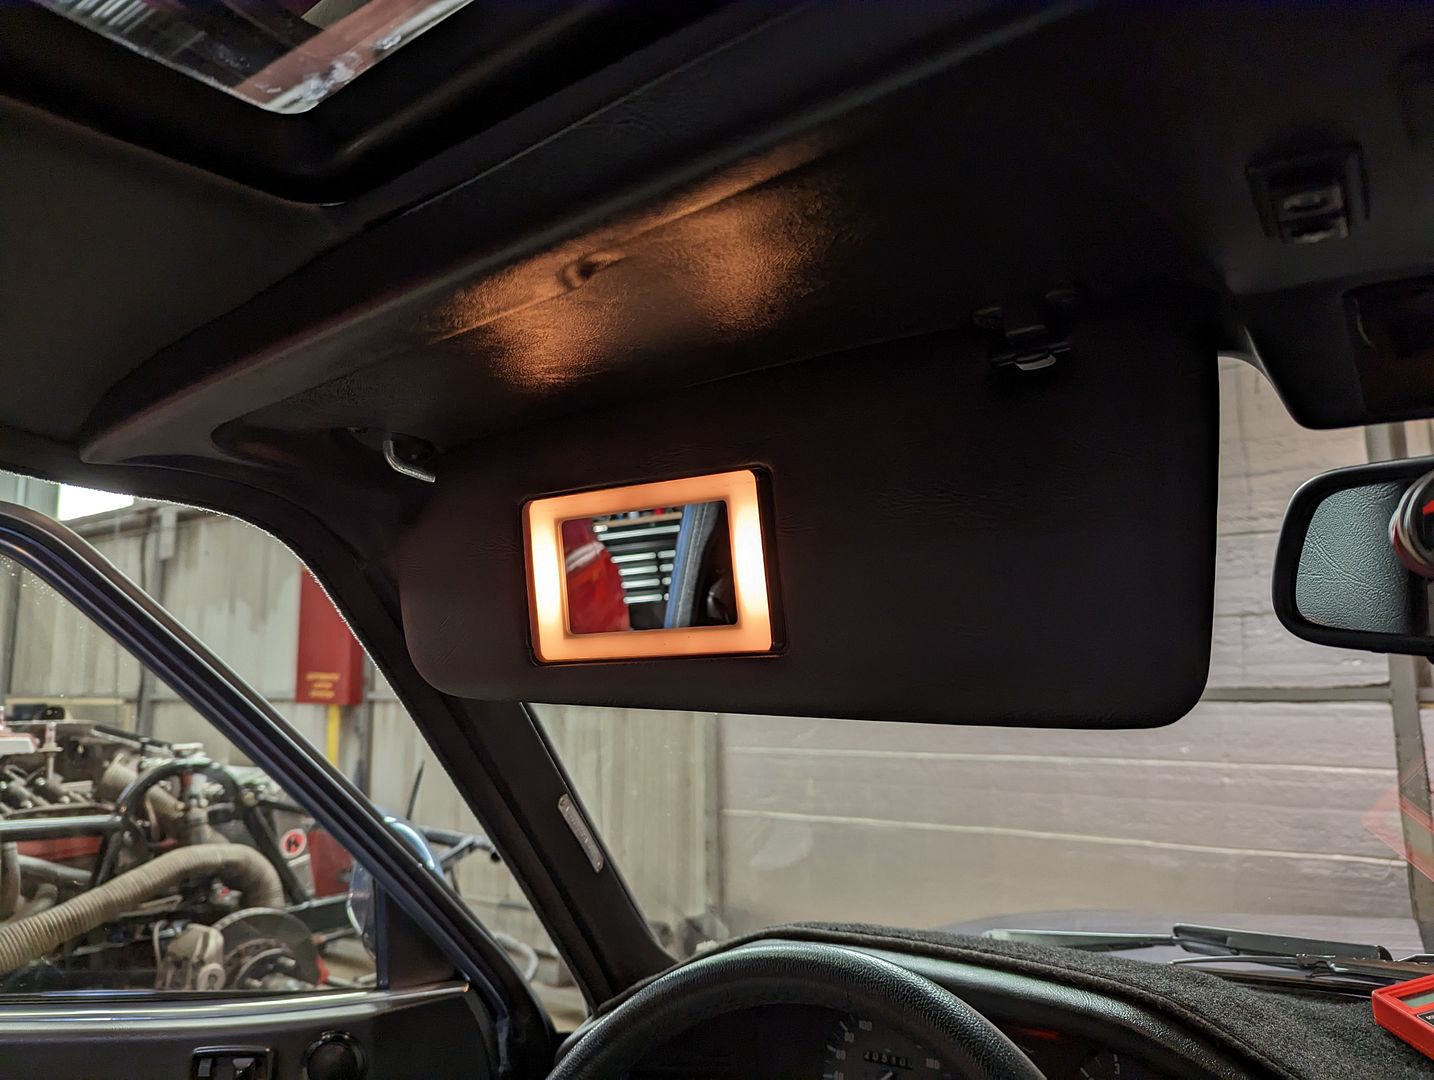
3)They still don’t work 100% and is dependent on what position the visor is in (the contact points on those clips is a bit 'iffy) but more than they did before, which wasn’t at all
Image
Image

Interior Door Handles:
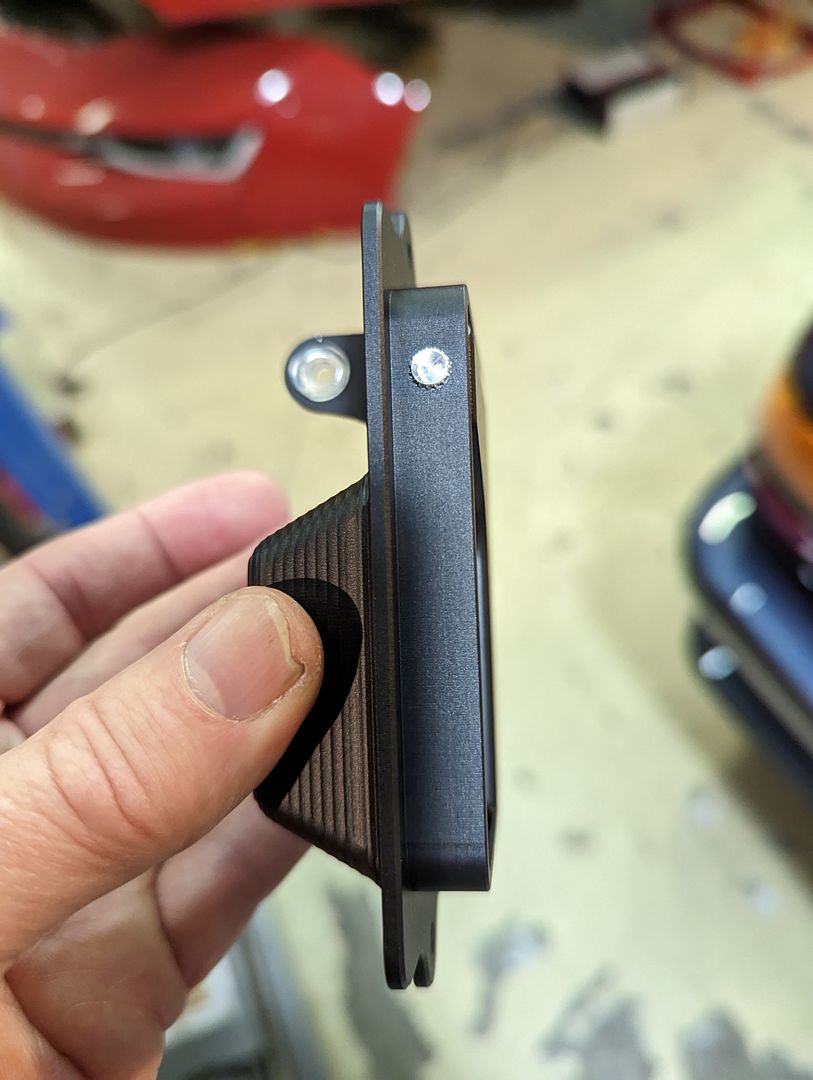
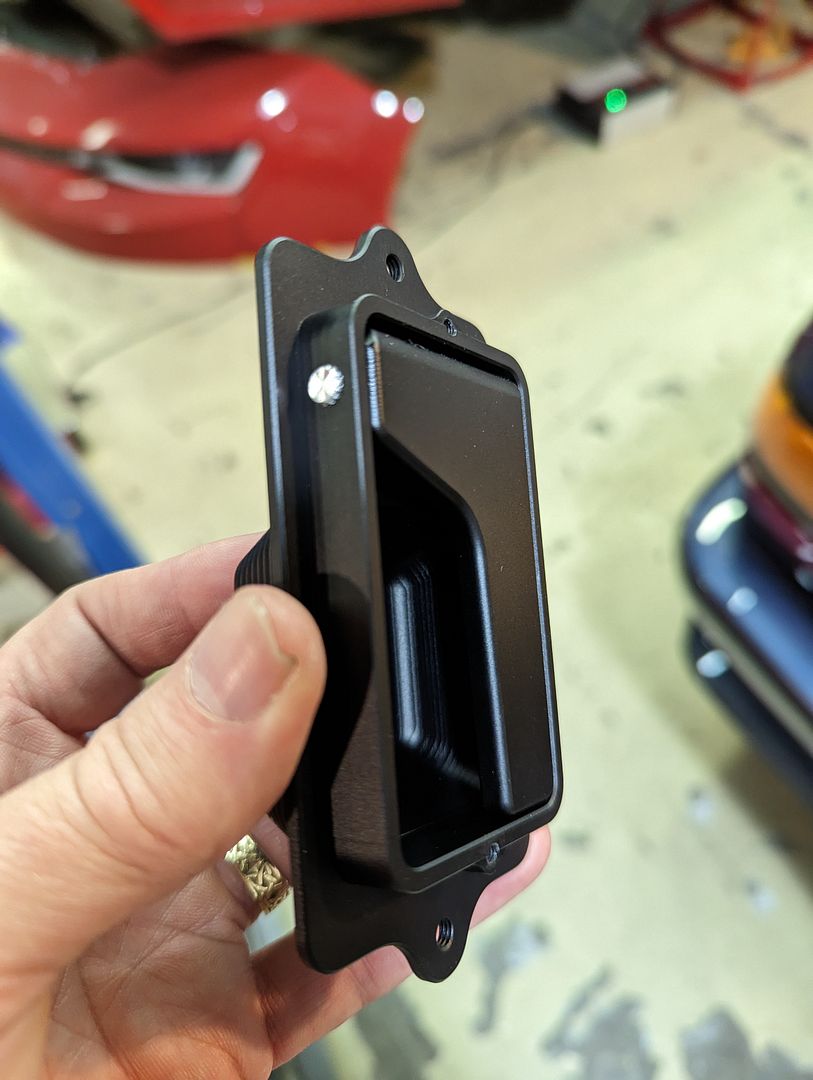
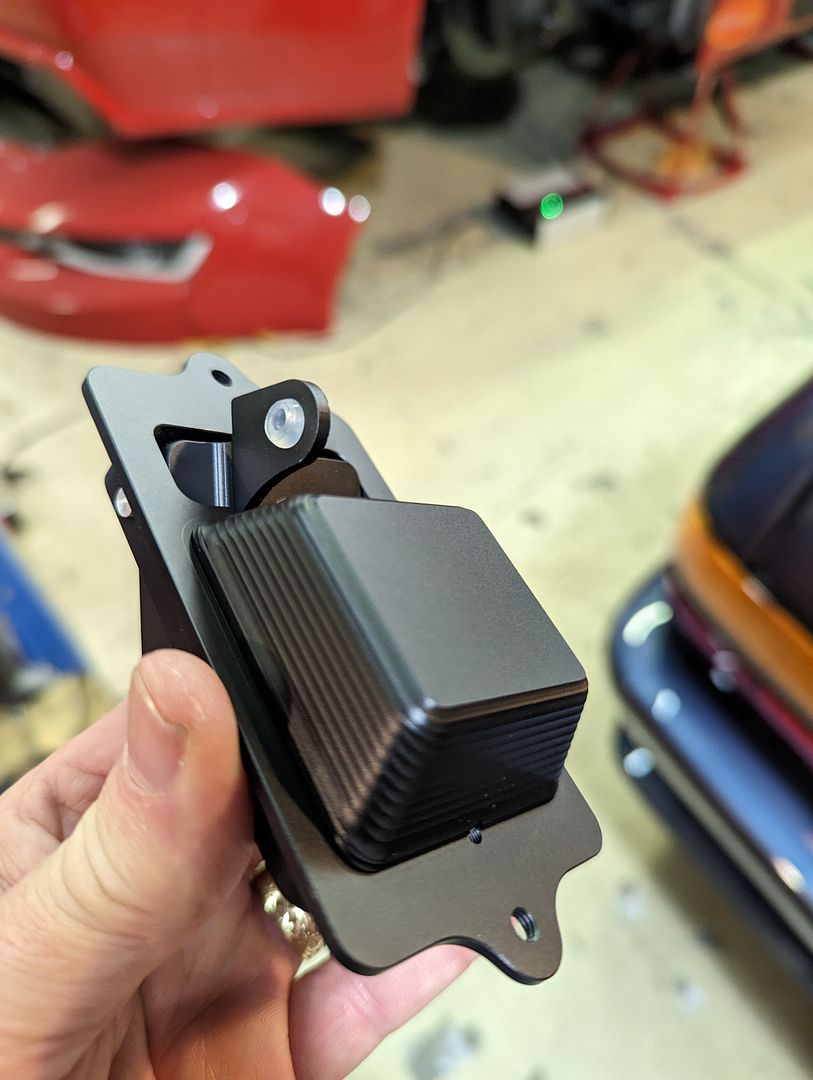
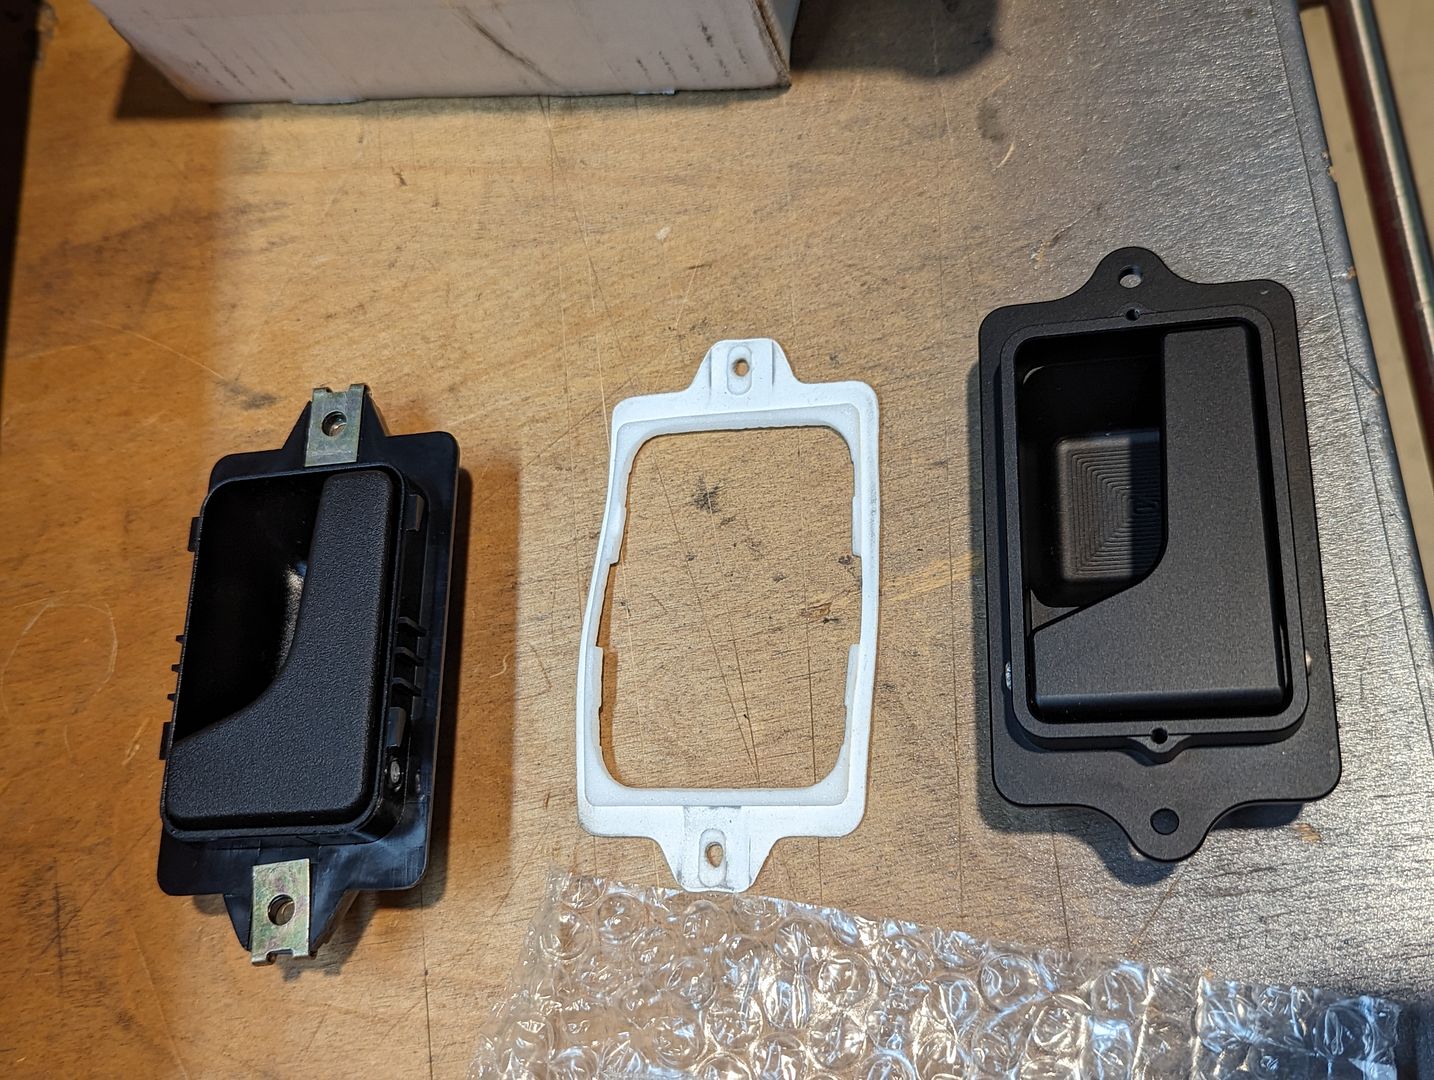
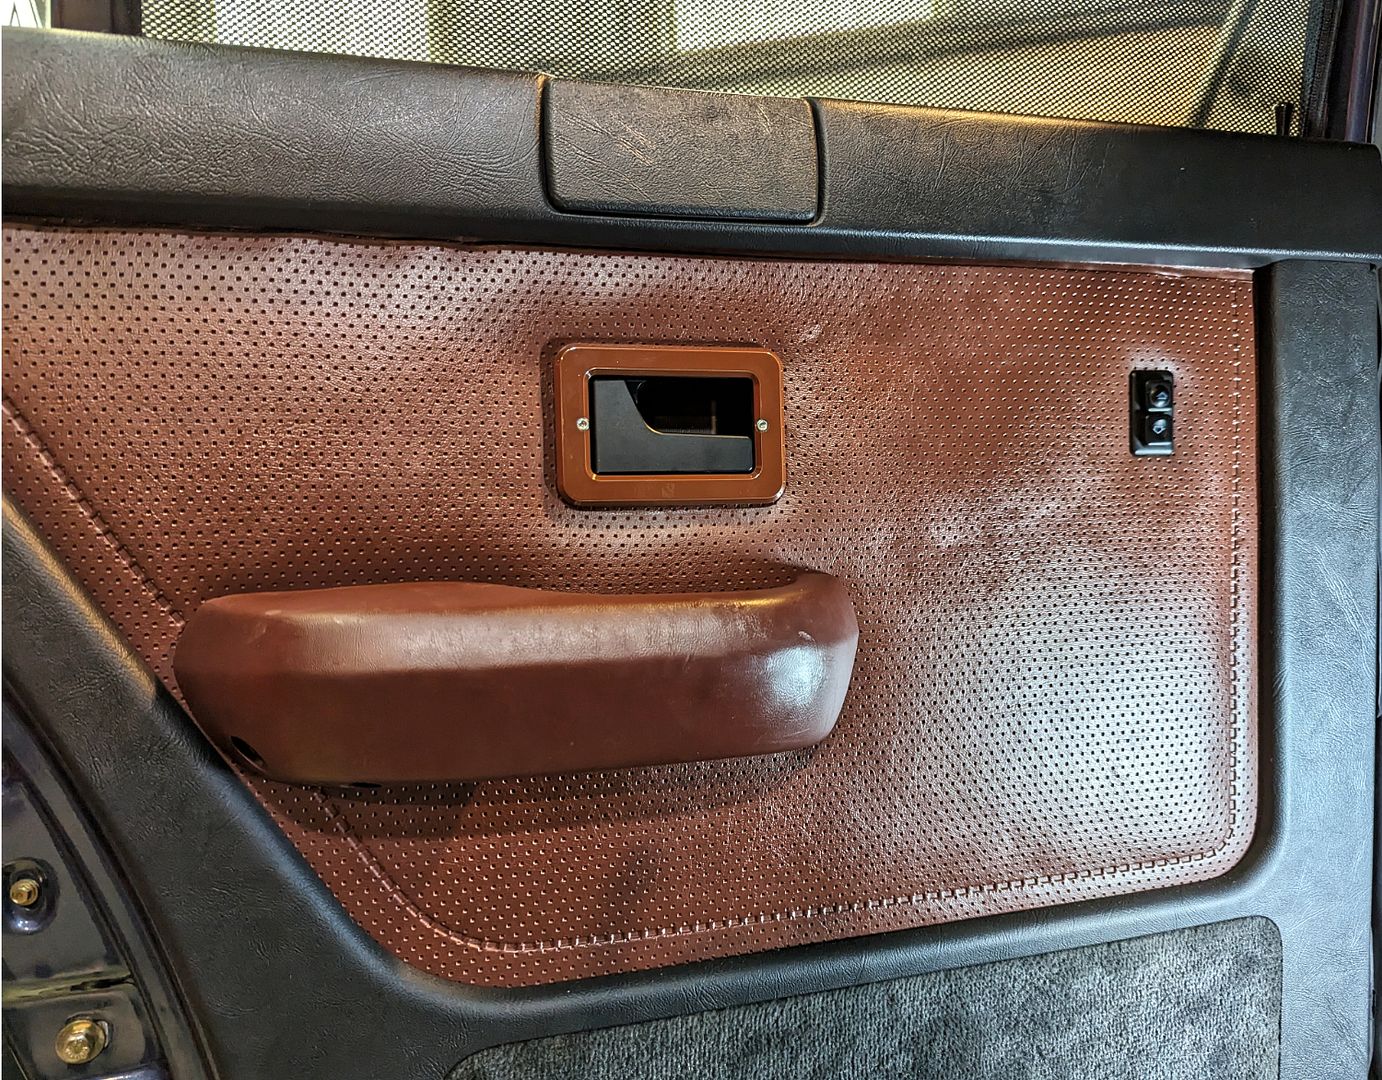
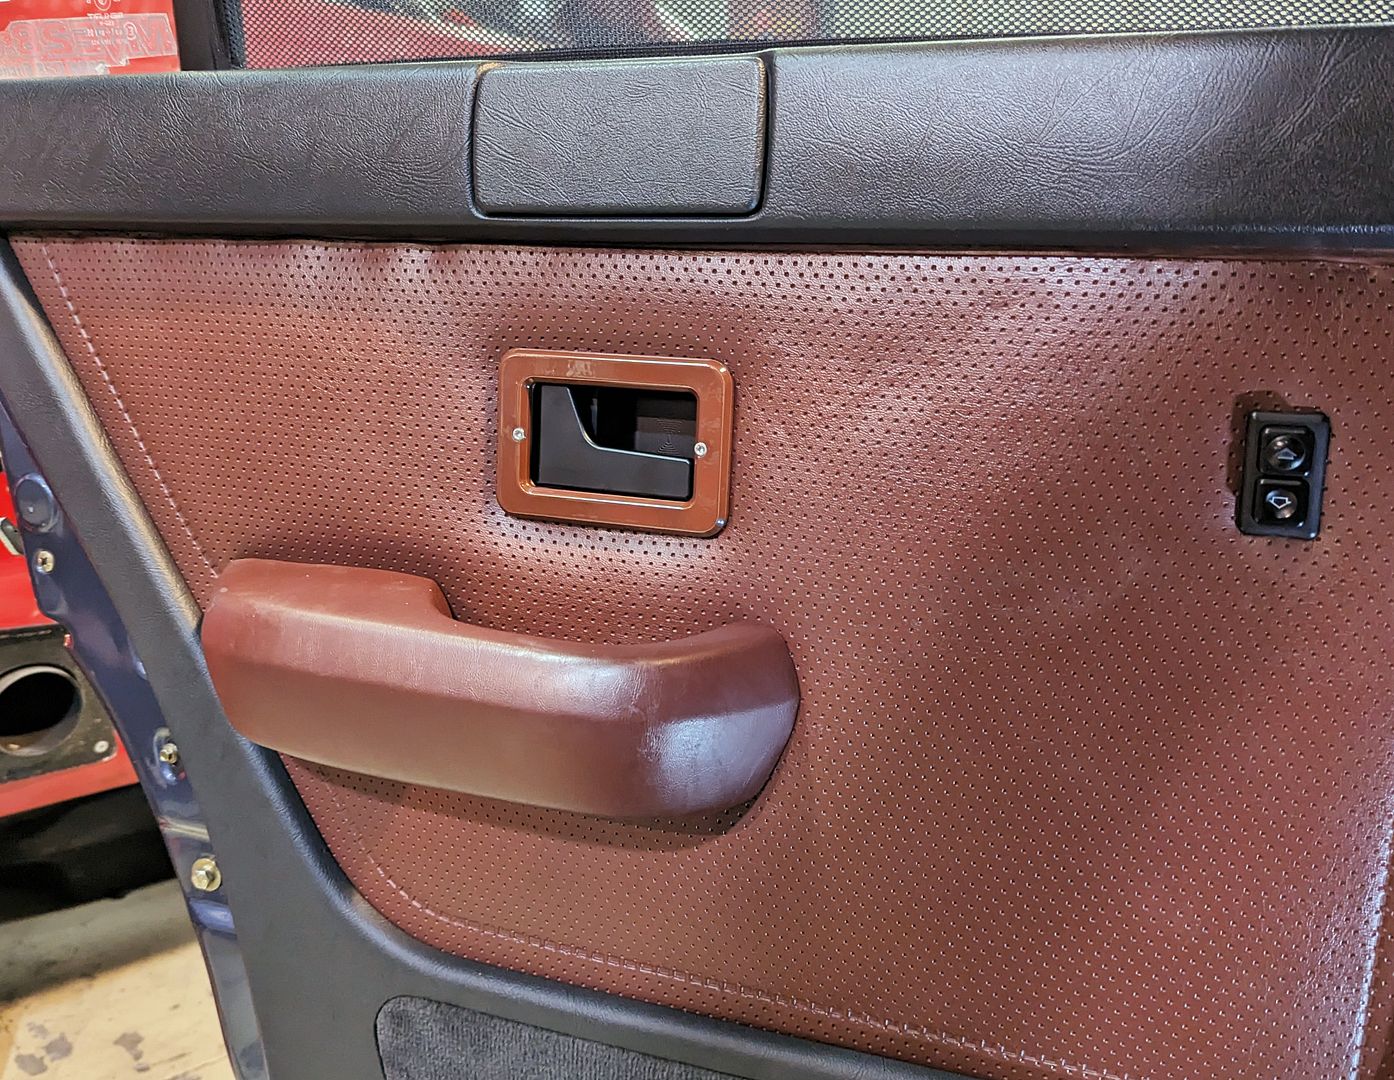
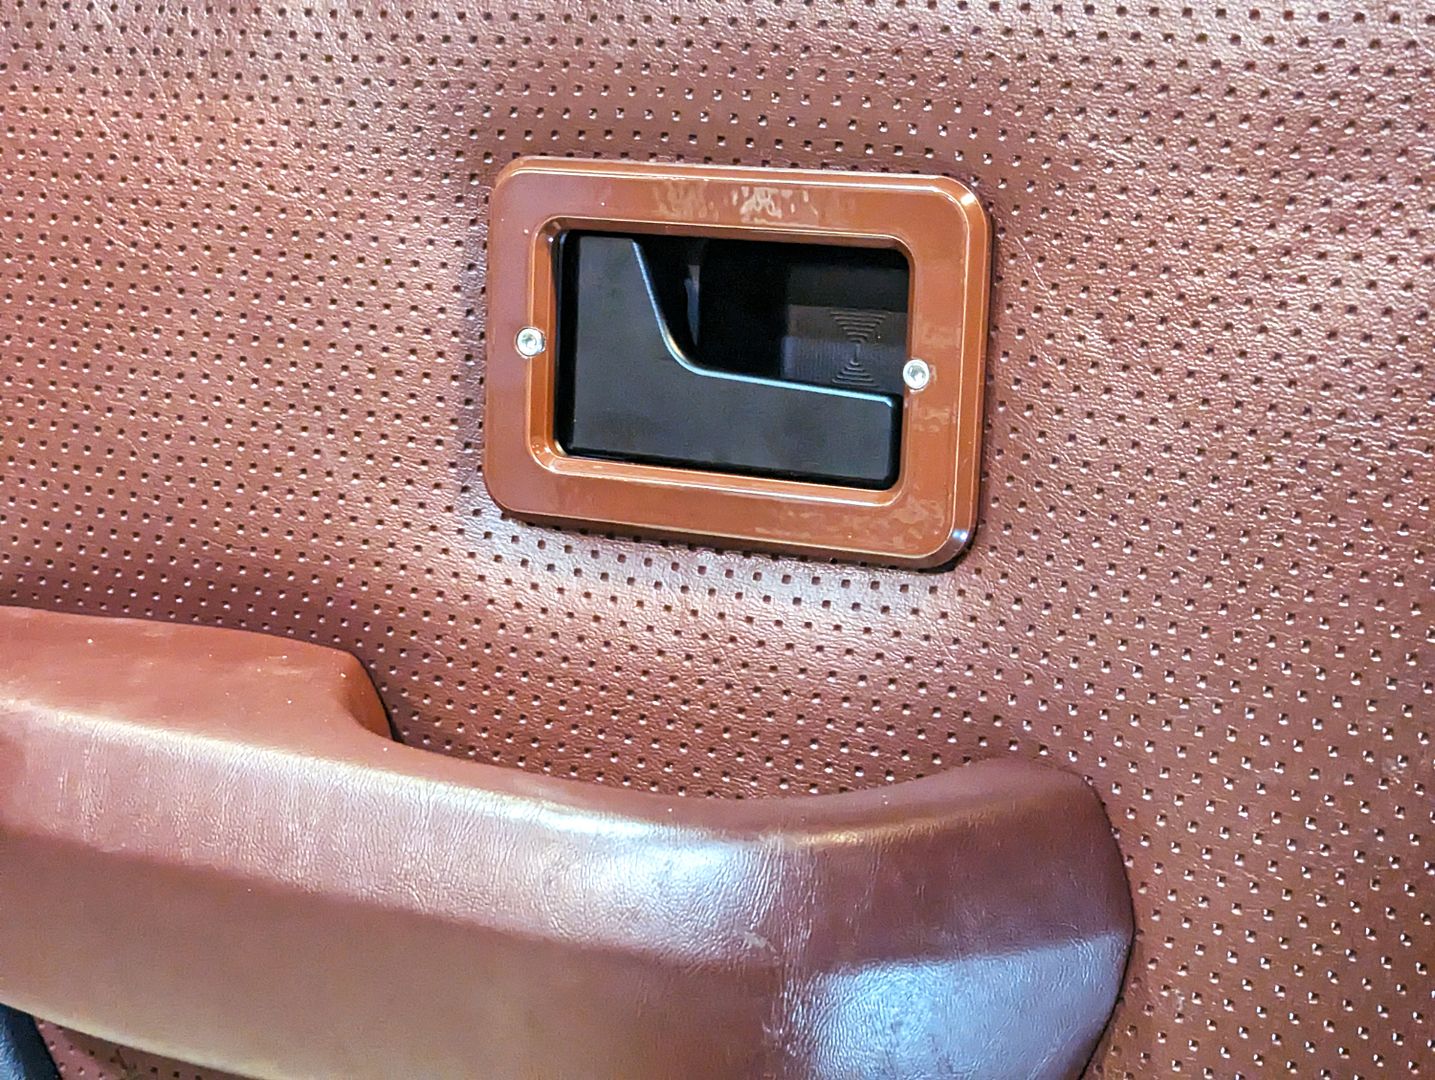
Okay, I thought the Wiper System was a splurge, this, however was a total indulgence. After I have replaced several Interior Door Latch assemblies in recent years, it is evident that the quality of these new parts is really lacking. Someone came up with solution, albeit an over the top, expensive one. Leo Grande Racing out of Long Island, NY started fabricating aluminum replacement assemblies. This included the one part that keeps breaking: the Interior Trim Ring. These are really robust pieces that will hopefully outlast my lifetime.
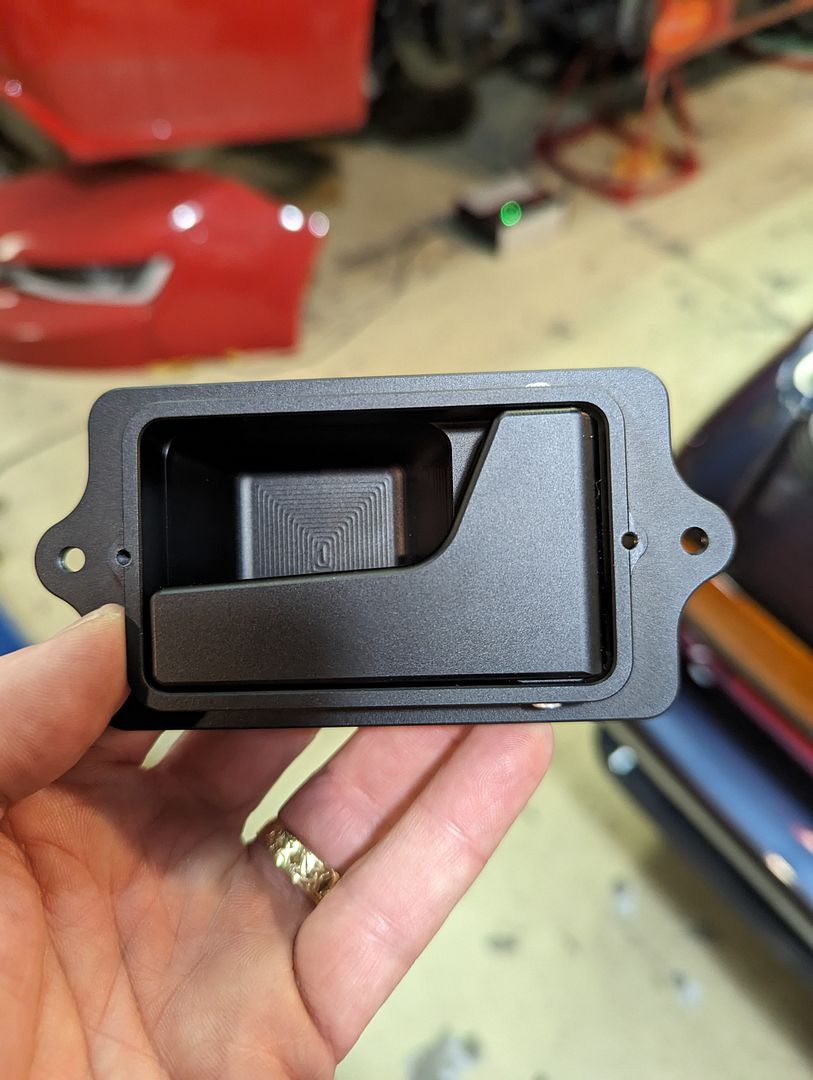
Image
Image
Image
Image
Image

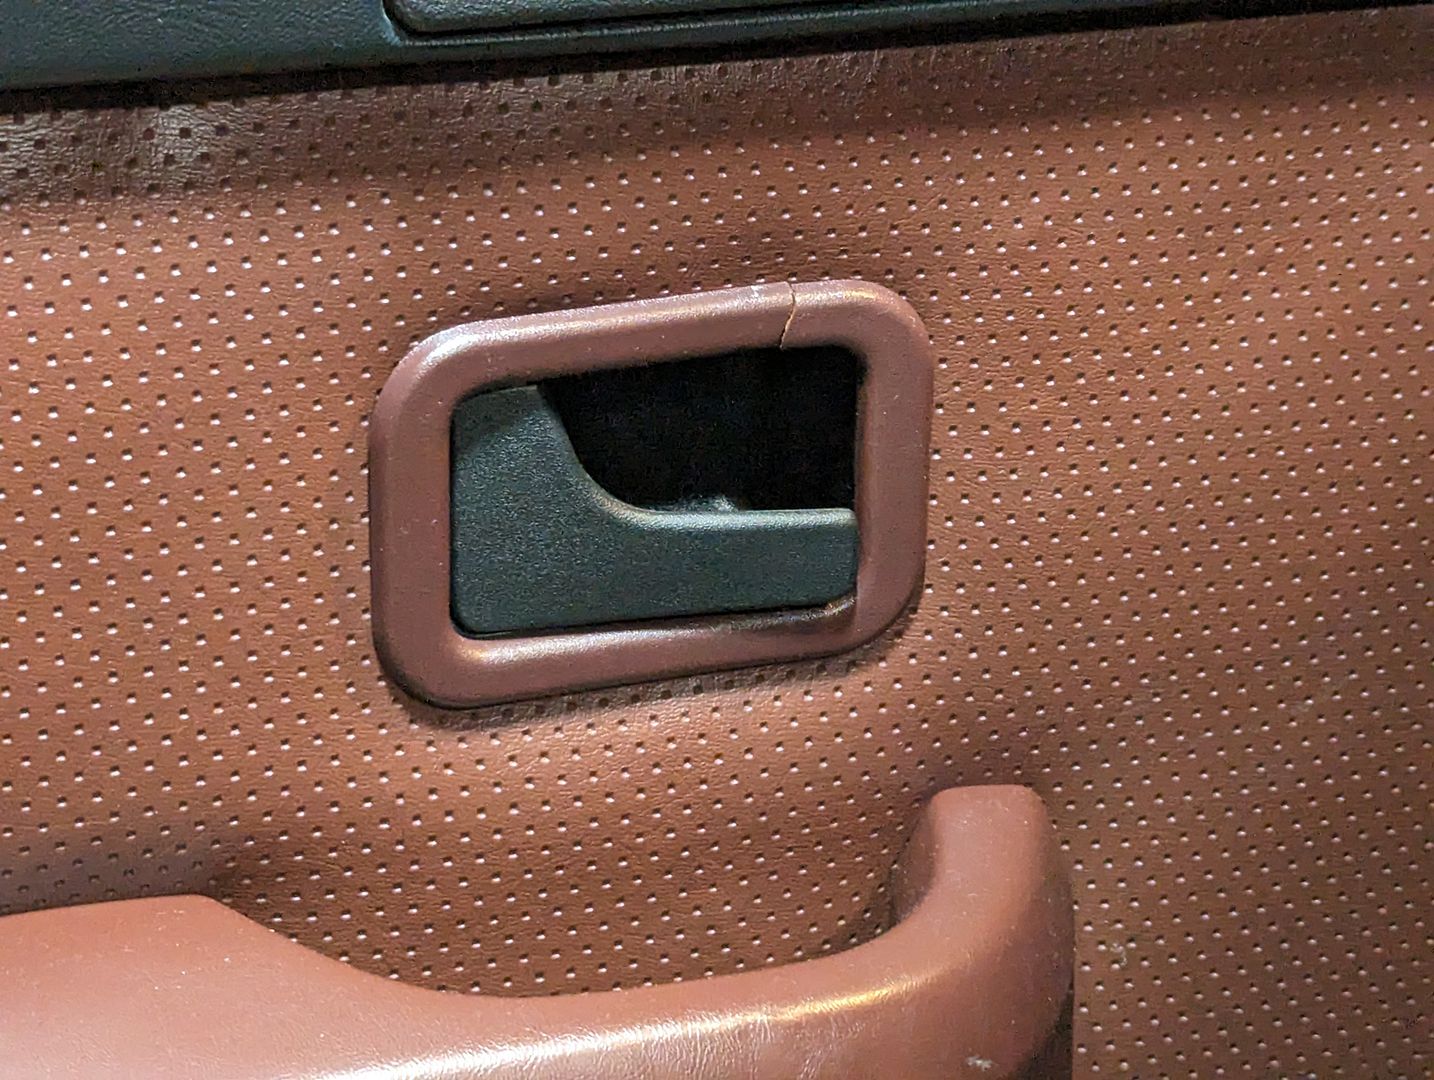
Here I was in a bit of quandary regarding the Trim Rings: BMW still makes replacements in a color that they claim is Taurusrot but in reality is Cardinal. All my used or old NIB Taurusrot trim rings consistently break even after I tried reinforcing them by laying down a bead of Super Glue on the back side. (You can see the 'new' Taurus rings in one of the photos below; see how light it is compared to either the original ring or vinyl cover)
Image

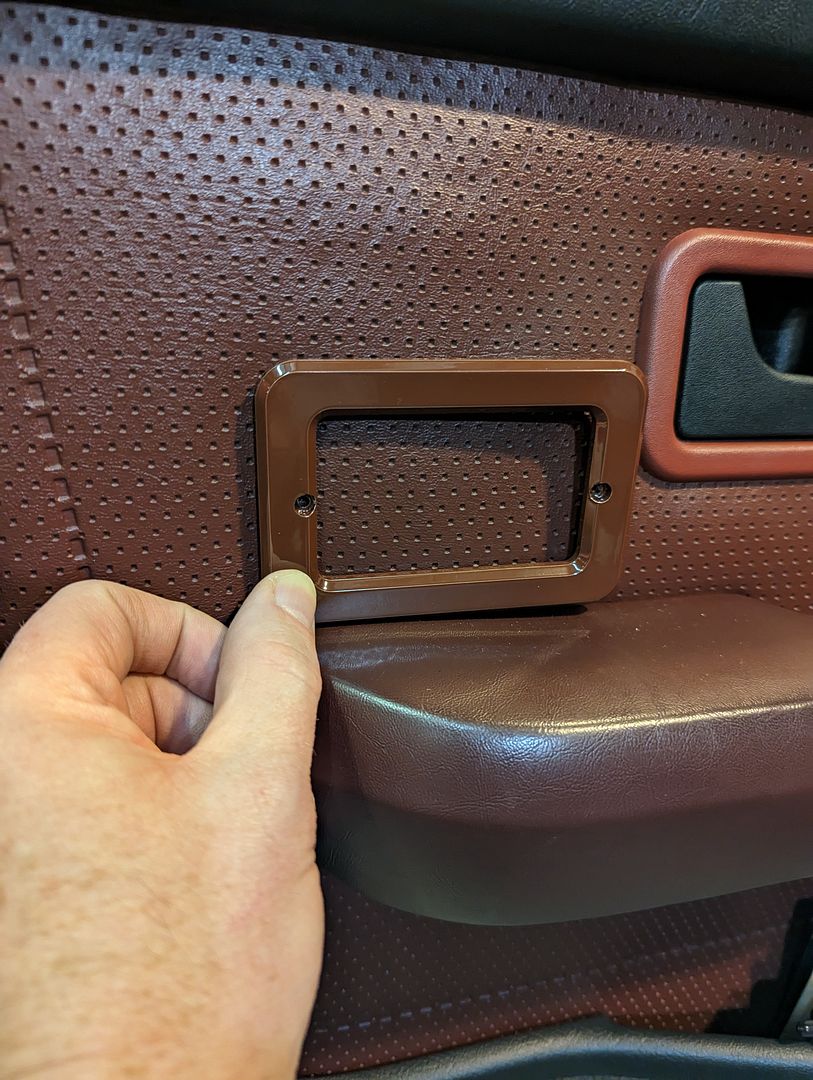
The quandary was that Leo Grande only makes the Trim Rings in either black or clear anodized finishes. I could have simply accepted the black ones, but I just couldn’t, not after spending all this effort on the Taurusrot interior; it seemed a sacrilege. Since they weren’t changing their finishes, I asked for milled finish and decided to powder coat the rings in a matching color.
After going through RAL color samples at the powdercoater, I came up with one from Prismatic Powders (RAL 8016). It’s actually a brown but given the brown nature of Taurus in certain light, it works. Too bad it’s only available in a gloss finish, but I’m living with it. I may apply a satin or low luster topcoat to knock that sheen down eventually. I will also paint the trim screws either to match or just black.
Image
Image

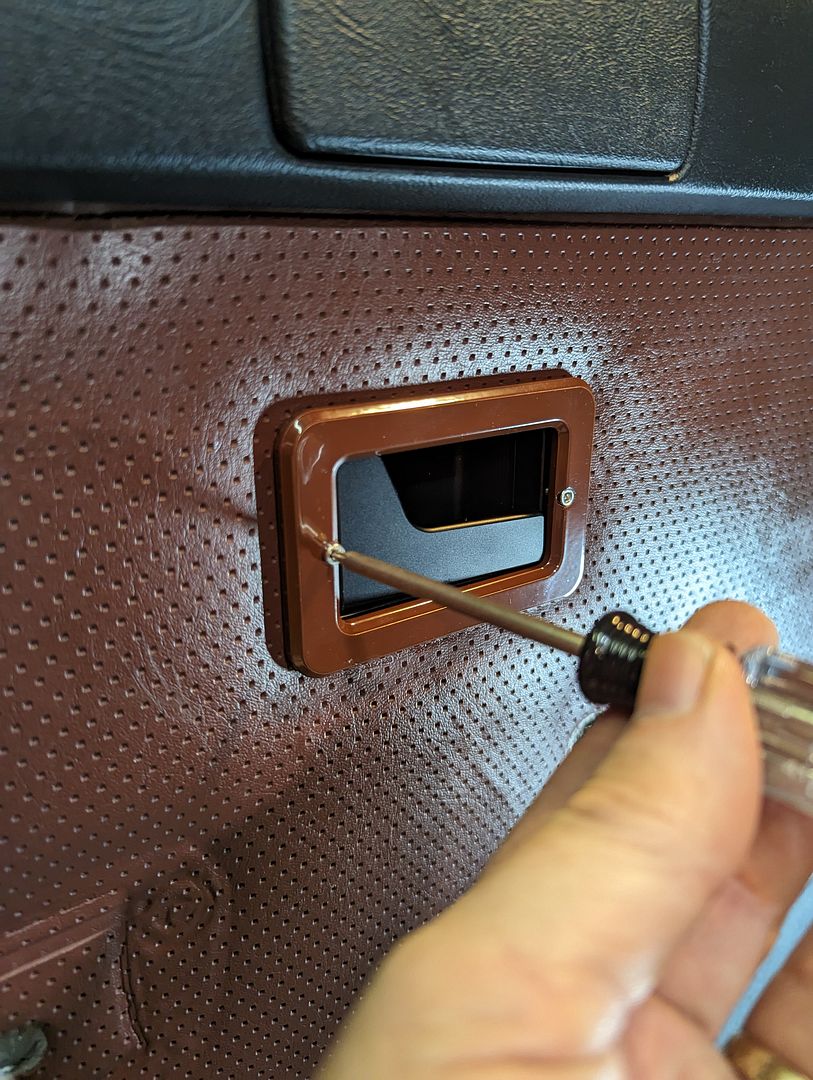
Installation was easy and they go in just like the OEM versions: Remove Trim Ring, Armrest/Handle, and Door Panel. Disconnect & remove existing latch. Connect and install new latch. Re-install all the components. Screw on the finish Trim Ring with the oh-so-impossibly small torx screws they provide. You’re set.
Image
Image
Image

Yeah, it is an expensive solution to a minor problem but I did it anyway.

Door Weatherstripping & Door Sills:
This too is a work in progress but is getting closer to being complete. I installed my original rear sets, but due to an extreme case of brain-fartness, I ‘lost’ my original front sets. I temporarily installed a set of after-market versions sourced from a guy in Turkey via ebay. While they don’t have the requisite “Mouse Fur” of the OEM, they fit really well and offered complete door opening coverage. This is the real weak part of the E28 door seal system: the seal breaks at the Door Sills and nothing is underneath them to seal off the opening adequately (BMW offered complete opening seals in almost every other model except the E28 and E12).
I also ‘lost’ my two front Door Sills (I don’t know what happened that week in the Hangar) and of course these are NLA so I set out trying to find decent, clean replacements; a tall order. I have plans to modify the sills and add some rubber/foam profile weatherstrip to build a better mousetrap, more complete seal to the bottom of the door seal to get better acoustic control.
In the meantime, the E12 Door Sills are/were available and compared to used E28 sills, a bargain from BMW. The E12’s are also all black which I tend to like better with my interior.
Image
Image

Door Lower Edge Guards:

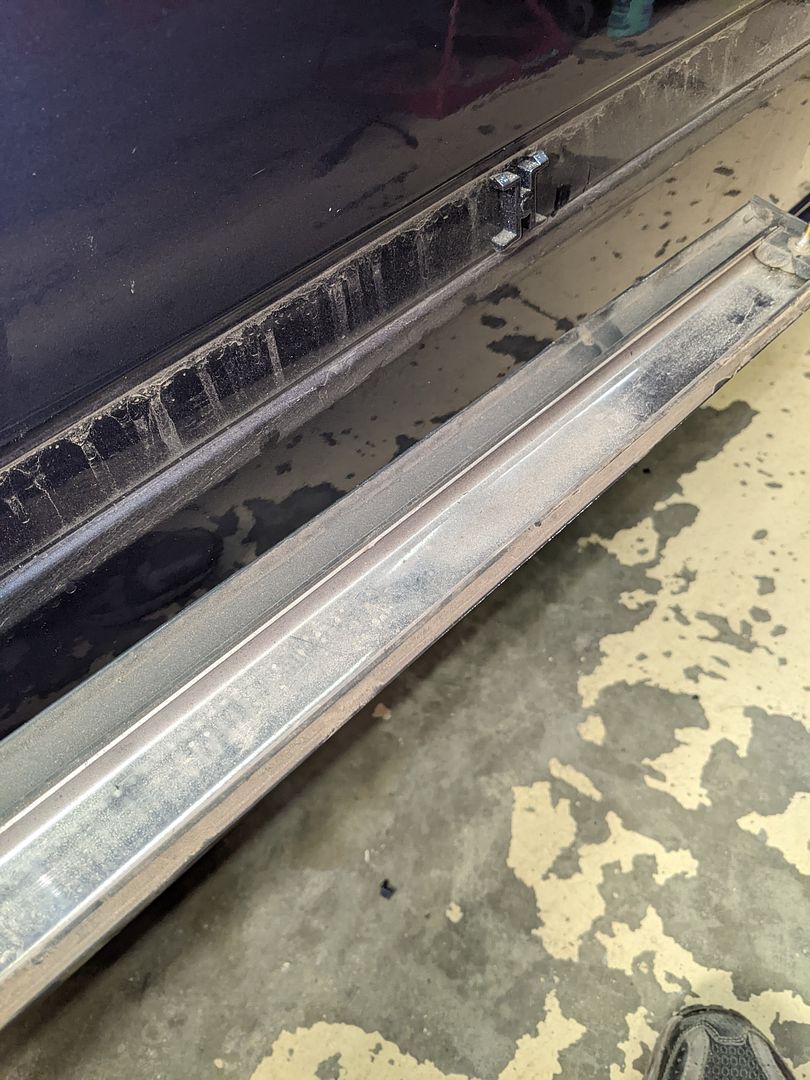
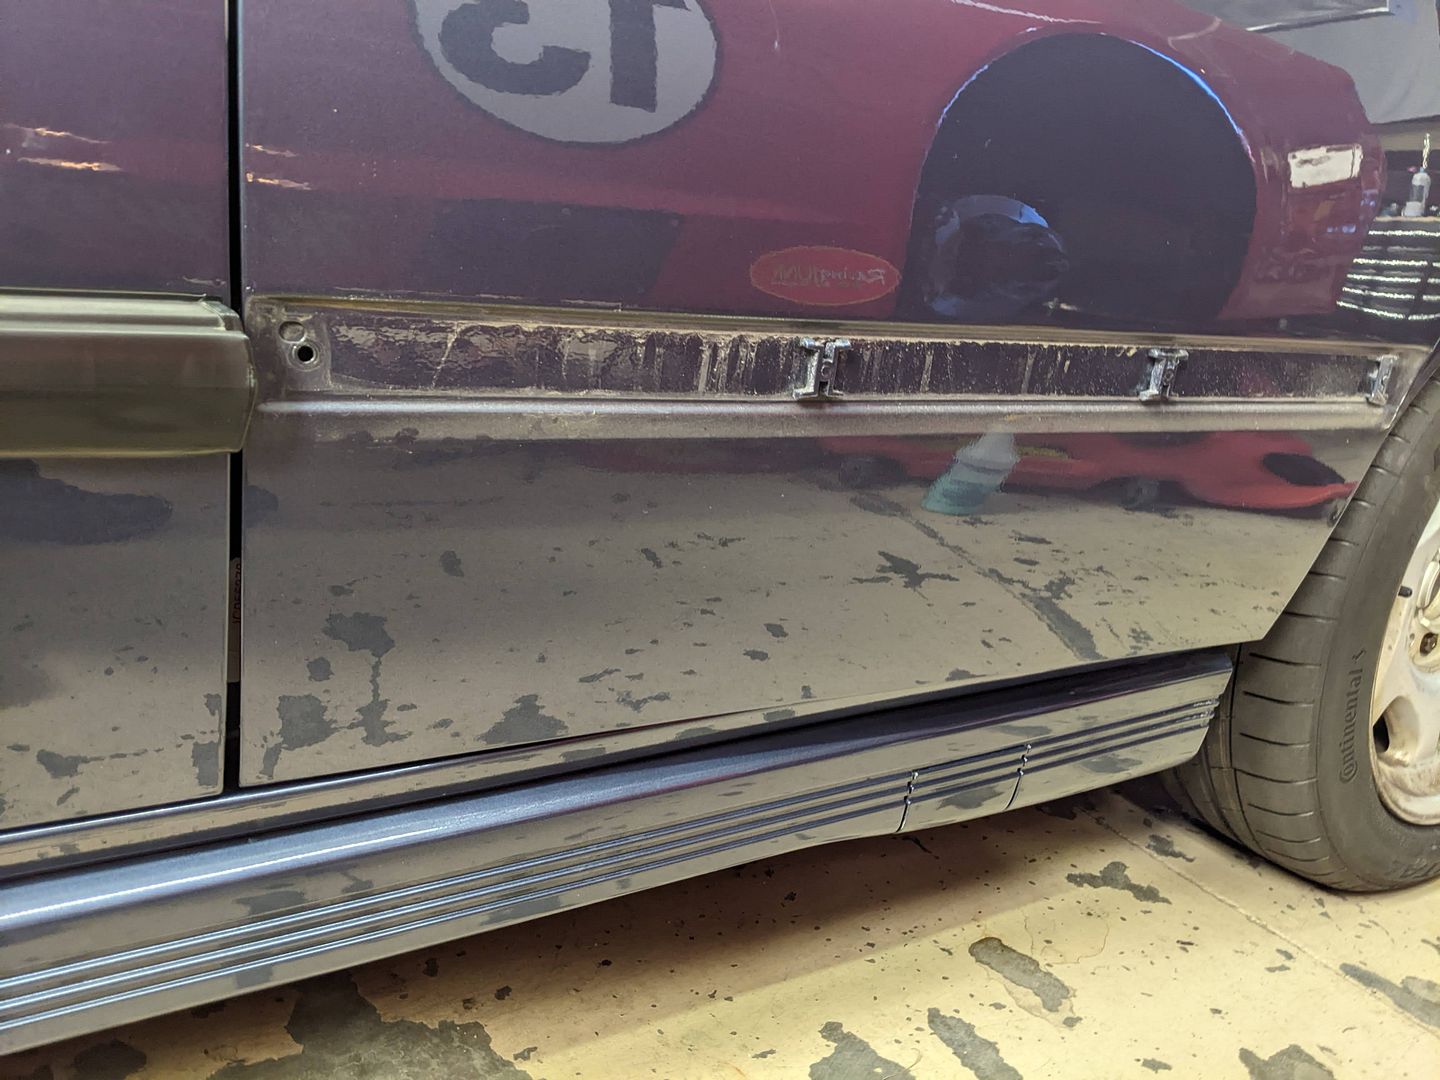
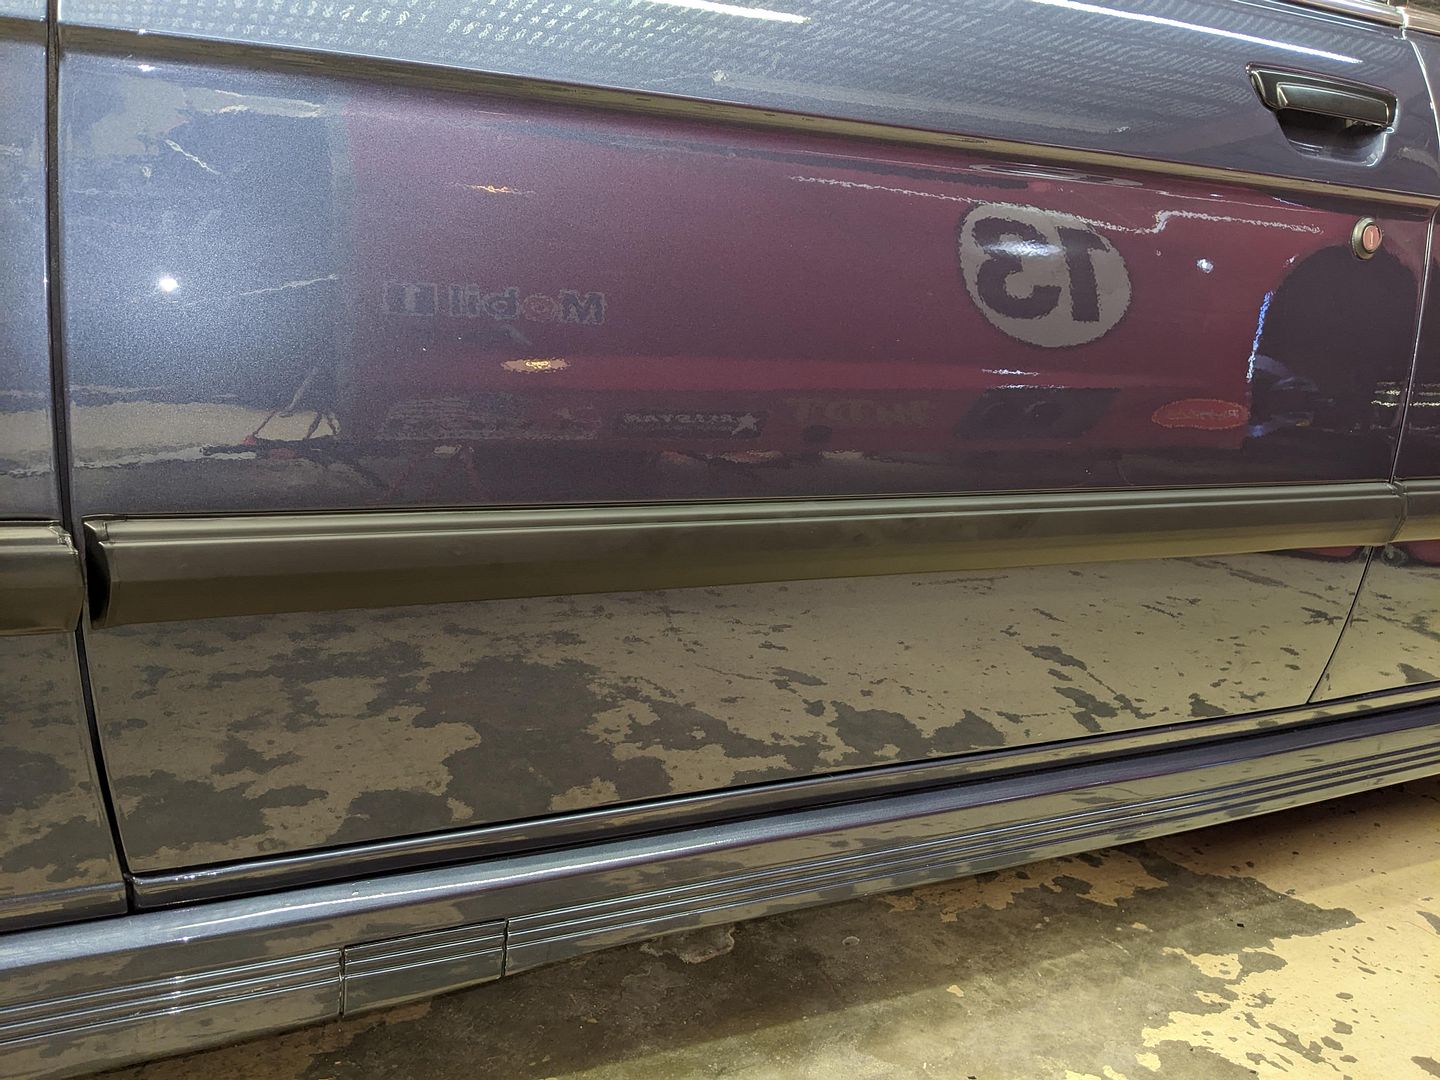
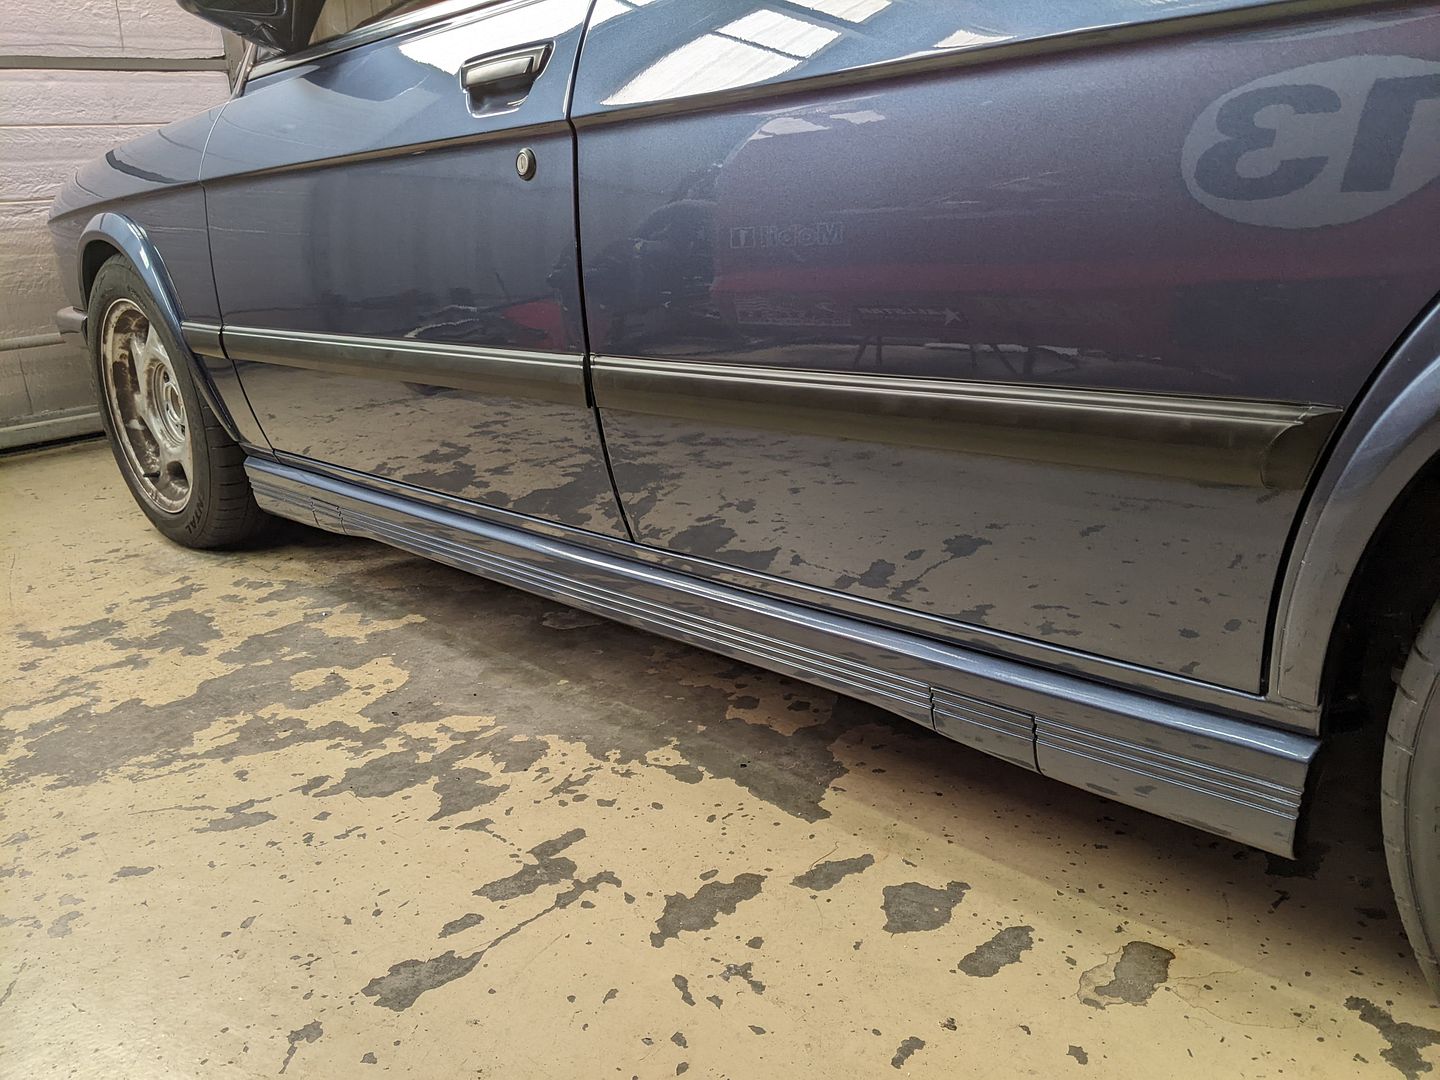
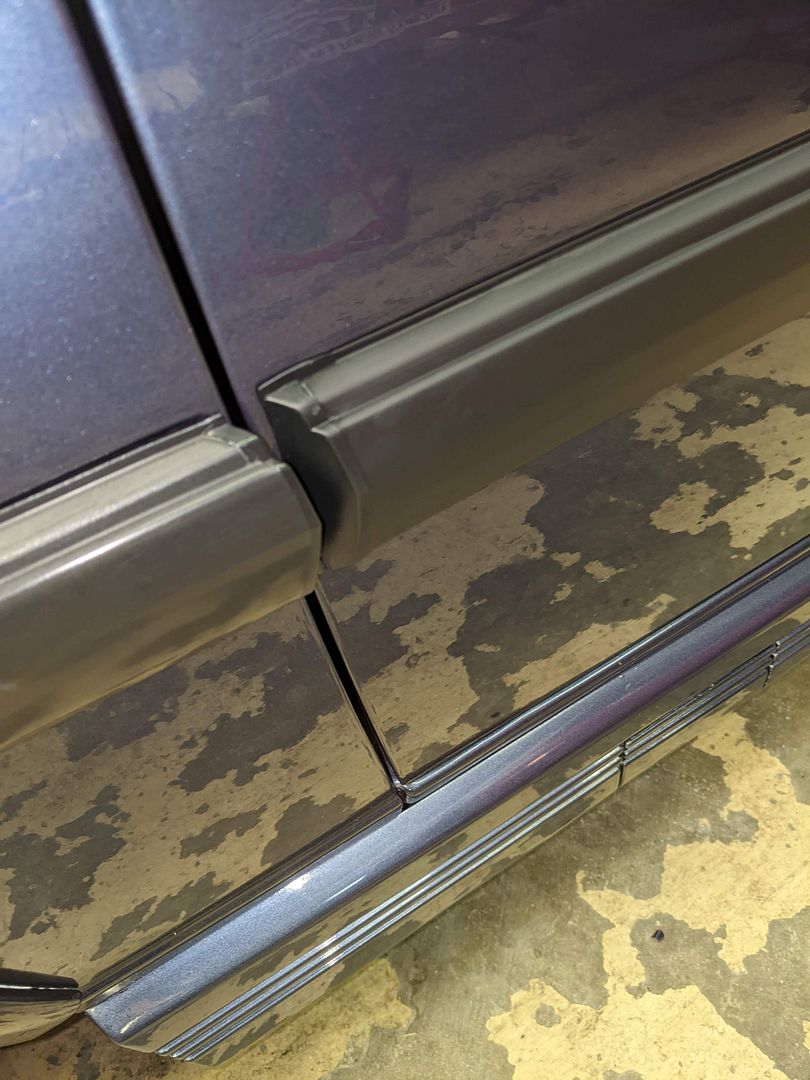
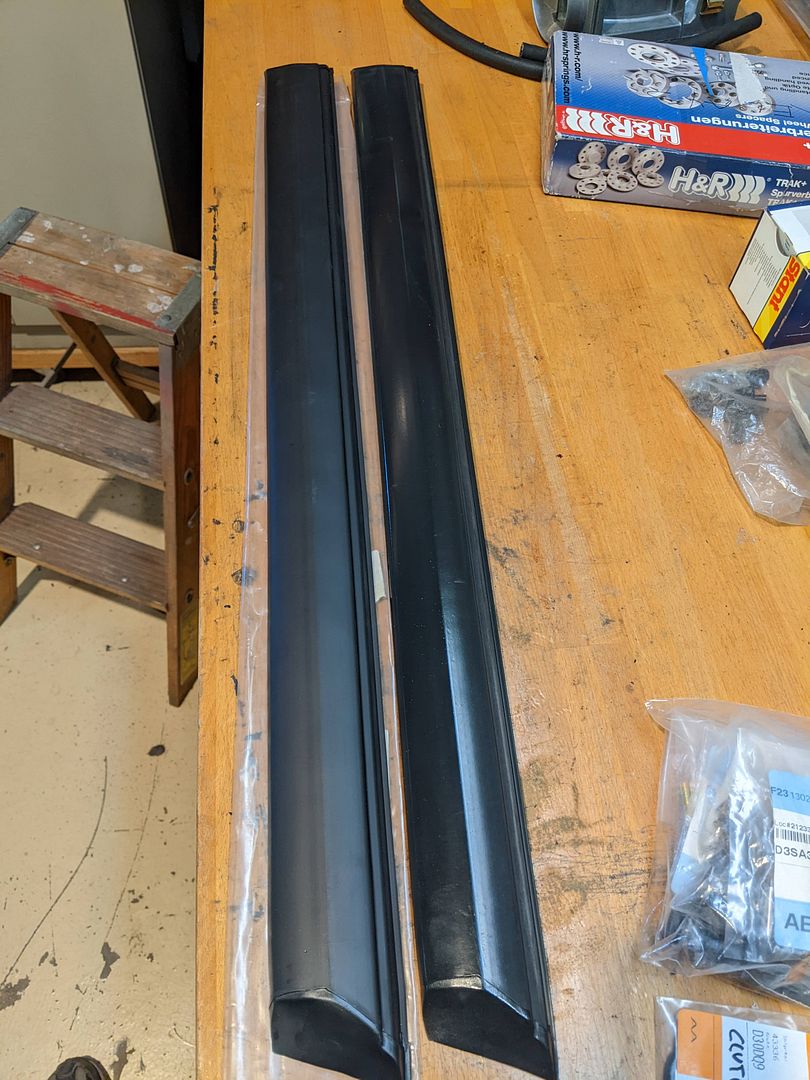
After 32 years those rubber edge guards were starting to show their age and wear. Multiple dings, scrapes, and general fading left these kind of dull looking and a bit distracting. No matter what refinishing and/or cleaning and treatments I did, I couldn’t restore them completely. On the M535i these are Shadowline trim so finding good replacements was next to impossible. Fortunately, these are still available from BMW; but unfortunately not all of them are available: missing are the Driver’s front fender and the Passenger’s rear door.
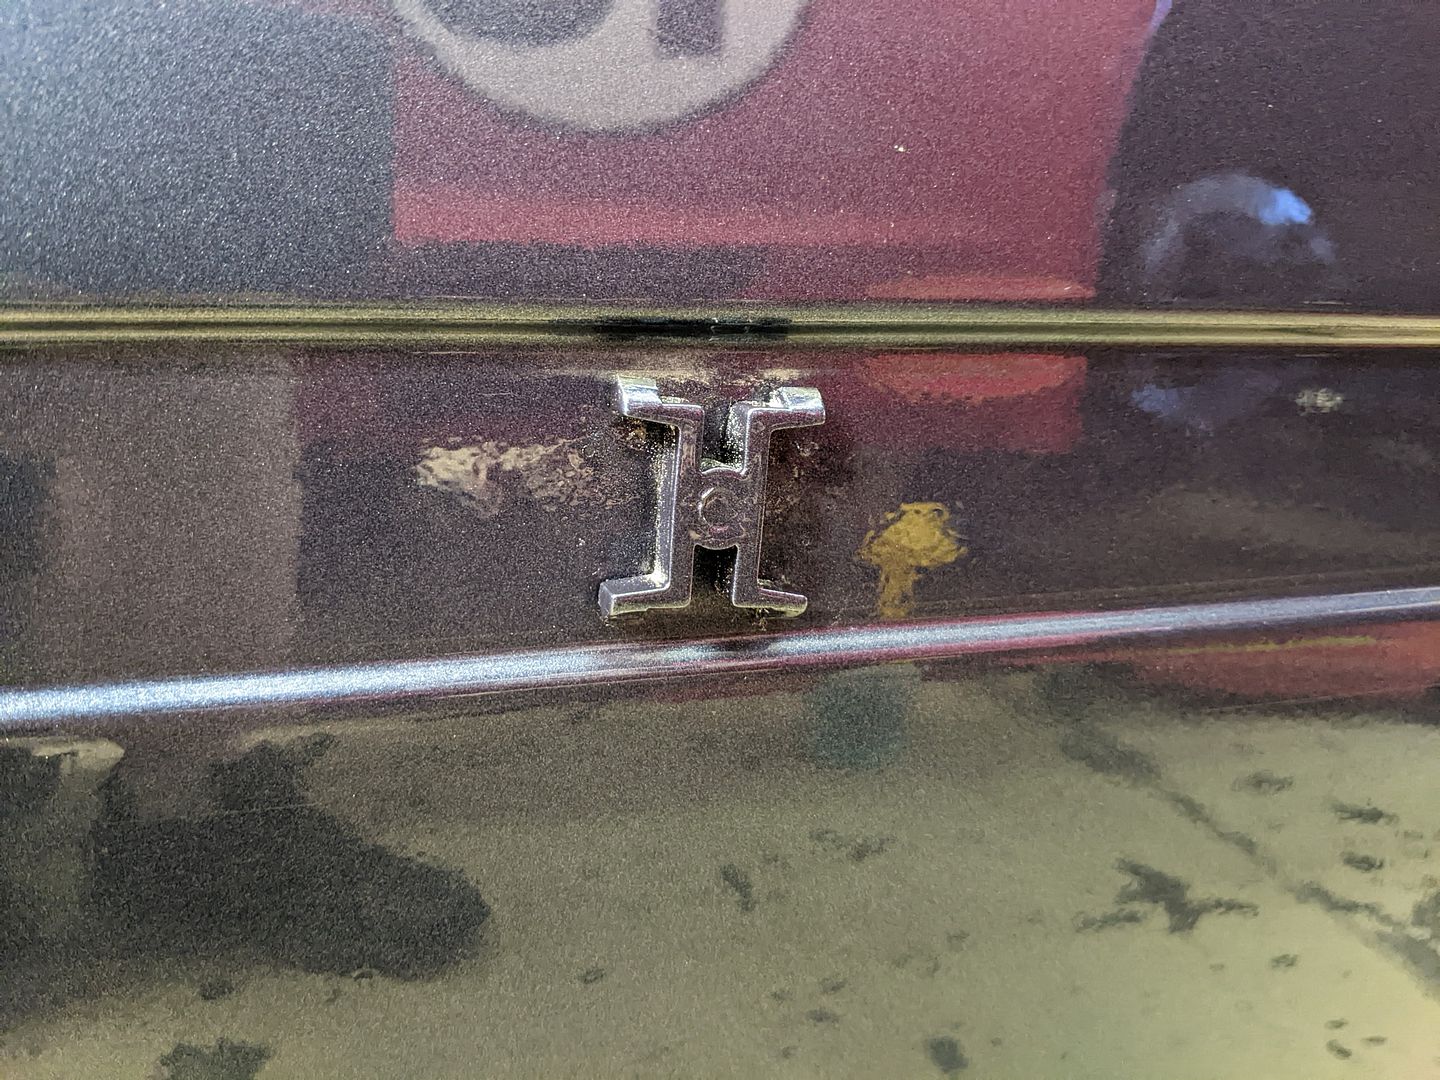
Replacing these is very easy actually as they are held in with just one plastic capture nut and some plastic clips on the door:
1) Open door, remove the plastic capture nut on the inside of the door edge at the back
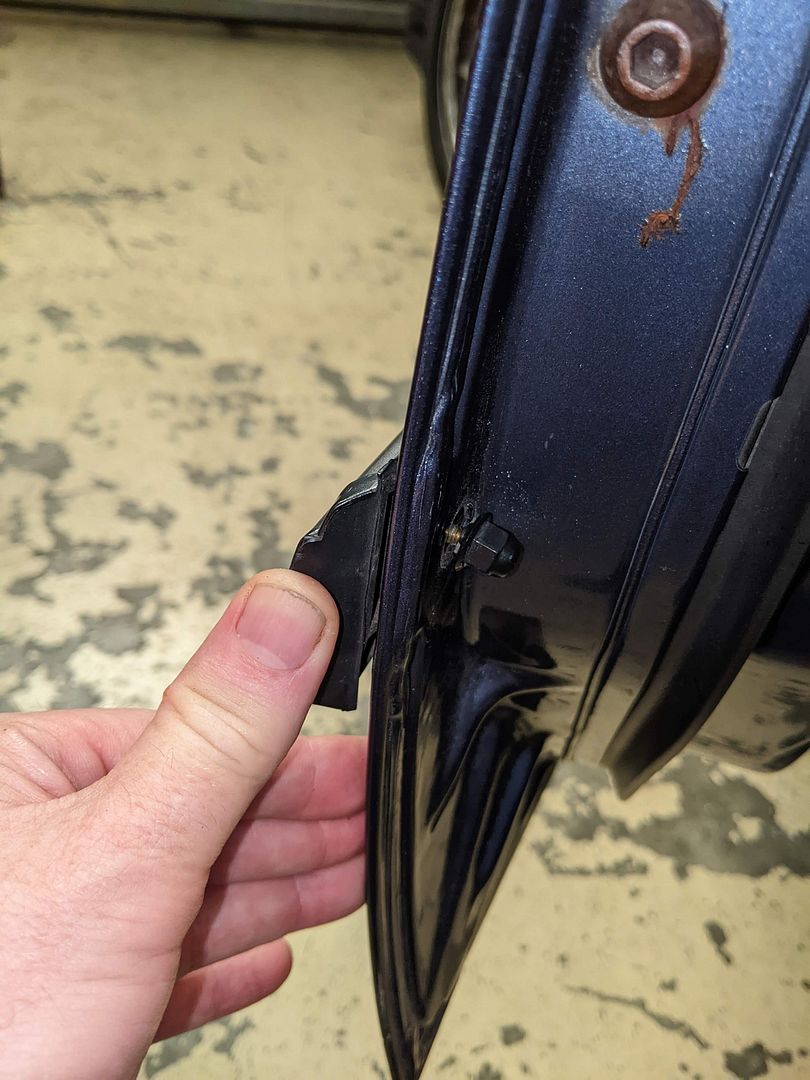
Image
Image

2) Gently pry off the edge guard with the correct plastic trim tools, they will pop off the clips with some concentrated effort
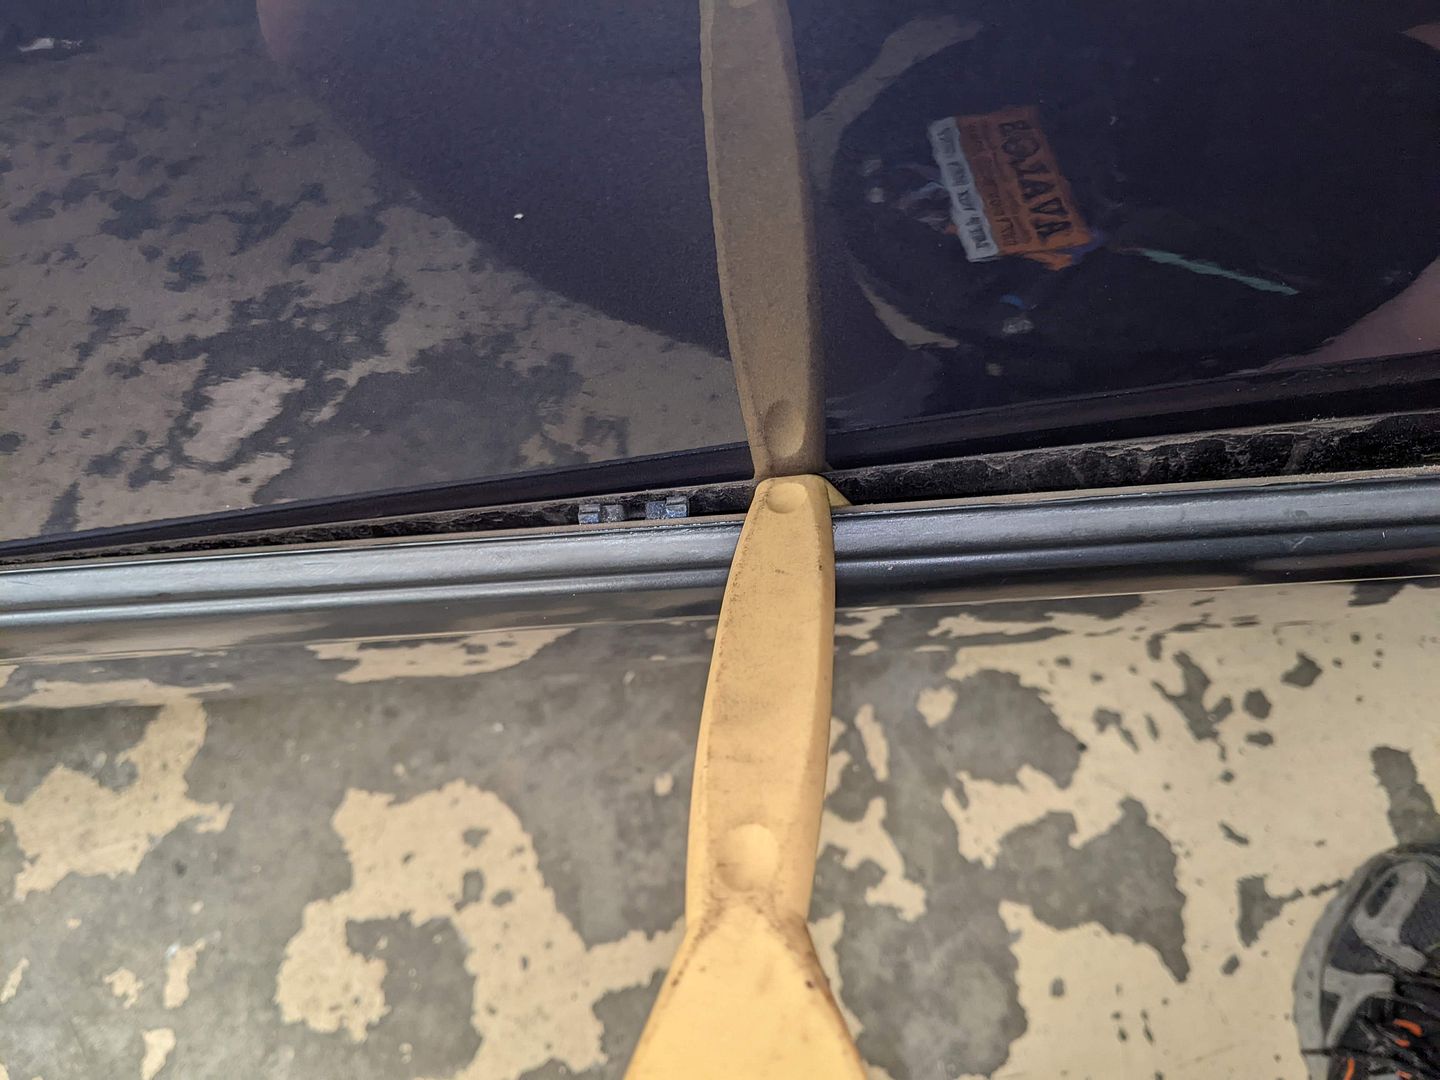
Image
Image
Image

3) Replace any retaining clips as needed, thoroughly clean behind them and prep the replacement edge guards (it’s a good idea to pre-thread the plastic capture nuts ahead of installation) as well as treating the new rubber. Mine were obviously not removed during the car re-paint in 1990-91(these are white and still available in bulk from BMW):
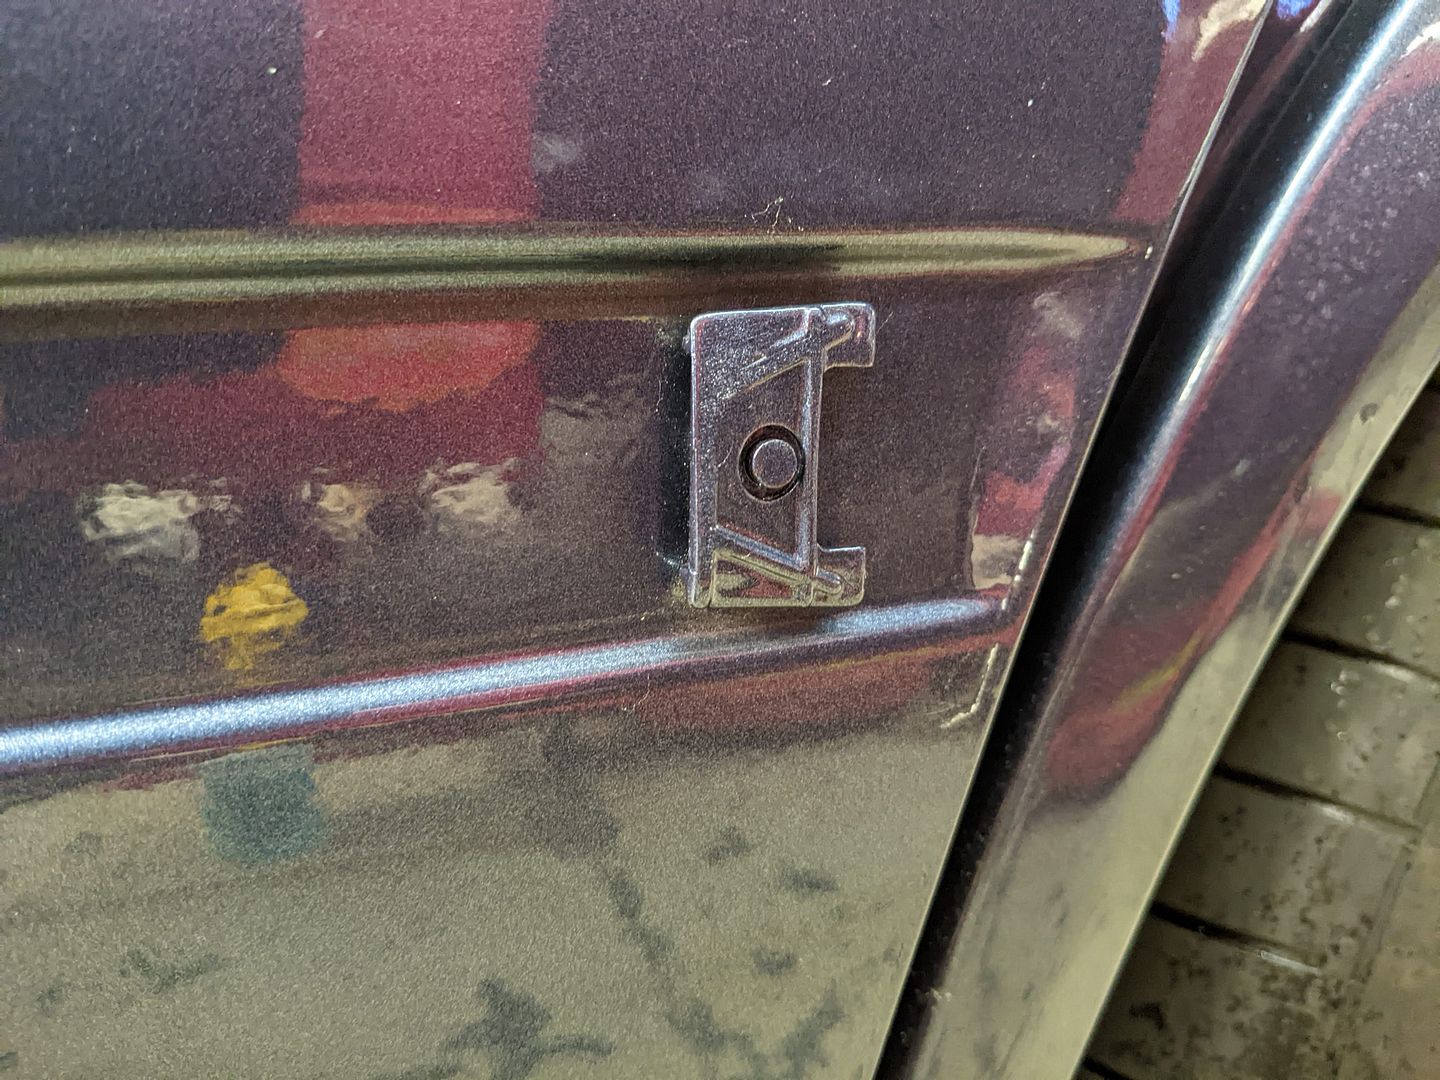
Image
Image

4) Install the new edge guard in reverse order.
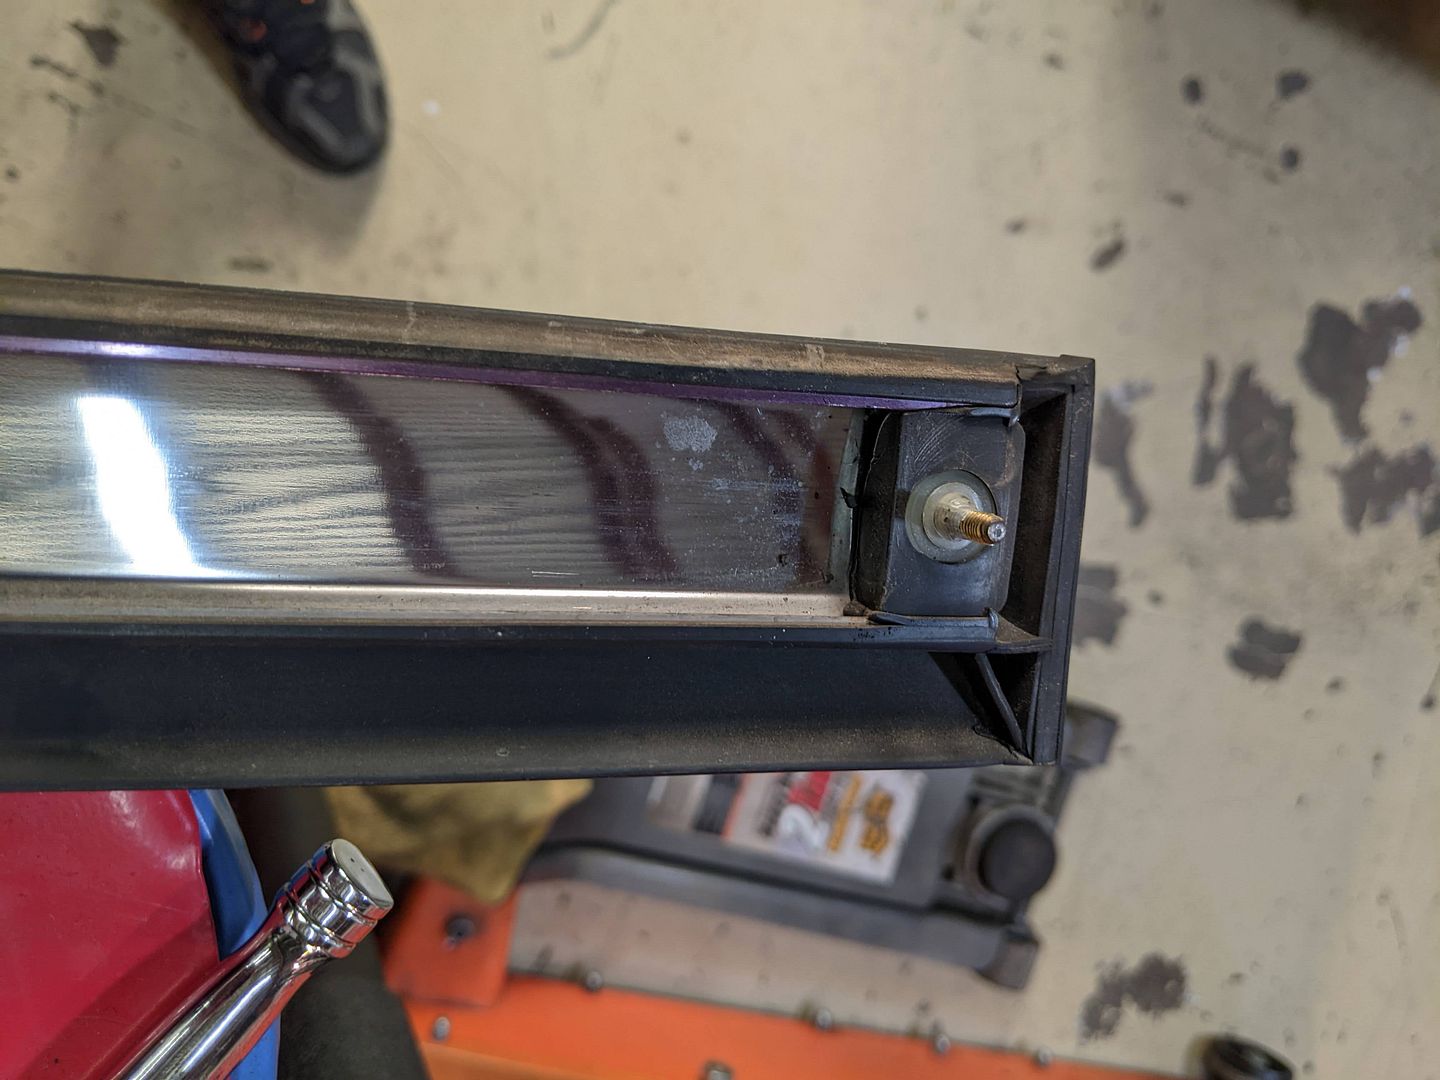
Image
Image
Image

However, that left what to do about the two pieces that couldn’t be replaced with new. The two choices were to source a good used part or refinish my old ones. I was able to find a pretty nice rear door strip which was actually better than mine (no dings).

I couldn’t find that front fender one to save my life. The issue with mine were mars and discoloration which I couldn’t do anything with by simple means; it was going to require more aggressive means. One of the issues to overcome was the texture differences between the new rubber and that of a 32-year-old piece; the older ones have usually been worked smooth while the new ones have the tooth and luster of new rubber. Duplicating that finish to match the other 4 new pieces was going to take some work

Re-Finishing:
1) First step was to strip all the finish and product out of the two pieces. Scrubbing them down with degreaser and soap then soaking them in said solution to leech out as much as possible
2) Second is a firm couple passes with an acetone soaked rag. This burns in a new layer of rubber, one that has tooth
3) Third step was a light couple of passes with 220 wet sandpaper, then progressively down to 600 grit. The trick is to not to polish the rubber too much, you need to leave texture in your wake.
Image
[URL=https://hosting.photobucket.com/images/ ... fit=bounds]Image
Image

4) Next was to put back something to restore the rubber and get the color back. I tried out the myriad of the many, many different rubber treatment products in my cabinet on one of the old trim pieces. I finally settled on this one: Trim Restorer:
Image

It was less a topical cover like Back To Black and some others; it actually soaks in while leveling out the finish and matches the luster of the new rubber. It takes some practice in application so as not to leave streaks and get even coverage. Let it soak in for as long as you can (6, 12, 24 hours or longer). Lightly buff it in one direction with a clean microfiber to remove any excess and even out the finish. It may take a few coats. If you leave streaks you have to strip it off with acetone and start over. Since I don’t wash the car down with water & soap nor does it sit out in the rain and sun, time will tell how long this finish lasts.
Coincidentally I tried a similar process on the rubber M-Tech Rear Spoiler rubber lip, that is a work in progress. (More and that soon).
vinceg101
Posts: 4982
Joined: Jun 20, 2007 2:40 AM
Location: Los Angeles, CA

Re: 1985 Arktisblau M535i Renovation - Progression

Post by vinceg101 »

MORE 2023:
Transmission Repairs:

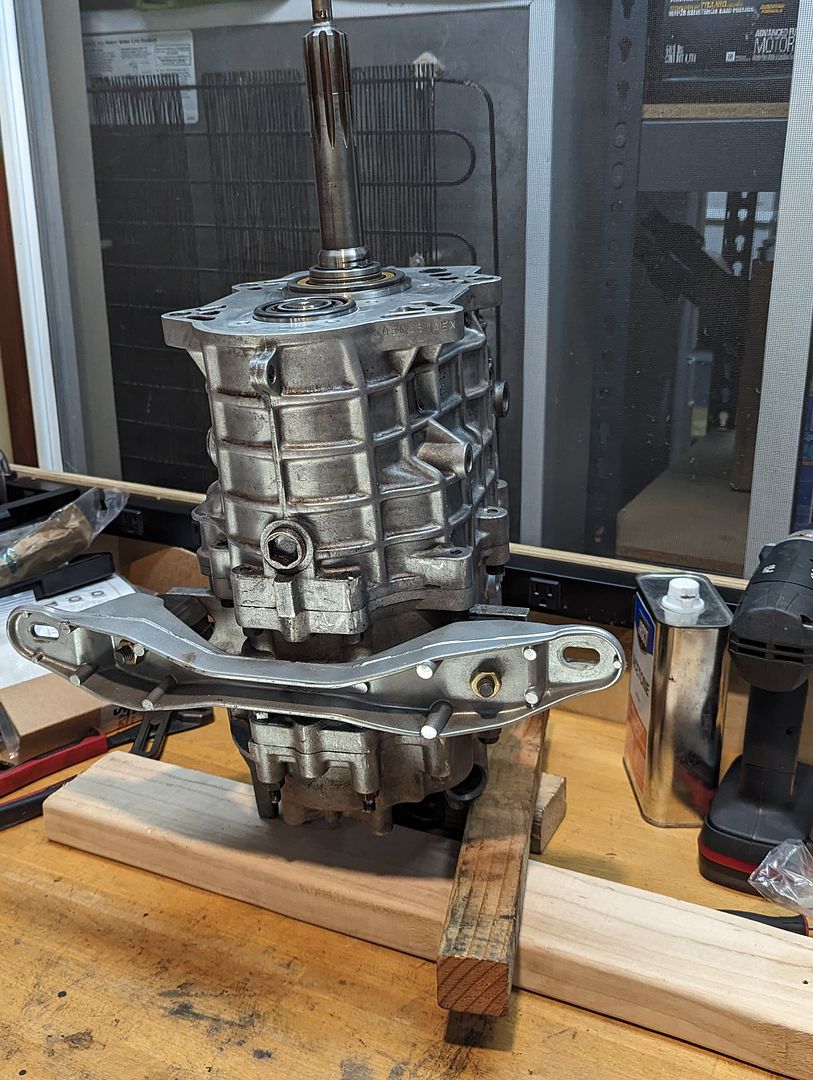
Okay that leads up to the last item I did just before the holidays: Transmission troubleshooting. This has been on the Punch List since 2016 when I did the last big mechanical work. I have a Getrag G265/6 Overdrive unit in this car (this is actually the third such unit this car as seen since it was converted to manual back in 1989/90). The big issue is the trademark signature of these older transmission: excessive internal Bearing noise. Derogatorily known as the “Death Rattle” and is most noticeable when in neutral and the clutch out. It actually doesn’t automatically mean the unit has failed as it can usually go for years in this state under normal or light driving conditions. But it does get progressively worse, as my current one is doing.
The big culprit for the G265/6 is the wearing of the Input Shaft Bearing (ISB); FAG made these for BMW and they discontinued making them decades ago. The versions for the /6 are unique to these so any old replacement is insufficient and they are next to impossible to find any NIB. There are whole threads on this issue, so I won’t go into too much of the R&D for solutions and/or sourcing, except to say that my partner-in-crime Ralph came up with a temporary fix that seems to relieve and lessen the rattle noise.
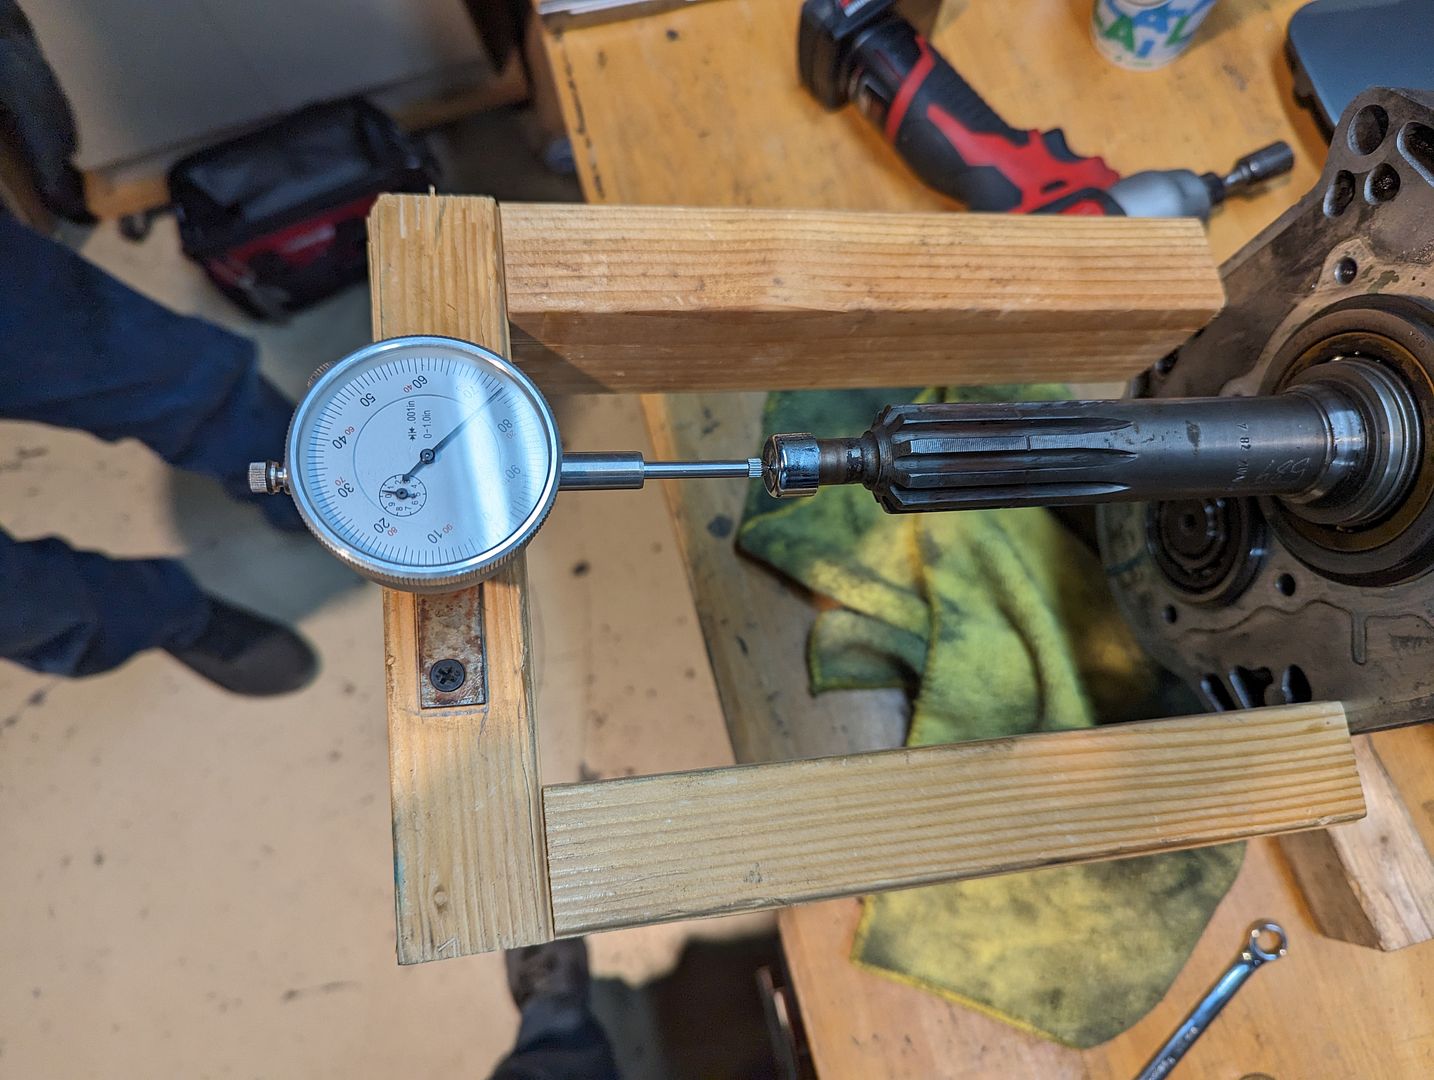
It involves replacing the shims around the Input Shaft just outside the ISB; BMW employed a set of steel shim snap rings of varying thicknesses in order to take up the play in the shaft (it’s almost as if they knew there would be a need for this in the future as the bearings wear out). Luckily all the thicknesses are still available so it would be a matter of determining which one to employ.
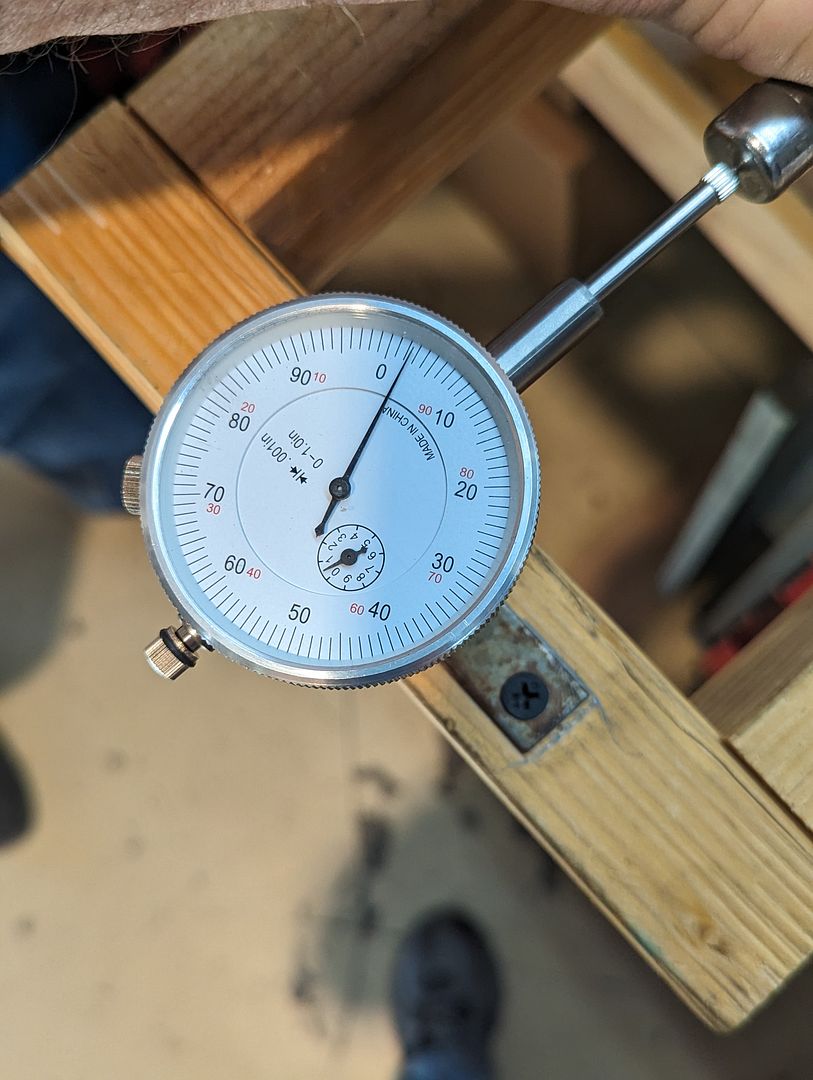
Ralph fabbed up a crude tool to measure the play (shaft in/out) and matched that to one of the shim thicknesses I picked up. As you can see when we started, there was quite a bit of play:
Image
Image

Replacing these shims is somewhat fairly straight-forward with the biggest PITA is the removing/re-installing the transmission itself. Having a lift makes this infinitely less of a PITA, especially for middle-aged men like Ralph & I (all that lying on a concrete floor working on our backs, oy).
Once out and on the bench:
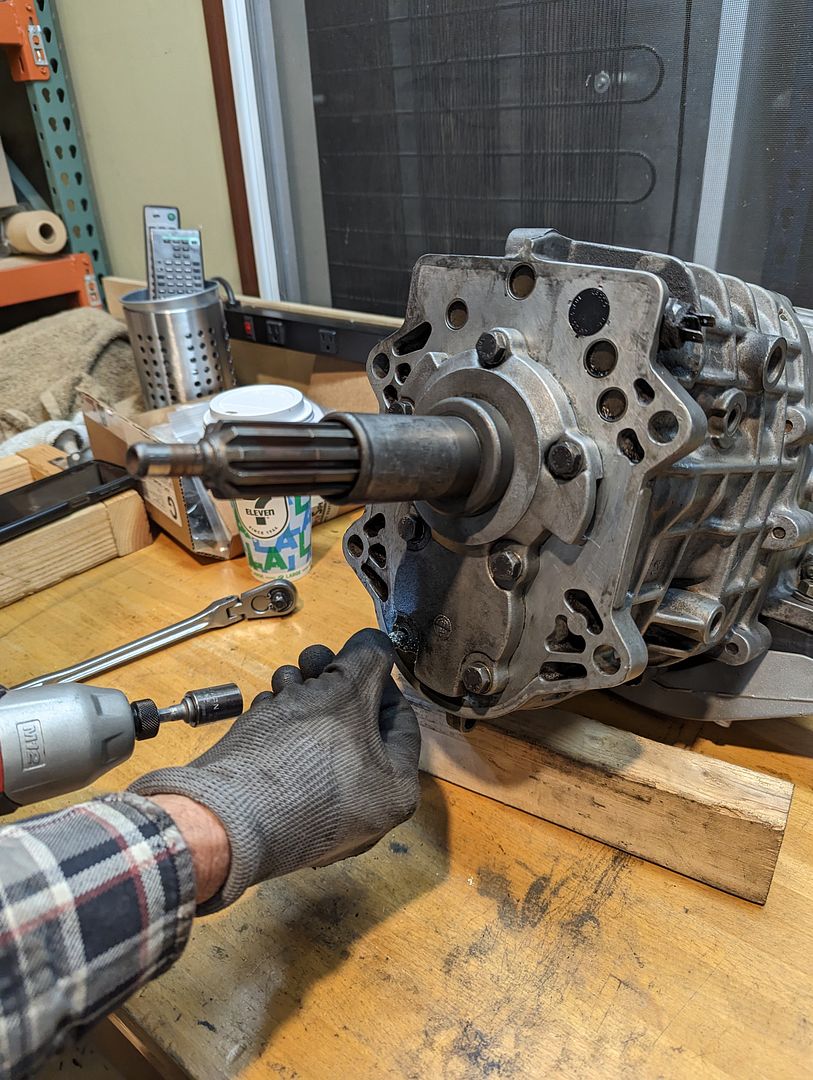
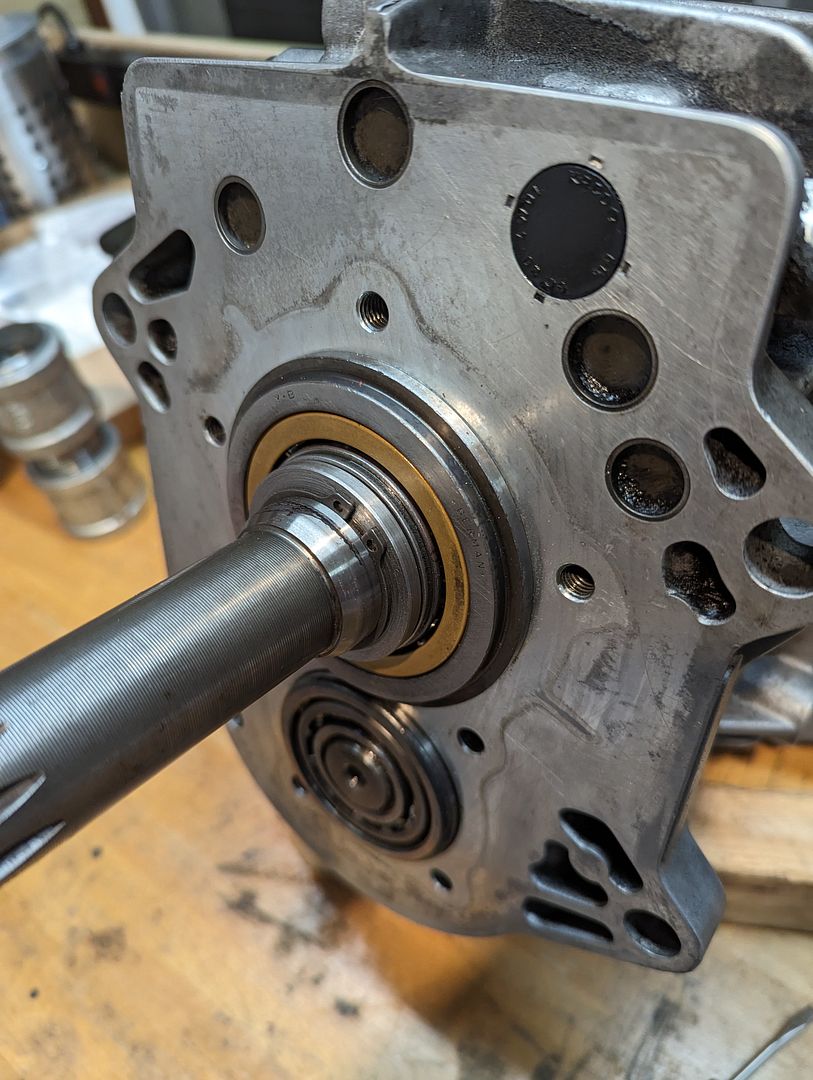
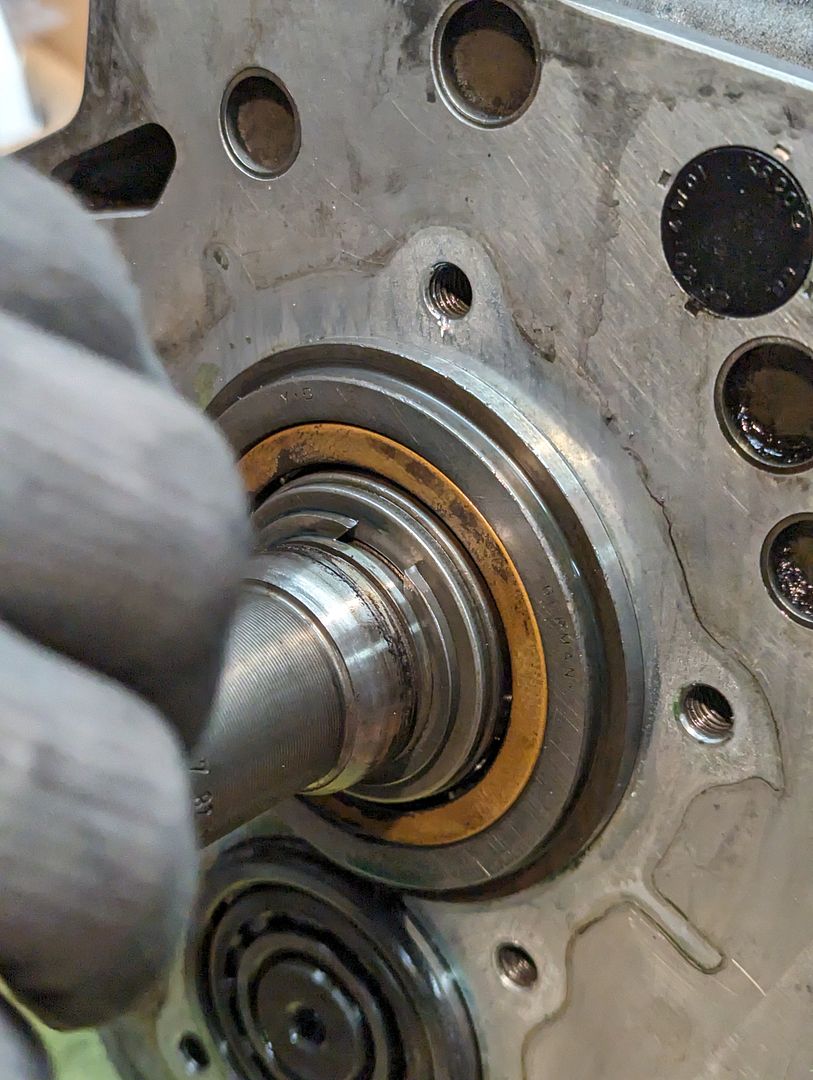
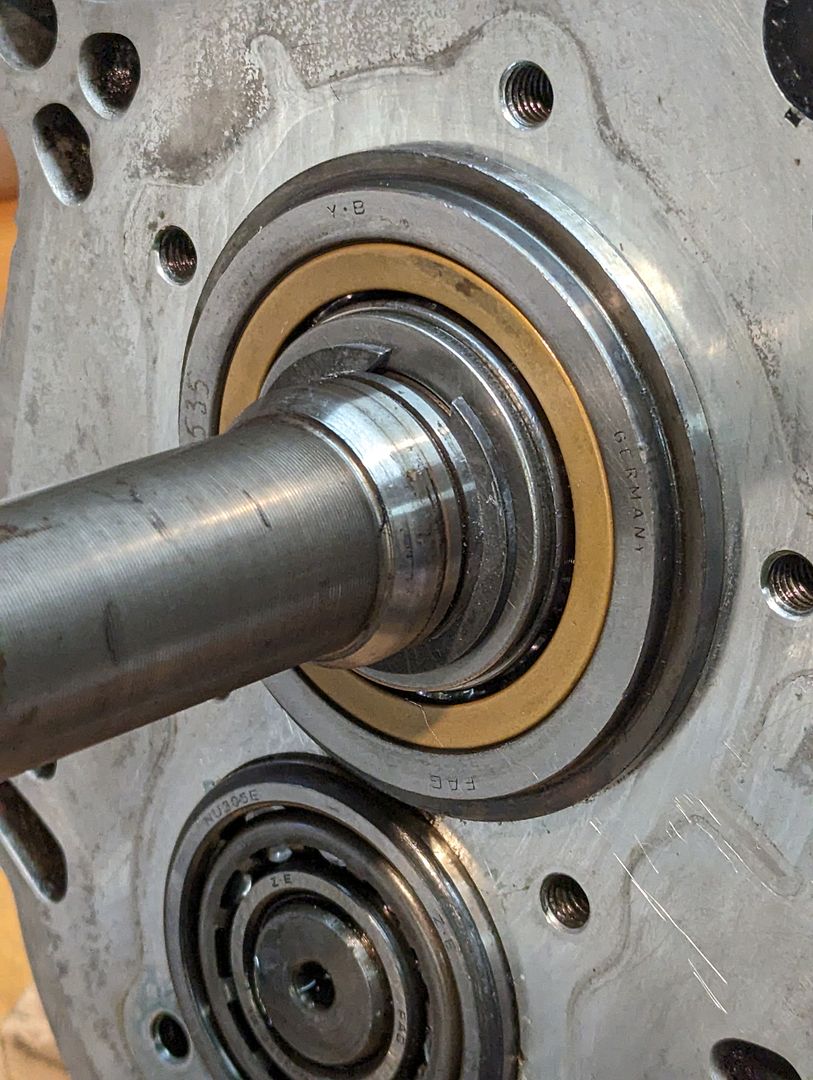
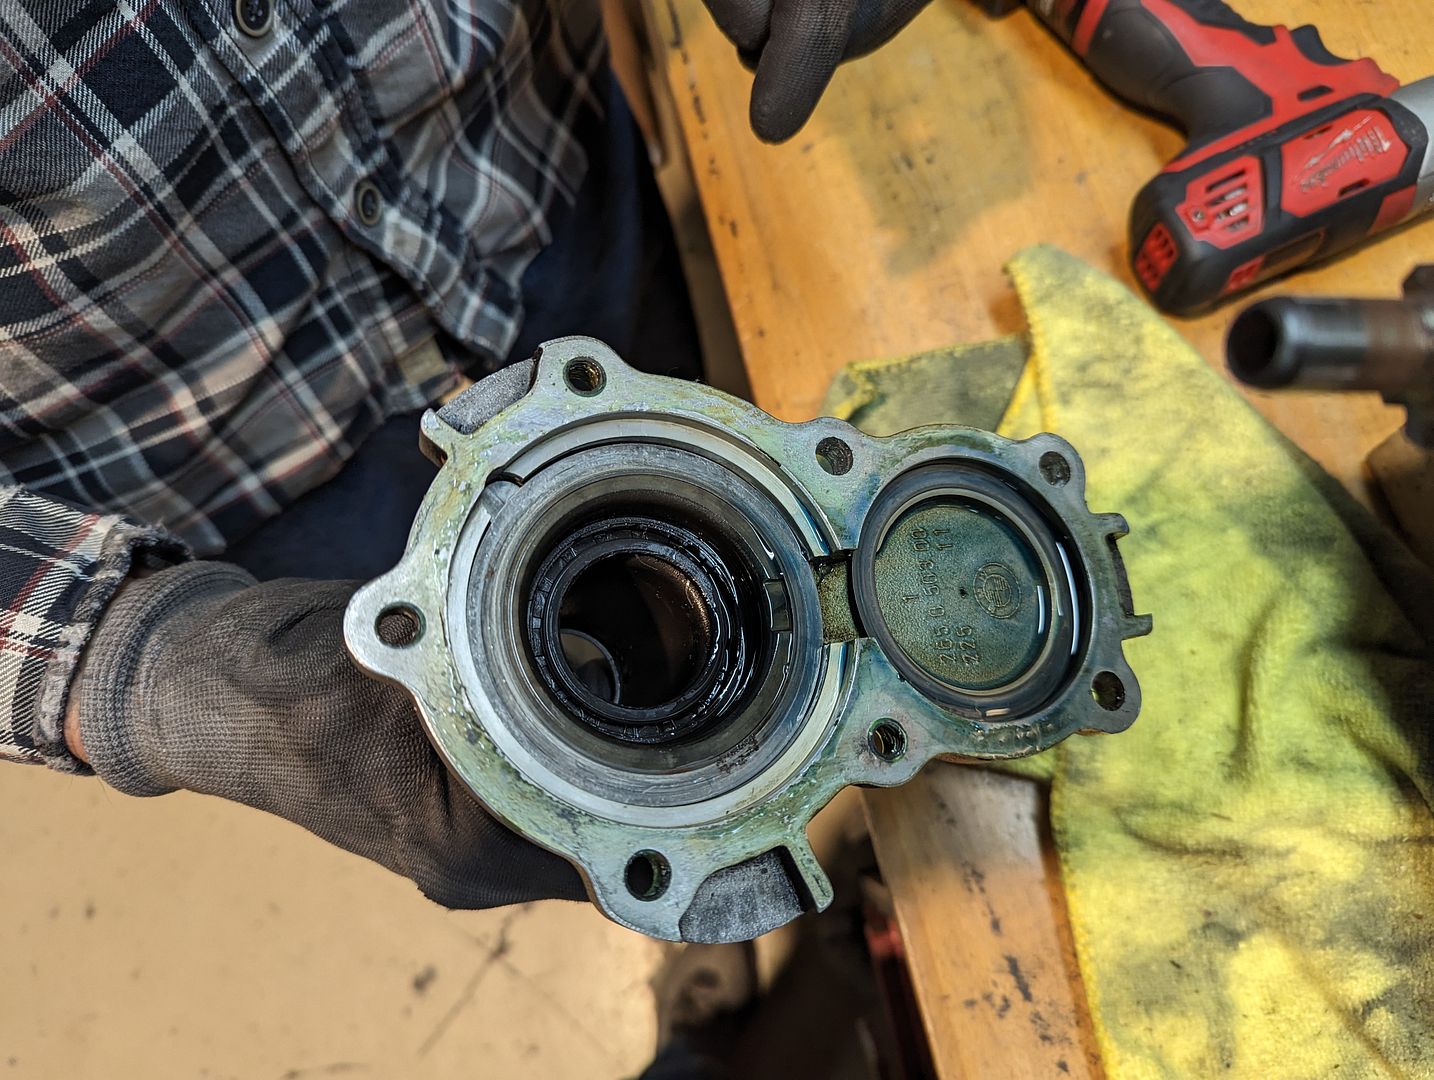
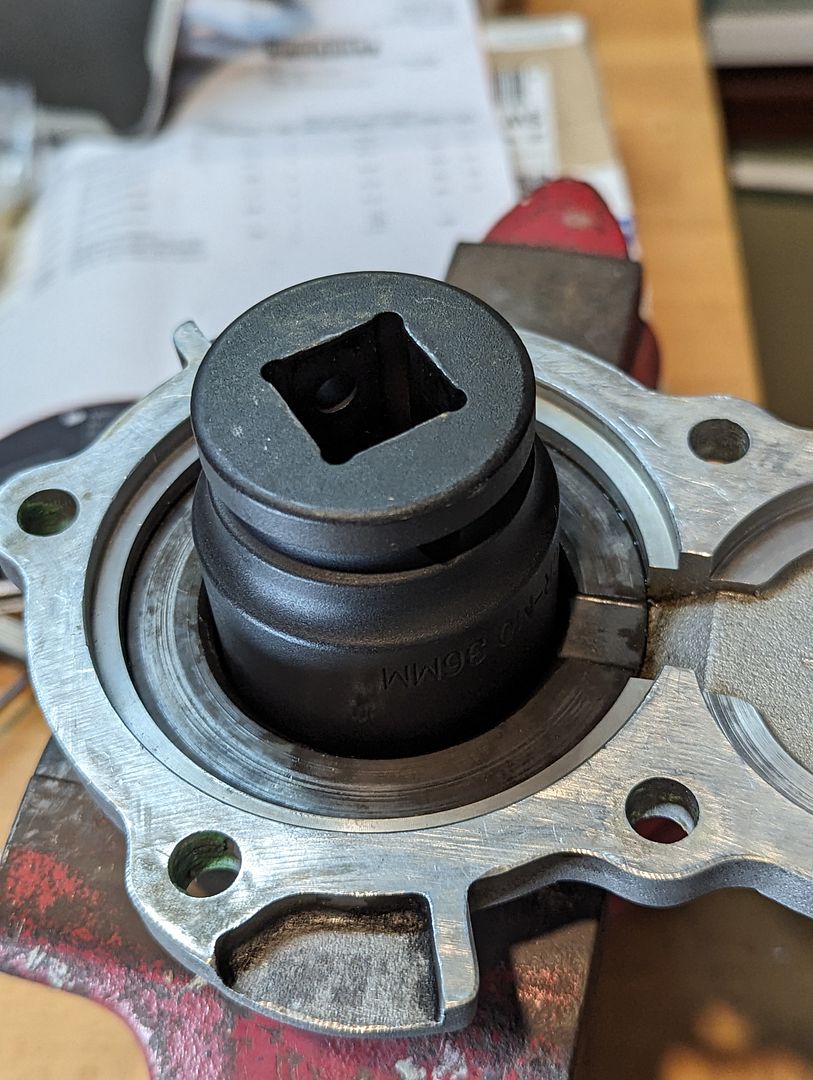
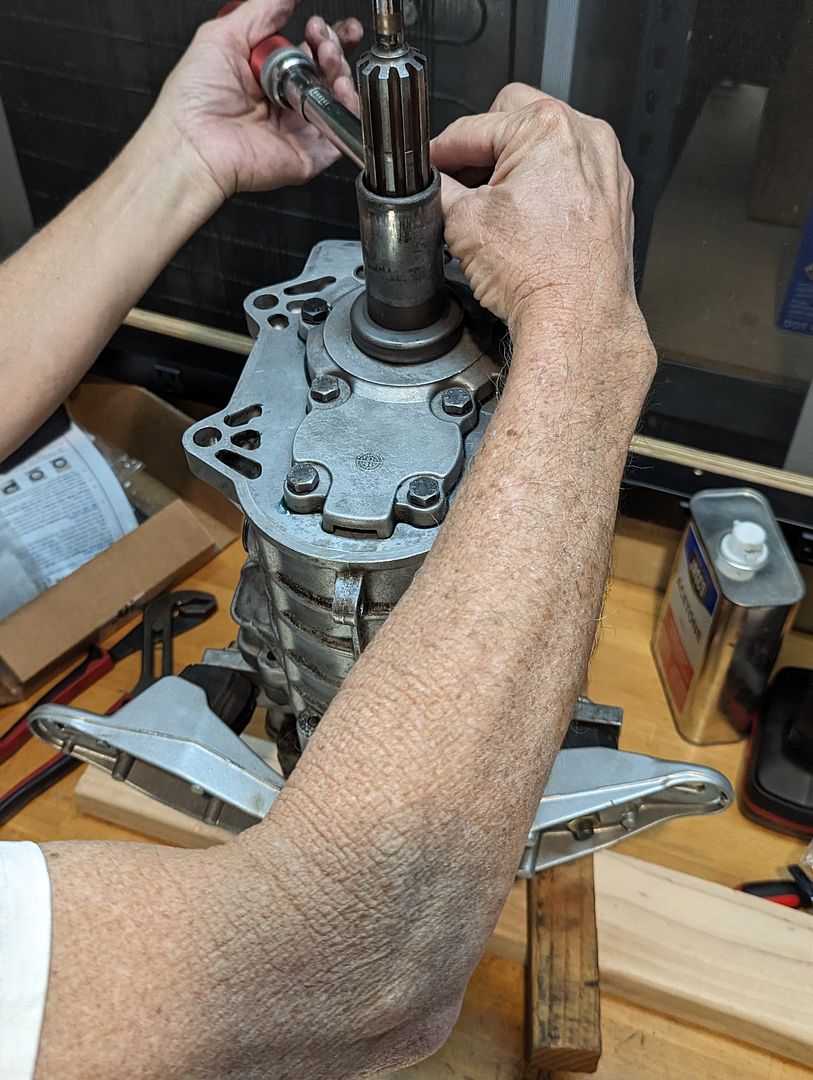
1) Remove the front cover that surrounds the Input Shaft. This exposes the shims, protection rings and the ISB itself (it’s the big thing at the back with the brass ring)
Image
Image
Image
Image

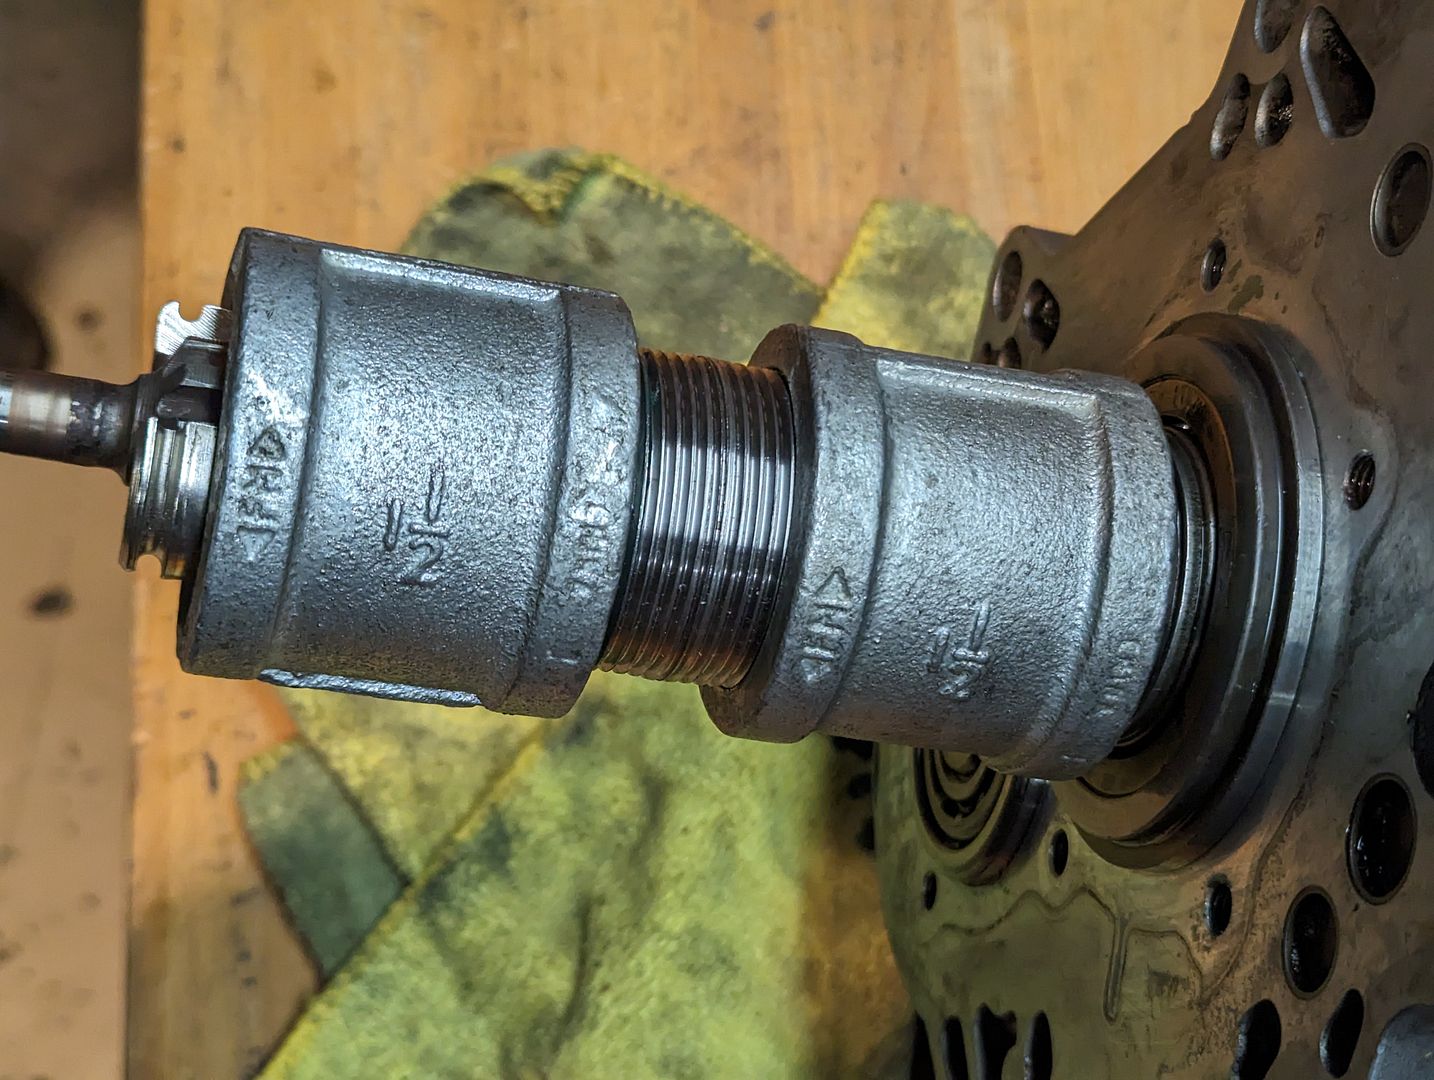
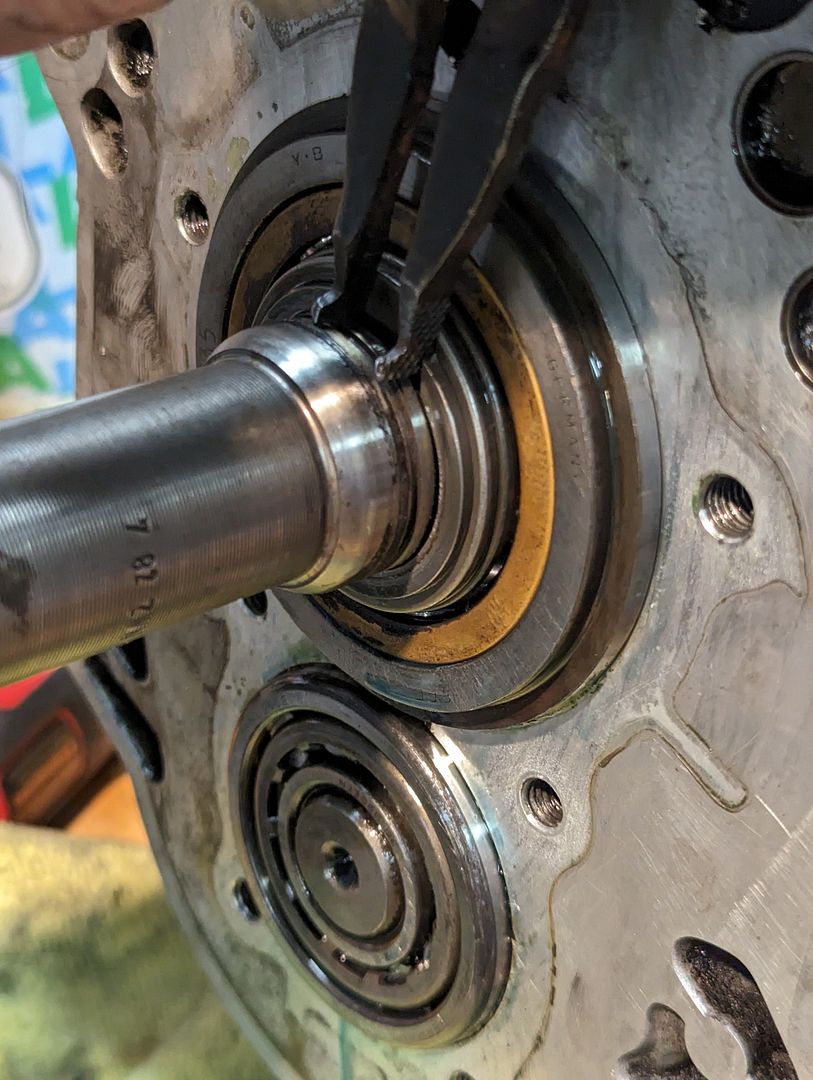
2)Now comes Ralph’s other tool: a set of simple pipe fittings to compress the shims and spacer rings back to relieve the tension and fully expose the shim ring we’re after. Without this, no snap ring plier in the world will be able to get that ring out. You’re going to maul this getting it out so don’t sweat it
Image
Image

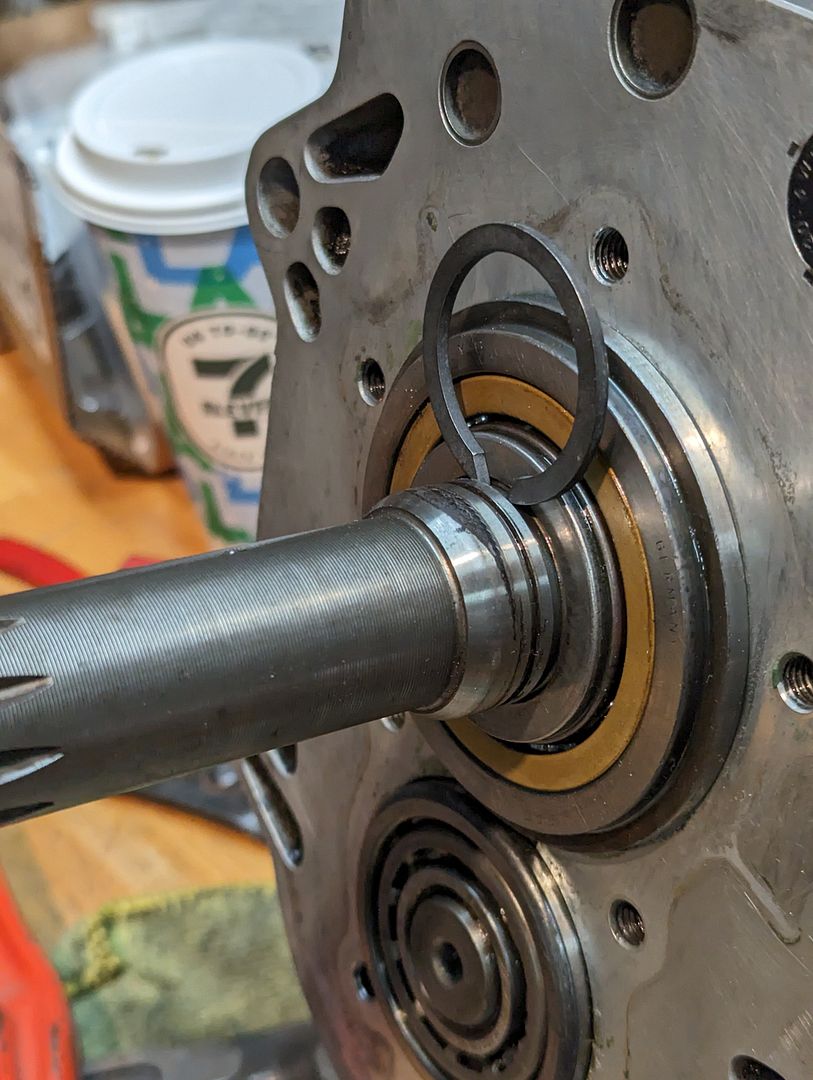
3) Chose the appropriate replacement shim and begin to install it; it too will take some effort without damaging it or the surrounding components
Image
Image

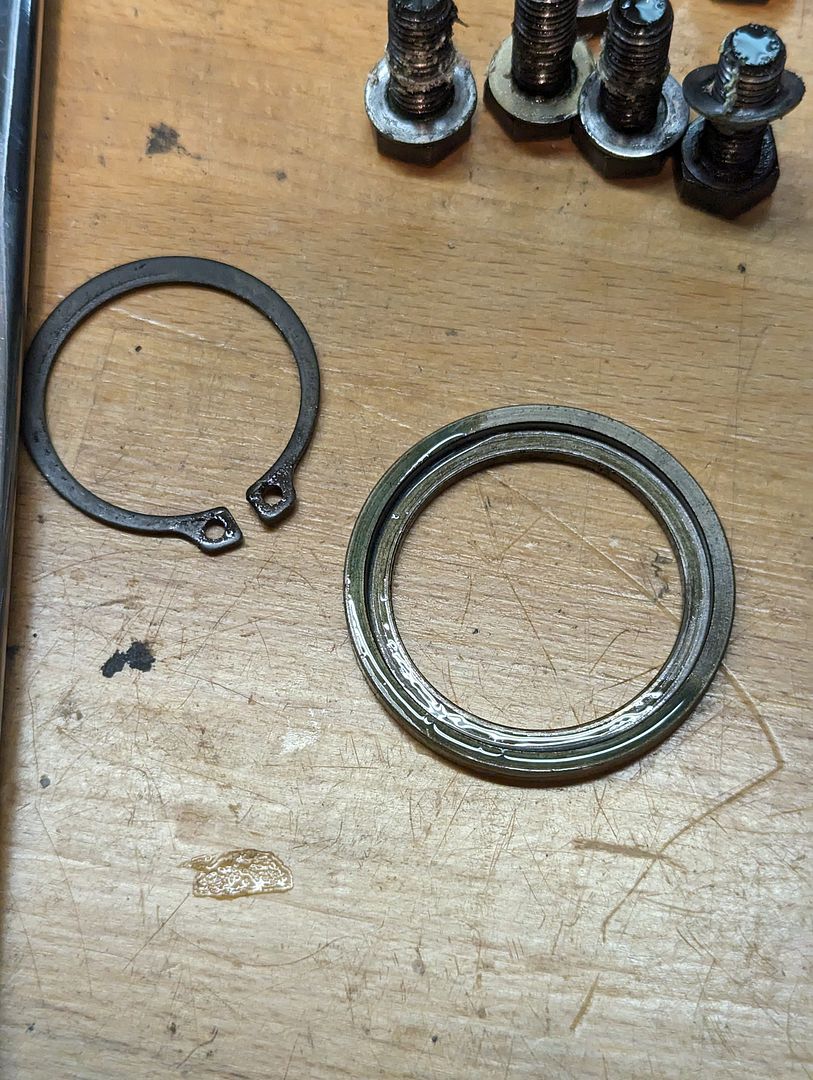
4) Re-install the old cover cap (this part is NLA so don’t damage it), a new outer snap ring and you’re done.

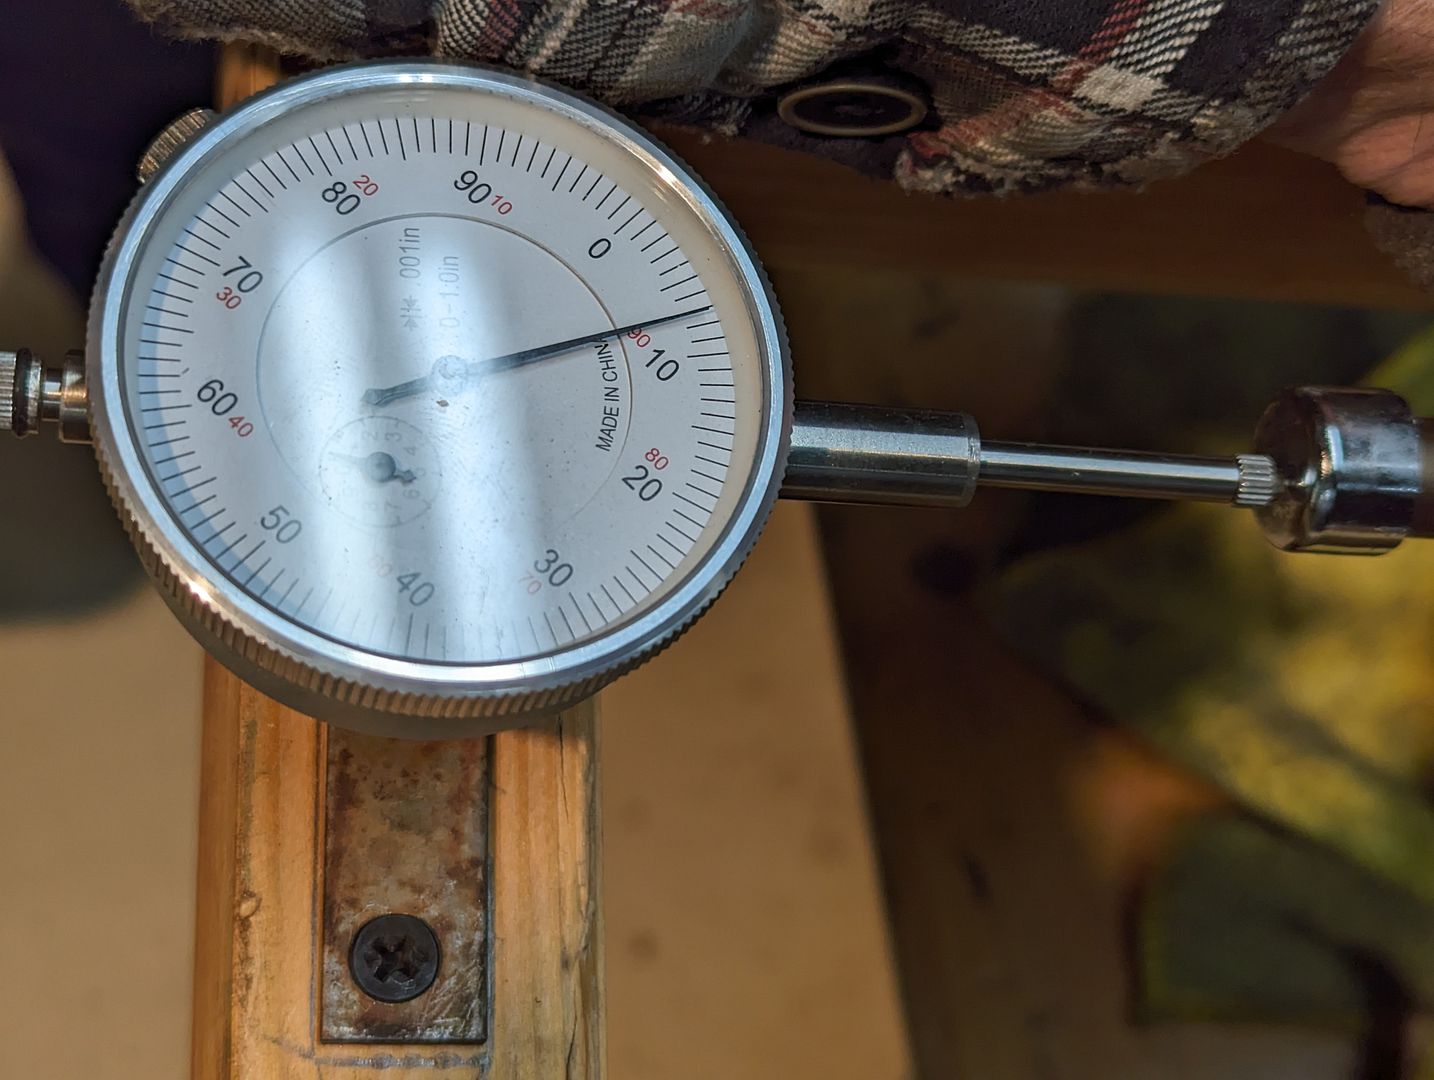
After shim replacement, we got the play down considerably:
Image

Outer Cover:
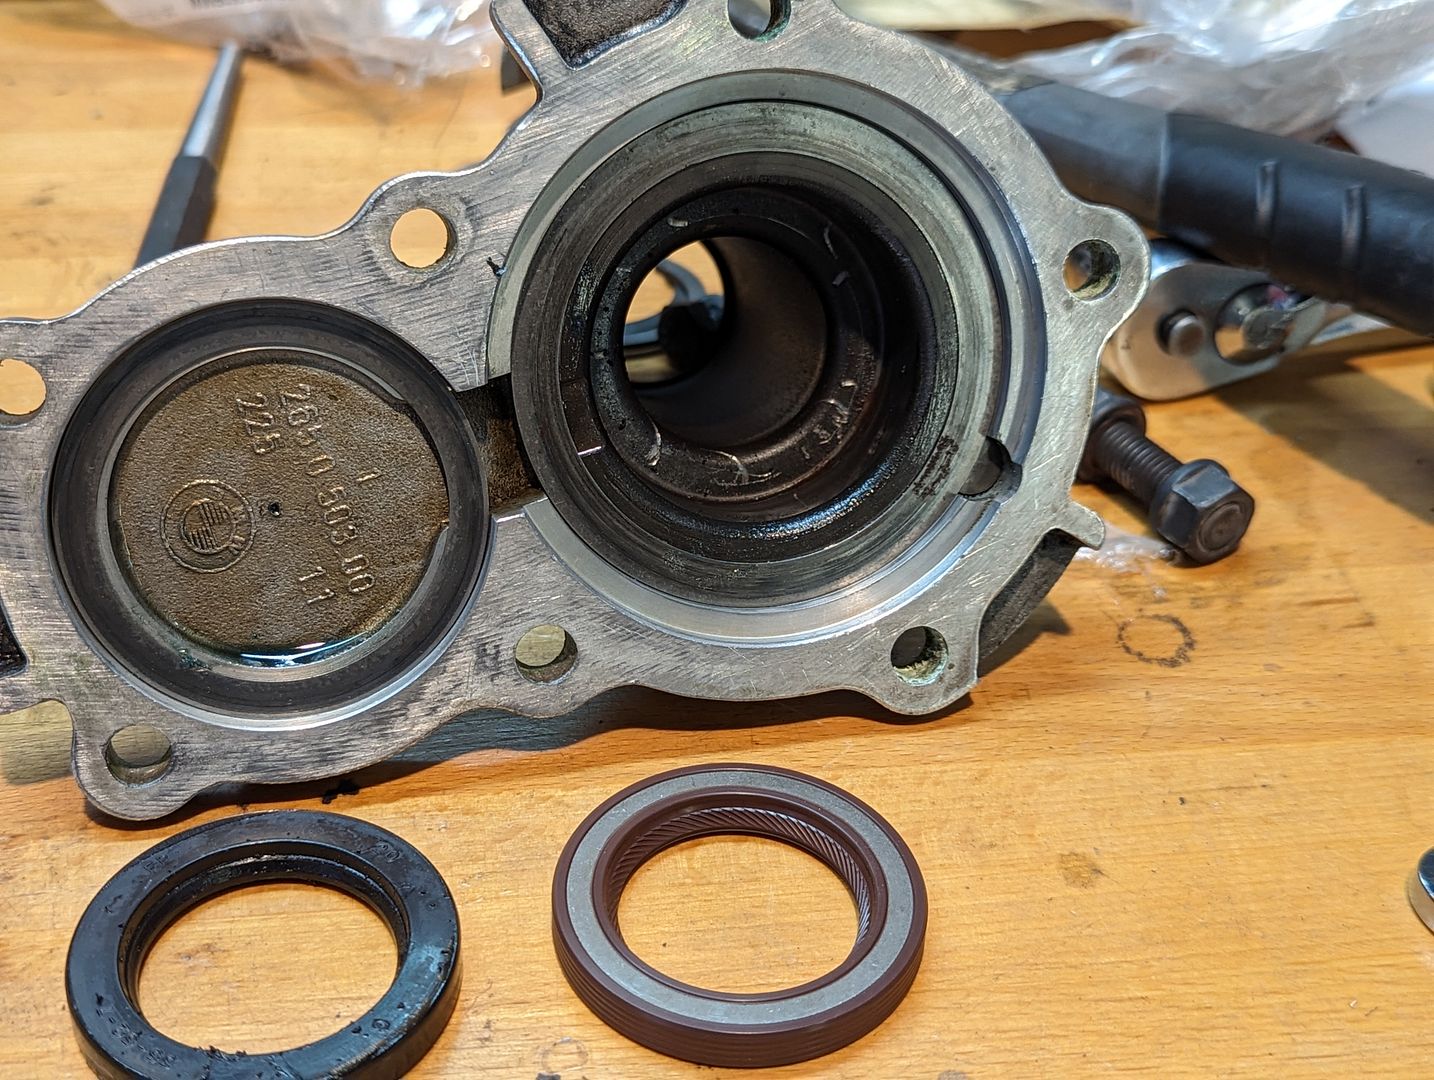
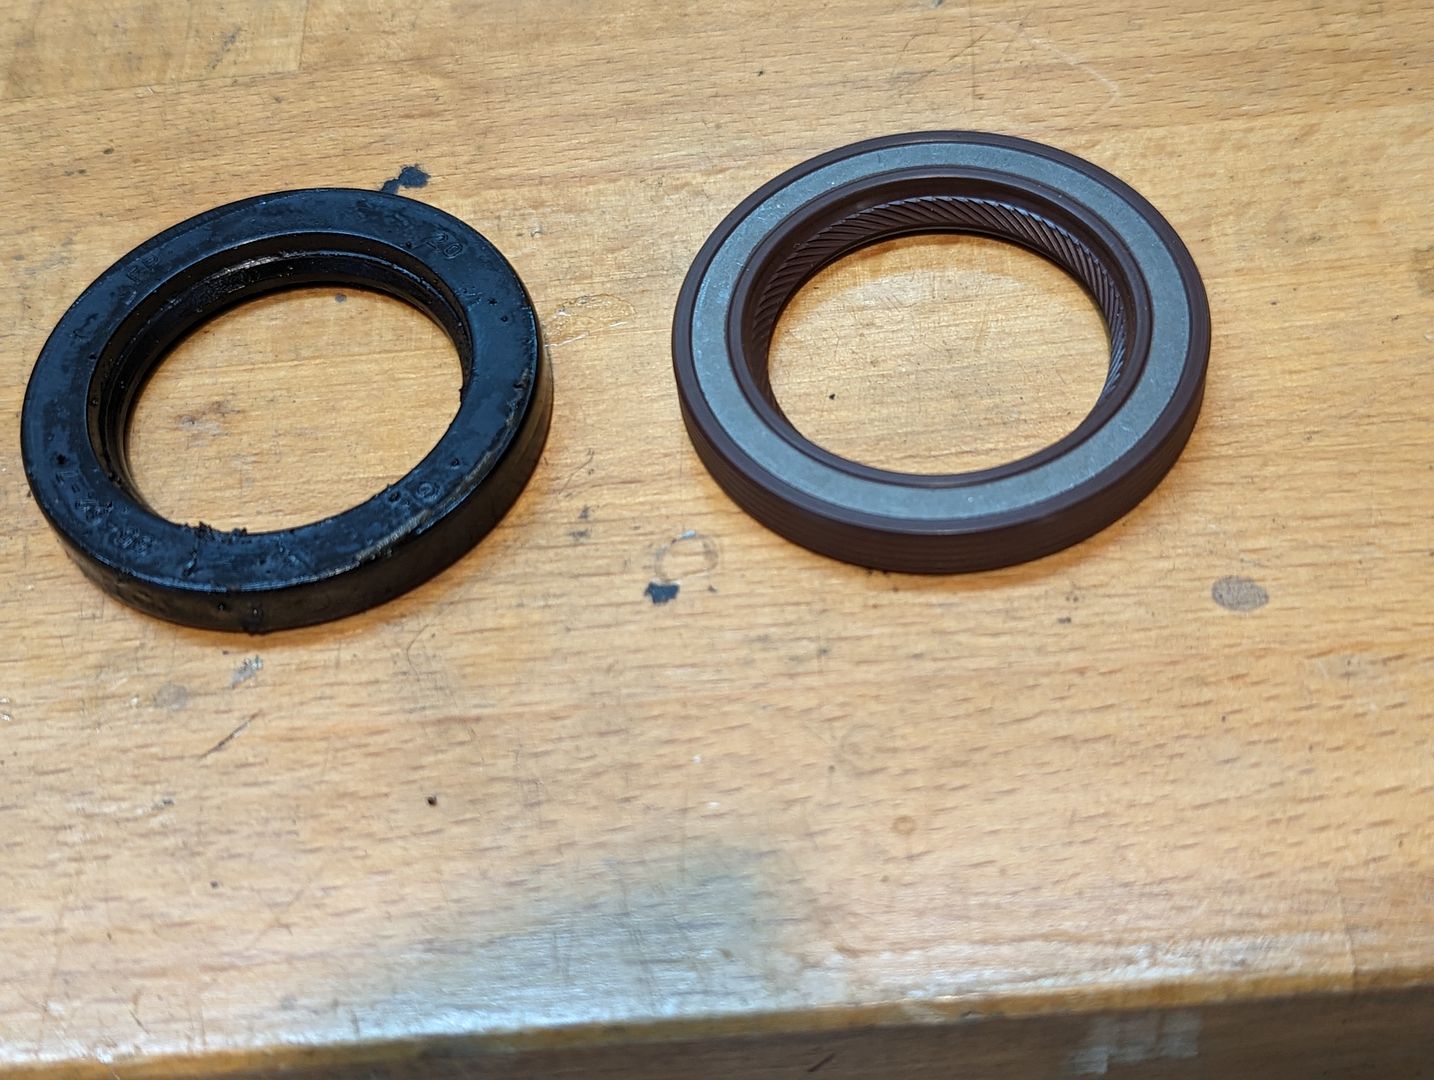
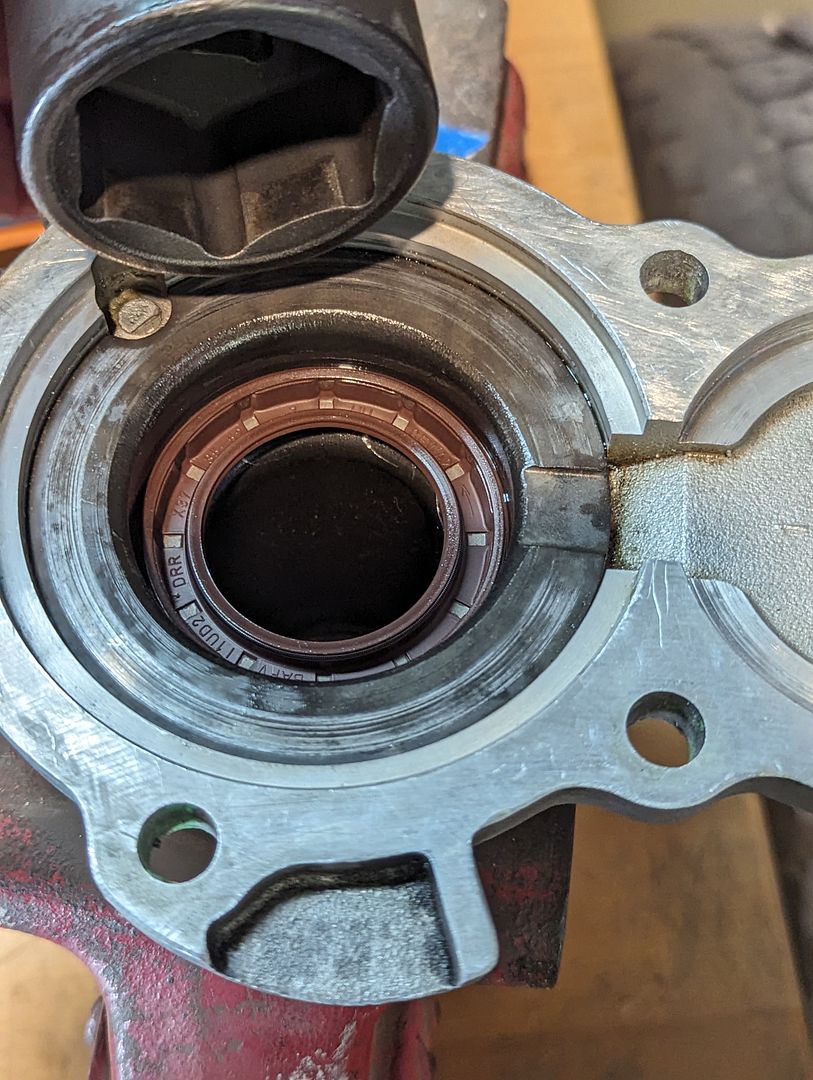
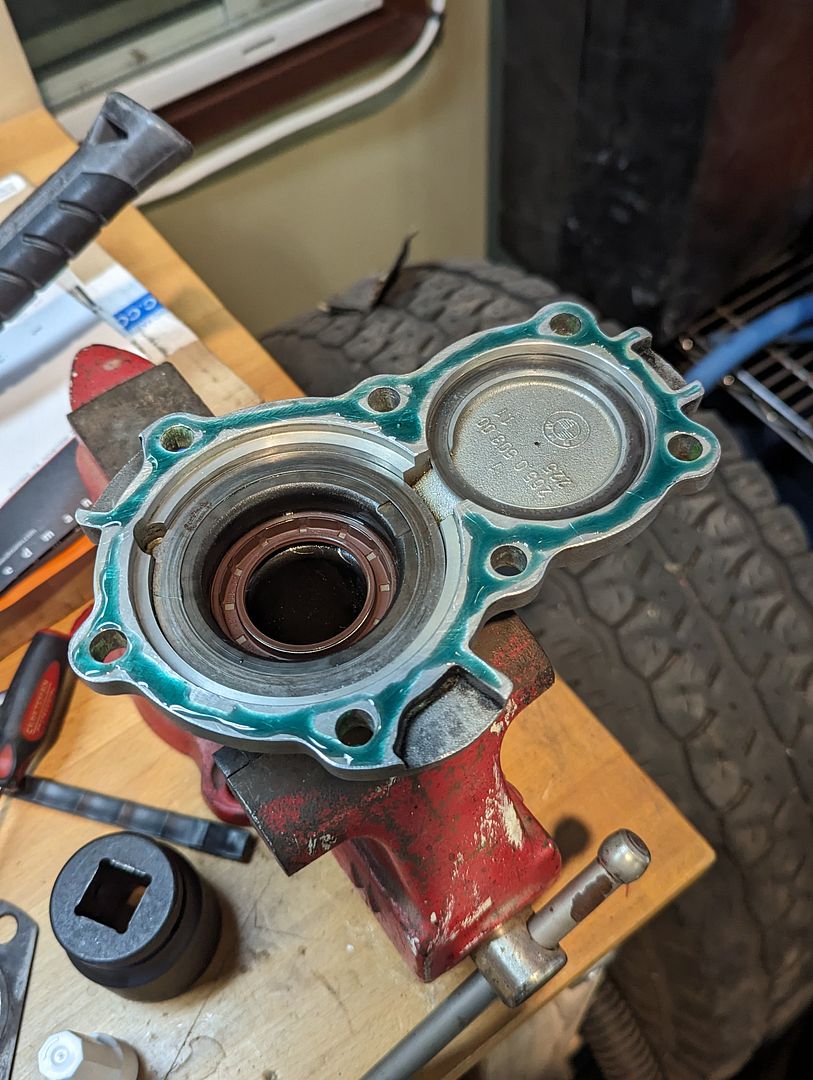
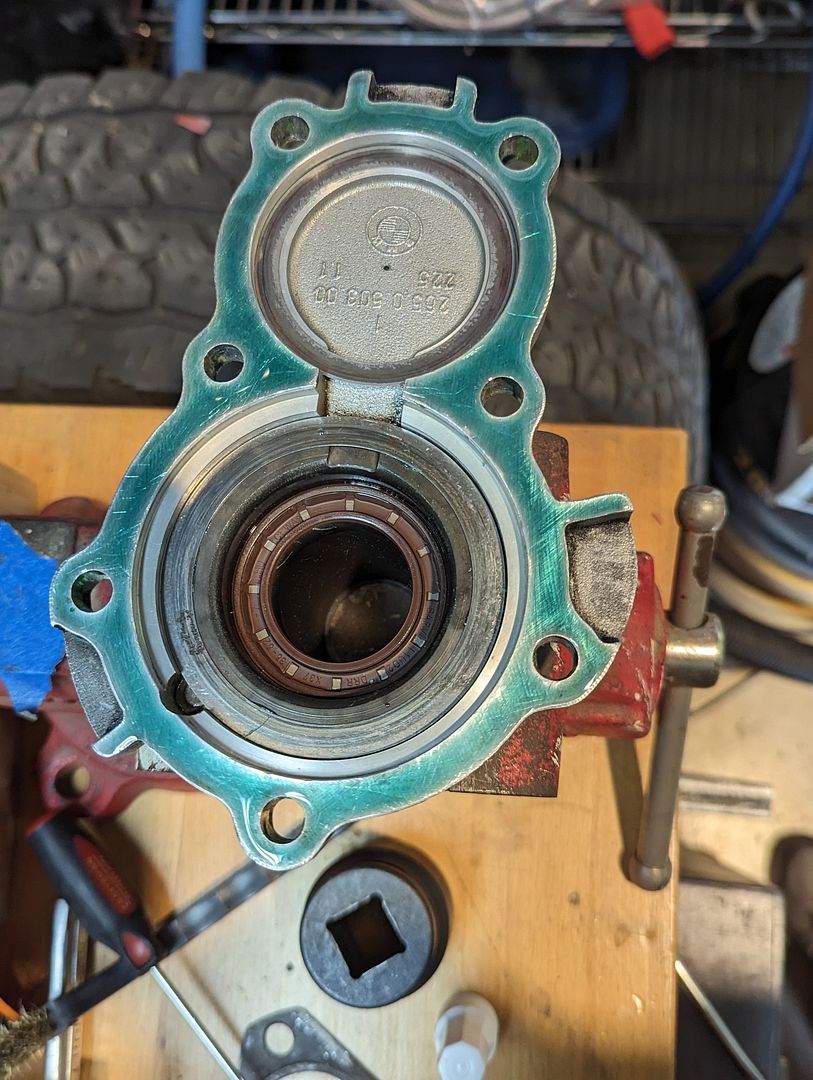
Since the space behind it and around the ISB gets transmission oil into it, this cover is the source of most transmission leaks. On a /6 there is no gasket (unlike the /5 Dogleg) between the cover and case, it relies on sealant to prevent leaking. So, you need to clean off any of the old and replace the gasket/seal, making sure to properly seat it into the cover.
Image
Image
Image
Image
Image

Liberally apply generous amount of Loctite 609 Green sealant to the Cover and re-install to the case. Torque the cover bolts, keep upright so as not to let the transmission oil into this front area until the Loctite has set up.
Image
Image
Image
Image

Next up is to reinstall the transmission (and the driveshaft, and the exhaust system, and the gear shifter, and the front sway bar). Lower the car and test drive.
The verdict?
Totally worth it, so far. The noise has been dramatically reduced; my real test however will come in two months on the long drive to San Diego and in traffic where it will get hot, that was when it was at its’ loudest. If we have some clearer days soon I will take it out for longer drives to see also.
vinceg101
Posts: 4982
Joined: Jun 20, 2007 2:40 AM
Location: Los Angeles, CA

Re: 1985 Arktisblau M535i Renovation - Progression

Post by vinceg101 »

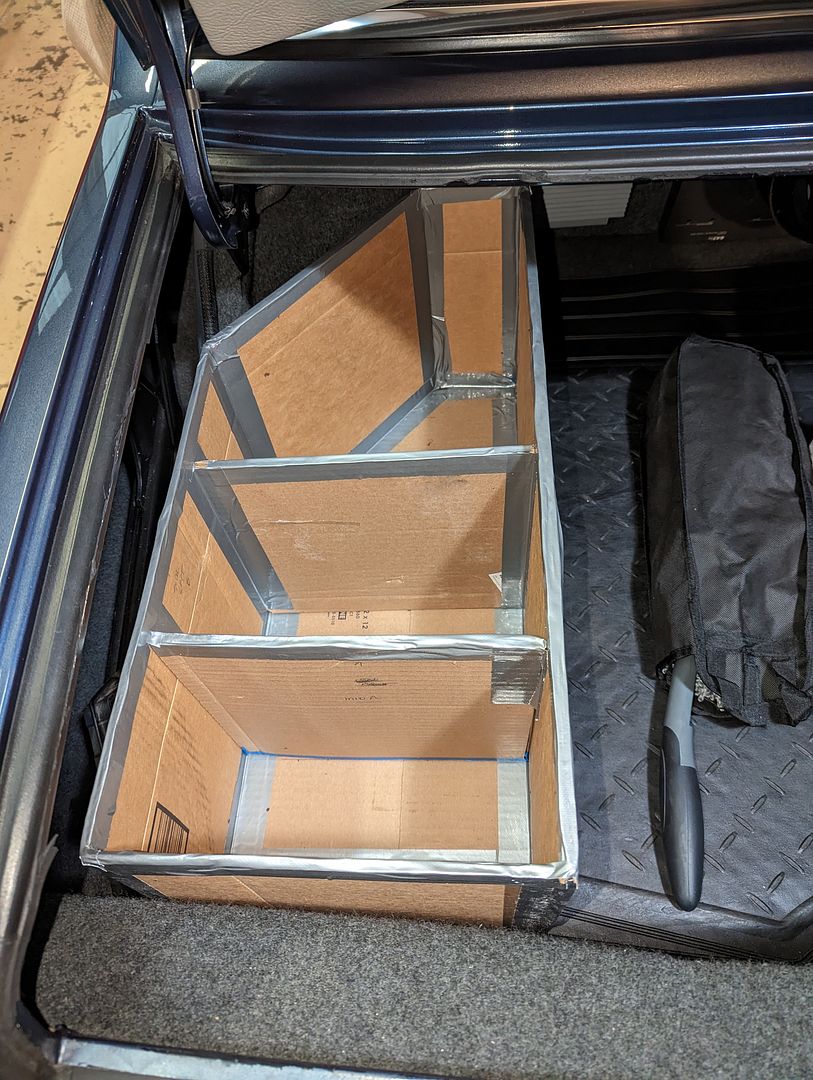
Okay, so this is only tangentially related to this car as this is something I've been kicking around since my last E28. Again, in an attempt to make a better mousetrap and not to settle with other perfectly fine solutions, I set out to design the ultimate trunk organization box.

This was inspired by a blurry image from the German language E28 Accessory catalog of something BMW called a 'Kofferaumbox' (cleverly translates as 'Trunk Box'). It was a metal box wrapped in the same trunk lining material and was a simple affair of just one open compartment; but what attracted me to it was that it was shaped to fit the driver's side of the trunk so it is specific to the E28.

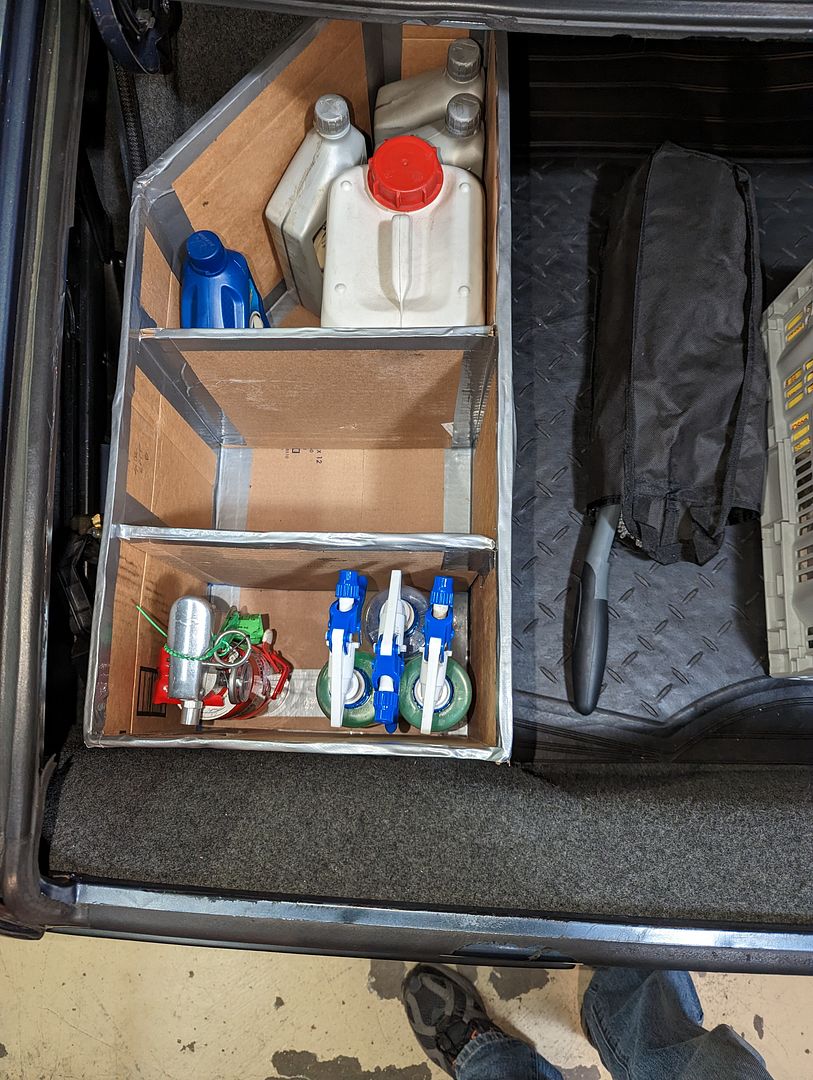
I, of course, needed my version to handle a lot more program and turn it into a multi-function storage box and tool kit. This needed to hold:
-Fluids
-Fire Extinguisher
-First Aid Kit
-Flashlight/Lamp
-Tools
-Spare Parts
-Car Cleaning Supplies
-Misc items

I, like you, probably have several boxes (cardboard, milk crates, etc.) to solve this; but I am kind of tired of having those slide around in my trunk.
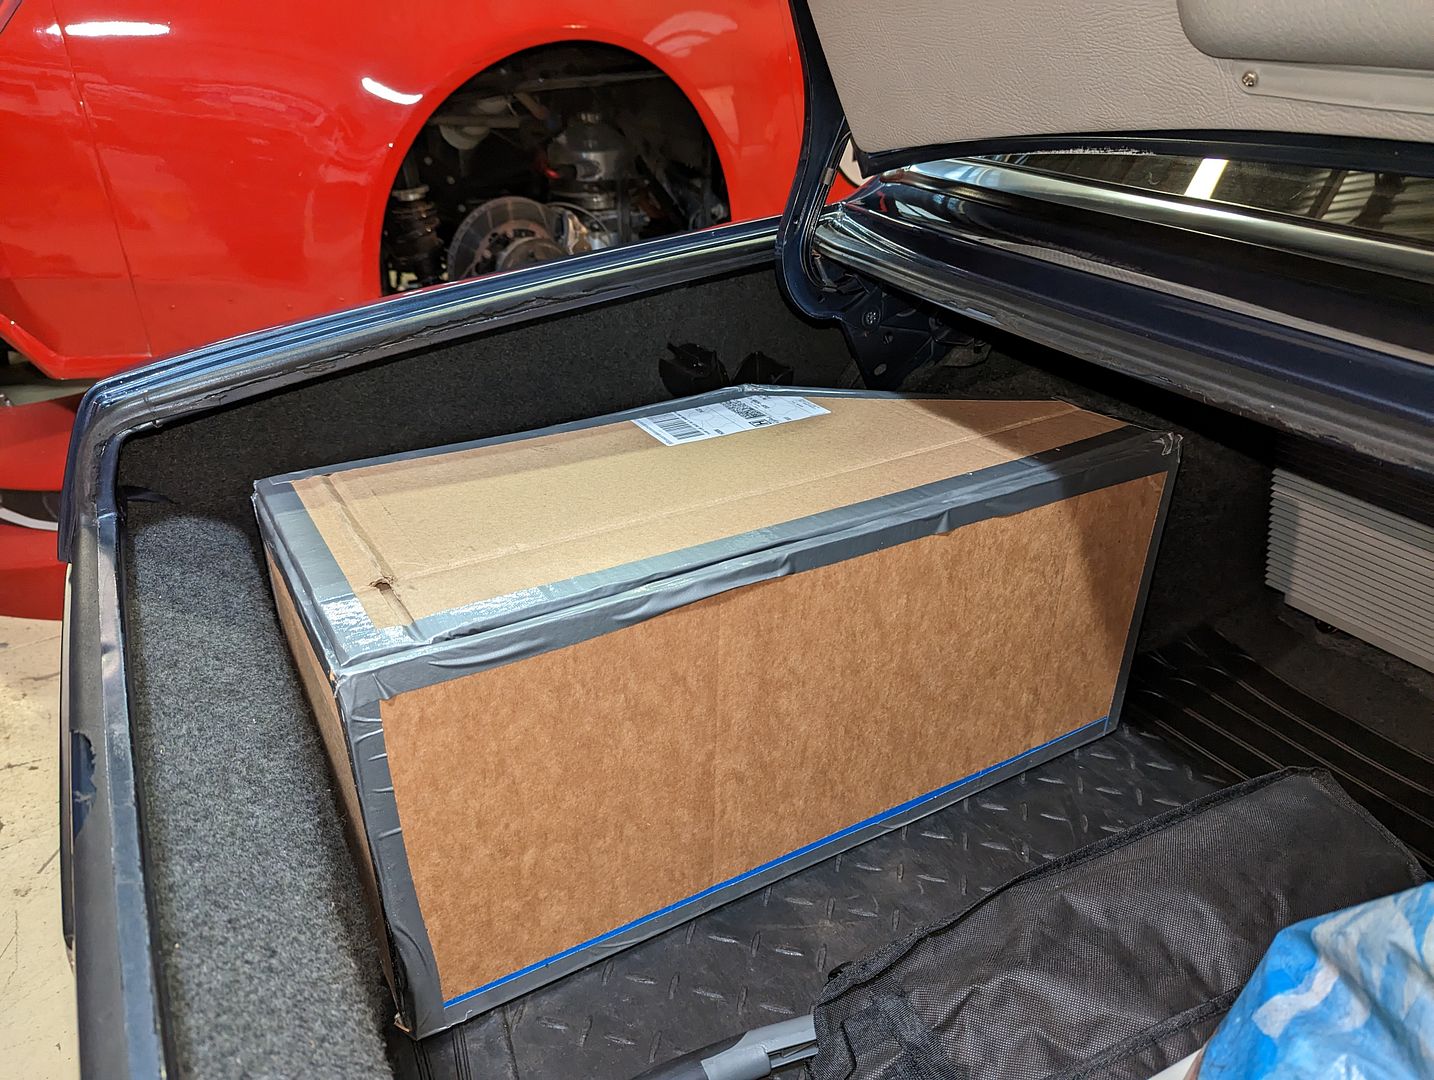
This meant that it needs to have multiple compartments and be tall enough to completely cover all the contents with a lid, but yet still fit inside the trunk. As a result, this new box kind of resembles the M5/6 Battery Box, albeit slightly bigger.
This cardboard mock-up is a proof of concept working model as I needed to adjust its' proportions and shape to best fit the geometry of an E28 trunk.
Image

The middle section will have two lift-out stacking trays that hold the tools (wrenches, screwdrivers, pliers, socket set, etc.). I know, I know: BMW gave you a perfectly good tool kit in the lid of the trunk, but these tools are the 'everyday' tools one might need on a road trip.
Image
Image

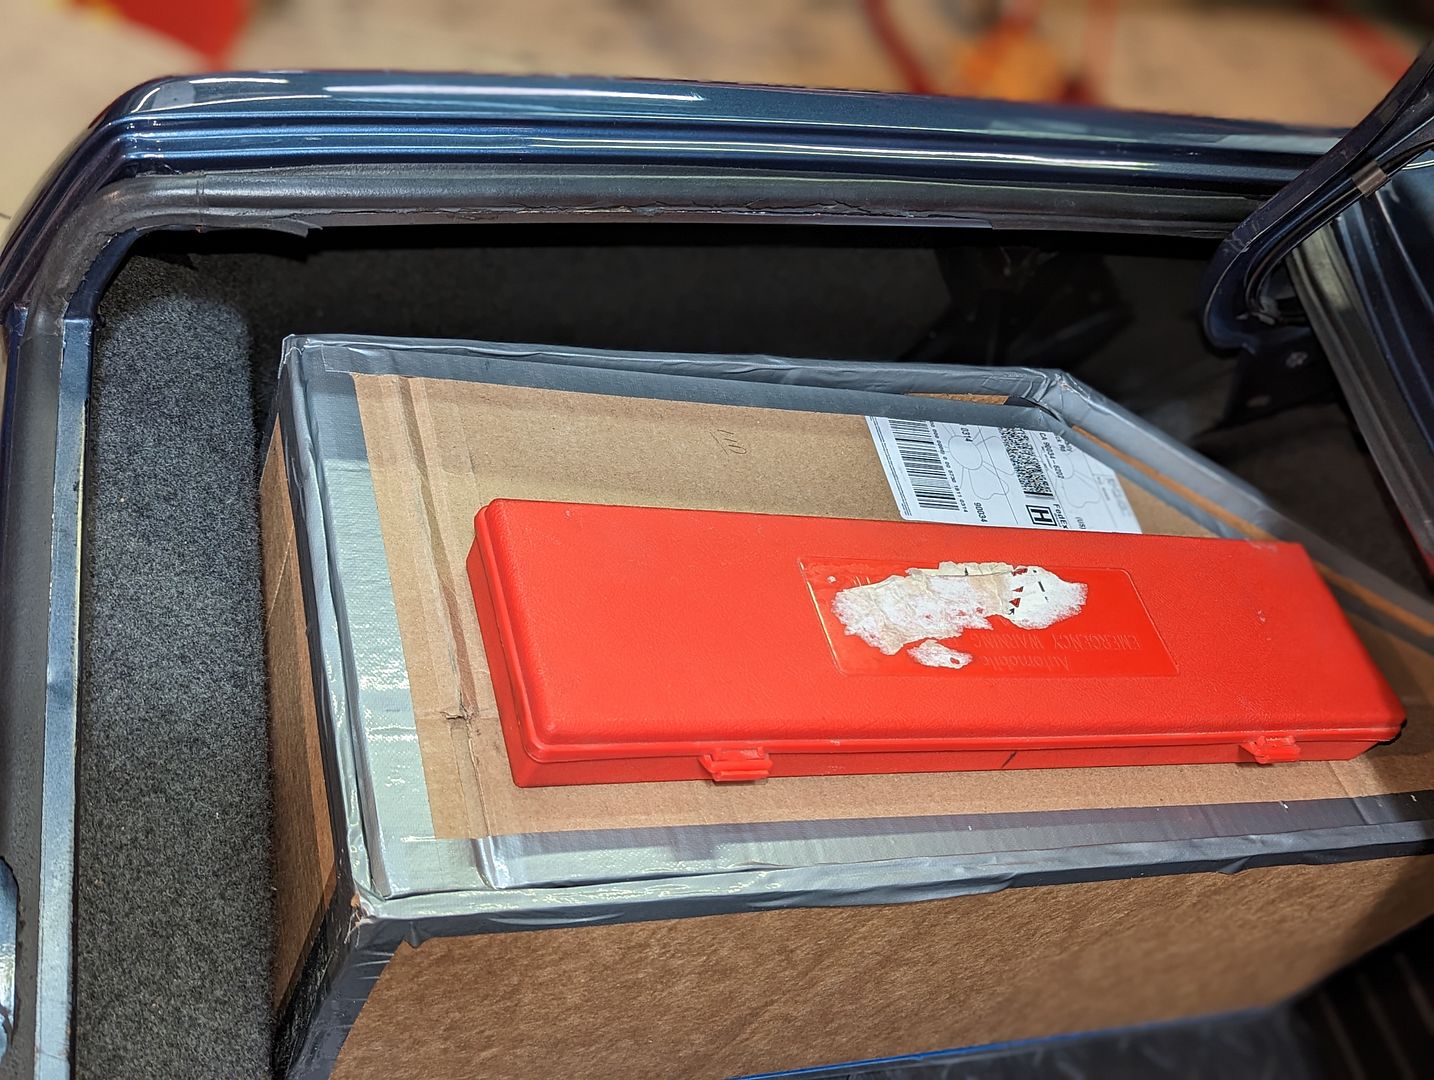
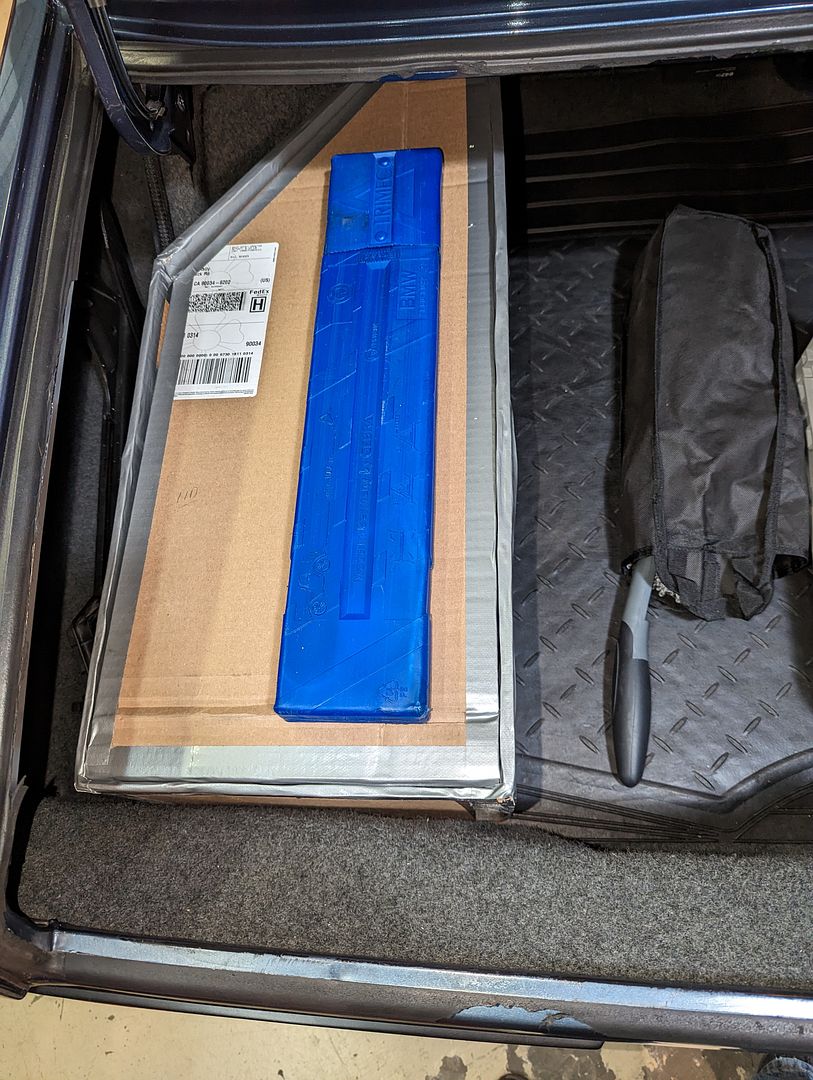
I am trying out which Warning Triangle to mount to the lid. The BMW version is correct, but that red one is a better triangle
Image
Image

It will be covered inside and out with a covering that matches the BMW trunk liner material. There will be a hook or angle that holds this to sloping panel along the driver's trunk side (where the jack is stored); this will keep in place and allows it to be removed without too much fuss.

My next steps are to make a better template model for a welder since I want to make this out of thin aluminum panels to keep the weight down while giving it the most strength possible. Then finally execute this thing (it's only been about 10 years... :roll: )

Okay, so 2024 is bringing more opportunities for car road trips for events including possibly going to Monterey and participating at Legends of the Autobahn for the first time. This means I have to get moving on my Troubleshooting Punch List/Upgrade List, which means I will have more updates coming to this thread. See you soon.
5280 JB
Posts: 734
Joined: Apr 15, 2008 10:39 PM
Location: 5280' altitude: Denver, CO

Re: 1985 Arktisblau M535i Renovation - Progression

Post by 5280 JB »

Great work, Vince, and I love the detailed approach you take to these projects. Super helpful for the rest of us is the step-by-step pics and write ups you have done here (and big props for the amount of effort that takes).

This car just keeps getting better and better and better. It's come a loooong way from when I first saw it here in Colorado sometime in the early 2000's!

Jim
Shawn D.
Beamter
Beamter
Posts: 22162
Joined: Feb 12, 2006 12:00 PM
Location: Alpharetta, GA
Contact:

Re: 1985 Arktisblau M535i Renovation - Progression

Post by Shawn D. »

Impressive, as always!
raztaz
Posts: 73
Joined: Aug 13, 2011 10:15 PM
Location: The Mile High City

Re: 1985 Arktisblau M535i Renovation - Progression

Post by raztaz »

Well now, seeing as you now have all this experience....... ;) Hope to see it at some point!
ElGuappo
Posts: 8136
Joined: Feb 12, 2006 12:00 PM
Location: Sacramento, CA
Contact:

Re: 1985 Arktisblau M535i Renovation - Progression

Post by ElGuappo »

The trunk box is a thing of corrugated beauty.
I wouldn't be afraid to make it out of sheet steel though, weight savings will be negligible vs the cost delta (and considering all the weight it is holding.)
vinceg101
Posts: 4982
Joined: Jun 20, 2007 2:40 AM
Location: Los Angeles, CA

Re: 1985 Arktisblau M535i Renovation - Progression

Post by vinceg101 »

ElGuappo wrote: Jan 26, 2024 2:16 PM The trunk box is a thing of corrugated beauty.
I wouldn't be afraid to make it out of sheet steel though, weight savings will be negligible vs the cost delta (and considering all the weight it is holding.)
It's going to be a balance between weight and strength; and you're right: it has to be strong enough to support all the stuff inside when it gets lifted out. It's the reason I'm considering thin aluminum sheet/plate; however it's a discussion to have with the welder.

I initially tried making one out of 1/8" MDF and 3/16" Masonite Hardboard but couldn't get the joinery to work with the odd angles and thin stock. Once I get the advanced model mocked up I can then have an intelligent conversation with the welder.
ElGuappo
Posts: 8136
Joined: Feb 12, 2006 12:00 PM
Location: Sacramento, CA
Contact:

Re: 1985 Arktisblau M535i Renovation - Progression

Post by ElGuappo »

That would've been a good application for a medium size laser cutter and 1/4" plywood.
They cut finger joints for edges so well, all that surface area for glue. Also thru 'tenons' in the sides to lock partitions in place.
Canuck YYC
Posts: 350
Joined: Oct 06, 2008 10:03 PM
Location: Calgary, Alberta

Re: 1985 Arktisblau M535i Renovation - Progression

Post by Canuck YYC »

My goodness that is one staggeringly beautiful E28.
alpinab10biturbo
Posts: 9
Joined: Jun 12, 2006 5:33 PM
Location: NL

Re: 1985 Arktisblau M535i Renovation - Progression

Post by alpinab10biturbo »

Really informative and helpful thread - provided useful information for my own project (E28S M5 DC91)
vinceg101
Posts: 4982
Joined: Jun 20, 2007 2:40 AM
Location: Los Angeles, CA

Re: 1985 Arktisblau M535i Renovation - Progression

Post by vinceg101 »

Oh boy, has it really been 18 months since I last updated this project thread? Wow, sorry about that, time flies, doesn’t it?

So while no really large projects have been undertaken, there have been several smaller ones. There also has been a flurry of activity (projects and prep work) in advance of 2025 Legends of The Autobahn in Monterey next month. On to that now, in chronological order from the last post:

2024:
FRESH AIR DASH VENT:
After 40 years, the Fresh Air Vent on top of the dash needed some attention. Both the wheel & lever as well as the foam gasket gave up the ghost.

Image


Image


After securing a replacement for some parts and analyzing the old foam gaskets, I set about affecting the repairs. I found some high density, thin, self-adhering foam online that matched the old foam thickness but hopefully will perform better over time. It was similar to the stuff I used in on the HVAC box below it when I overhauled that unit.

Image


Image


After some general clean-up of the vent opening, it was all ready to go back together.

Image


So far, so good.

HOOD TRIM:
Specifically the foam Trim Gasket at the leading edge of the Hood inside the engine bay. This was a project I started way back in February of 2024 and didn’t find the proper solution until almost a year later. Chalk it up to me trying to build a better mouse trap, but I just couldn’t stand buying another (expensive) replacement foam strip from BMW knowing that it would only last about another 6-8 months. I know this because that’s how long the current piece lasted since I replaced it before.
The primary problem with it is that the strip is an very soft open-cell foam covered by a very thin, fragile black coating. It is all glued to a thick cardboard backer that has those awful plastic trim clips which snap it into the hood.

Image


Image


My initial goal was to come up with a replacement piece of closed-cell foam and some kind of stronger, more durable covering so I wouldn’t have to worry about this item ever again. I was going to keep the hard backer and clips and just glue on the new foam. I then set out testing various thicknesses and types of foam (Ensolite, etc.) and various coverings (duct tape, vinyl, etc.). The difficulty was moving from the very soft, spongy, less dense open-cell foam to the harder, denser Ensolite and closed cell foams and getting the thickness correct so the hood could close.
First up was to remove the existing:

Image


Image


Image


Then the testing with not much success:

Image


Image


Image


Image


Image


The final solution was a self-adhesive 3/8”x1 ½” wide closed-cell Sponge Neoprene Stripping with a smooth finish. The contact cement seems to be working well also (in addition to the self-adhesive strip on the foam):

Image


Image


Image


Image


I bought all the various foam samples from a local foam store except the final two which came off Amazon since the foam store didn’t have this type:
https://www.amazon.com/dp/B08HM6YJ9V?re ... asin_title

In the end, of course I spent more than just buying a replacement from BMW (likely twice), but I have peace of mind that my solution will endure (at least that’s my story and I’m sticking to it).

AUDIO FINISHING:
Mostly this was about making three key upgrades to the existing system:

Rear Subwoofer:
I have an 8” Basspump mounted in the trunk below the rear parcel tray. It had two MTX Audio Thunder 6000 woofers which worked perfectly well and in fact were quite punchy. However I wanted to make the car and all a/d/s/ speaker environment. So I found a pair of a/d/s/ AS8 woofers (singles from different sources) and set about replacing them:

Image


Image


Image


Image


Image


Image


Image


Image


Image


The end results are mixed, the a/d/s/’s are more ‘mellow’ and not as punchy or ‘loud’ as the MTX’s, but they are richer and more nuanced. I just have to make some final adjustments to the levels to dial them in better.

Front Lower Speaker Plates:
I had some custom wood (1/4” MDF) mounting back plates for the a/d/s/ 344is front lows in the kick wells that I carried over from the original installation. Since I upgraded the interiors and added a whole mess of insulation and acoustic layers, the stock speaker covers didn’t fit well and were proud of the carpet. It also caused the carpet to fit the door trim piece poorly and just looked bad. I needed to reduce the mounting plate thickness to pull the speakers in under the carpet.
I was going to have these fabricated out of thin steel plates but as I was fiddling around with various dash mounts for the MP3 player (another project), I came across these plastic sheets (ABS 1/8” x 8”x12”) which were the perfect material. I could easily cut them with a band saw and jig saw, and drill through them with ease.
https://www.amazon.com/dp/B0B795T1DS?re ... title&th=1

I devised the hardware to both mount the speakers to the plates and to keep the stock grille covers up off the speakers and out at the carpet level. Ordered it all from McMaster-Carr (but probably could have sourced it from a decent hardware store):

Image


Image


Image


Image


Image


I covered the back with some leftover Noise Red Acoustic foam to help with resonance and vibration (as well as sealing off some car & road noise from the well). Then sealed the speaker to the plate with some 3M Stip Butyl Caulk:

Image


Image


Image


Image


Final installation:

Image


Image


Image


Image


Amp Board Cooling:
One of the frustrating downsides to my overly complex a/d/s/ audio system, is that while it sounds fantastic (when it’s working correctly) is that it gets pretty hot especially in a closed trunk on the road over an extended road trip resulting in the amps sometimes thermal locking/heat cycling. So, again more BABMT (Build-A-Better-Mouse-Trap) thinking, I set out trying to devise a solution. An elegant one, that didn’t detract from the overall look of the equipment. Of course, I had some very limiting design and physical restrictions that eliminated a lot of off-the-shelf options. Combine these two things and I had to R&D a few solutions.
I ended up on these: Fish Tank skimmer fans which are axial fans that blow air across the top fins of the amps (one fan for each amp). The air flow is pretty decent and keeps the air circulating on and over the amp board which in turn keeps the trunk air moving.
https://www.amazon.com/dp/B0BYH7HZ8W?re ... title&th=1

Image


Image


Image


Image


Image


The part I’m having issues with now is these were supposed to be connected to the amp trigger wire via a set of relays so they only came on when you turn the system on. (Otherwise, they would be in an always-on state since they would be connected to the board’s power source which is constant hot and thereby drain my battery). I installed the relays under the rear seat and somehow they’re not working. I haven’t had the time to take it all apart and find the problem (and especially won’t before Monterey), so for now they’re powered by a set of voltage converters plugged into the 12V power plug I installed in the trunk before.

HOOD GROUND WIRE:
Again, BABMT, I needed to replace the ground wire that connects the hood to the body chassis. The one I fabricated earlier was too stiff and broke at the connectors due to the hood operation.
It needed to be flexible, strong, have very low profile connectors, and most importantly (for aesthetics), it had to be brown (or close to it).
This stuff is technically labeled as ‘black’ but being very translucent and over copper wire, it comes out more ‘brown’ than black. It’s kind of overkill at 8ga, but it’s working:

Image


Some 3/8” ring connectors, a big crimper and some heat shrink tape and we’re in business:

Image


Image


Image


Image


Image


So far it’s holding up well.
vinceg101
Posts: 4982
Joined: Jun 20, 2007 2:40 AM
Location: Los Angeles, CA

Re: 1985 Arktisblau M535i Renovation - Progression

Post by vinceg101 »

DOOR SEALS & TRIM:
I needed to replace the Rear Door Seals (aka ‘Mouse Fur’ trim) and managed to have a NIB set of rears from a while back. This was all pretty straight-forward since the originals weren’t glued in after the Interior Remodel. This was done knowing it would be needed for Monterey & Legends (although I hadn’t made up my mind I was going in 2025 yet).

Image


Image


Image


Image


Image


Image


Image


Image


The other item to fix was the passenger Rear Door Window (Ledge) Trim. I had to pull it off to replace the upper rear surround (along with the entire window assembly), and it didn’t really want to go back on correctly.

Image


Image


Image


Image


Turns out, I installed the clips in upside down. This is me getting schooled by Kohler as he fixed the problem in about 3 minutes. Both sides.

Image


Image


I’m still working on another BABMT application for the Floor Door Sills and how to make them better sealed against noise and wind intrusion. I am convinced I can spend another several hundred dollars and countless hours/days on this experiment. Stay tuned.

2025:
RADIATOR FAN COVER/SHROUD:
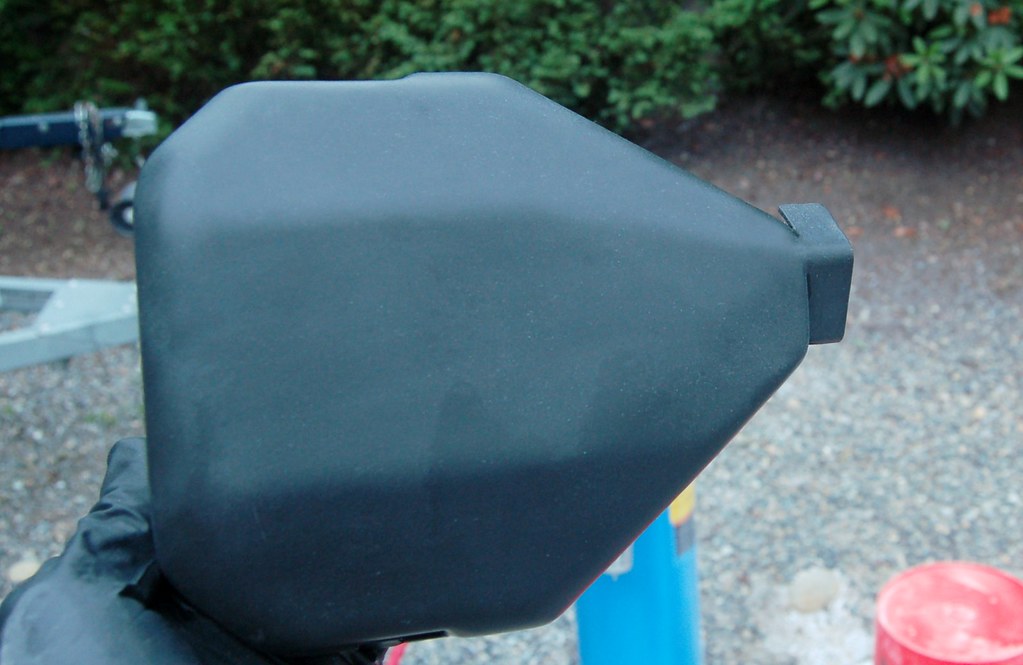
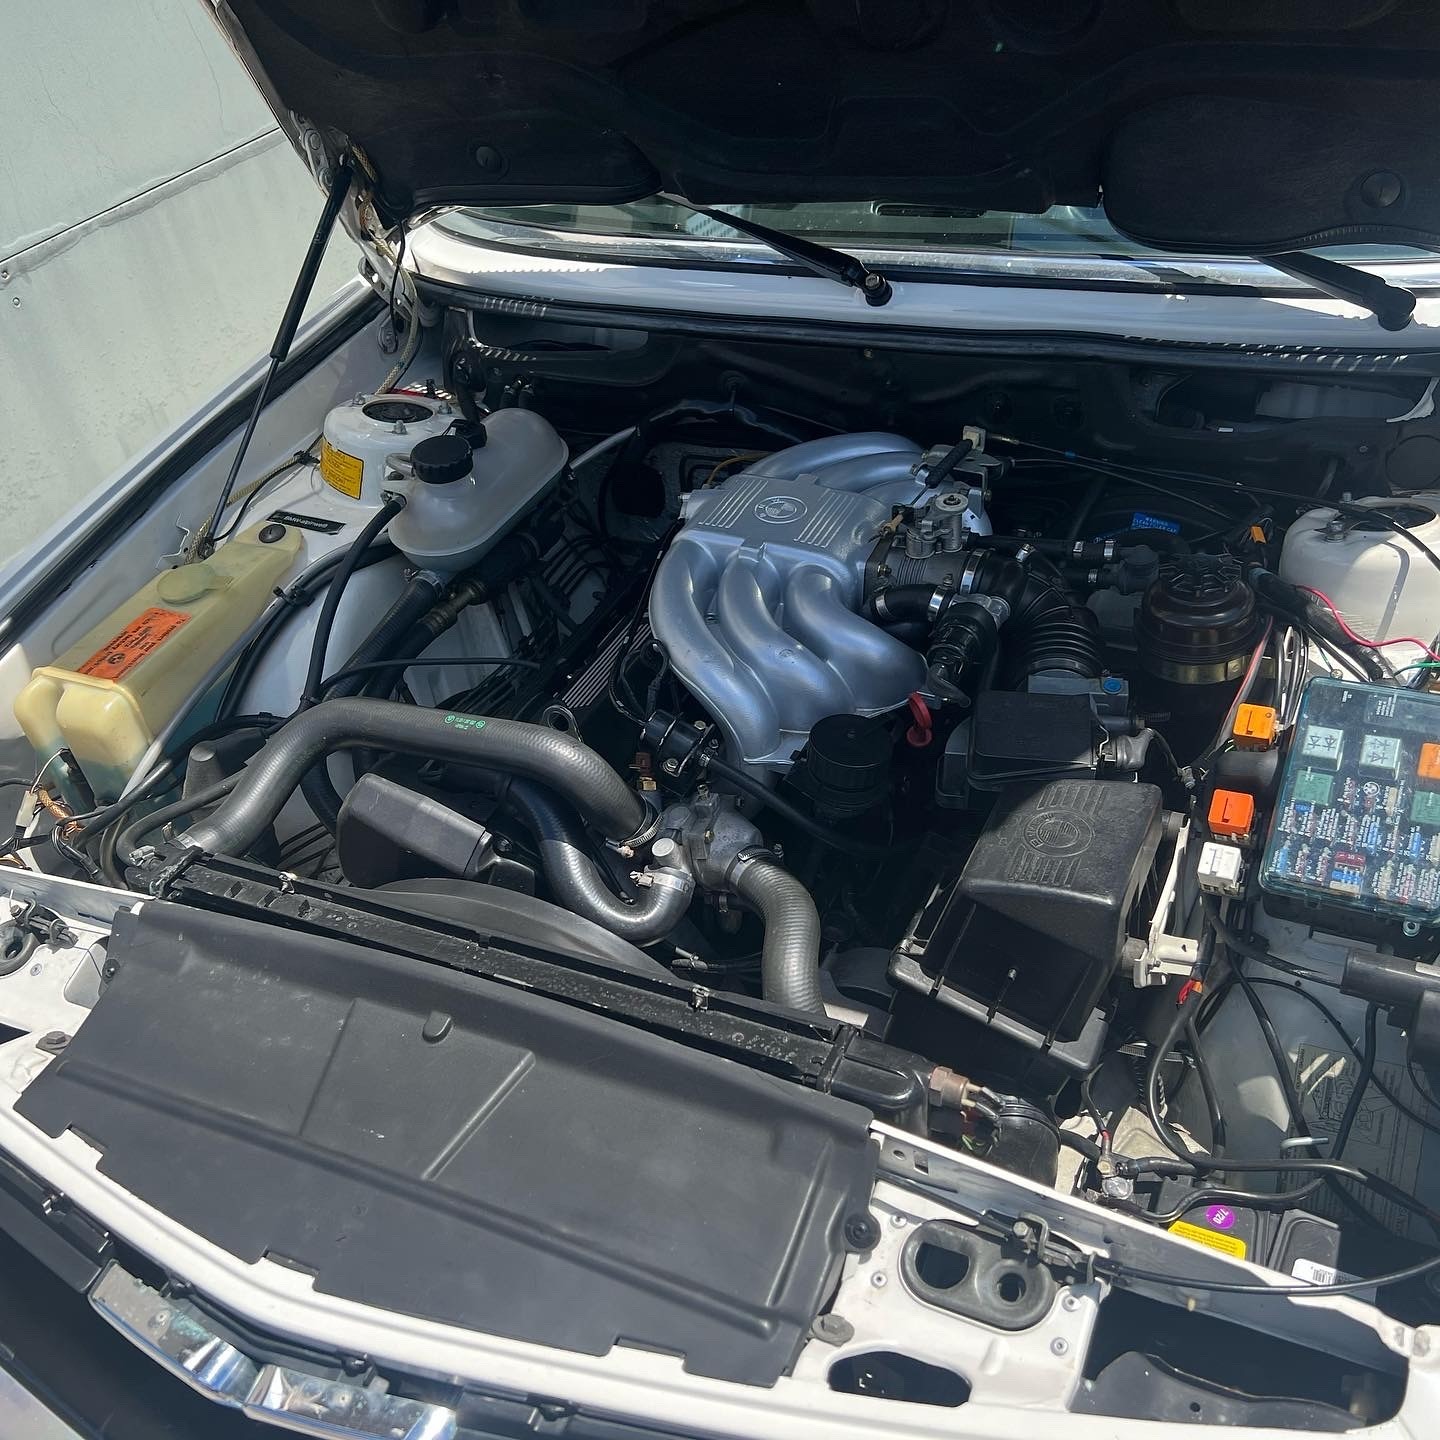
This brings us into 2025 and has been a long (long) range project. This was part of a series of projects slated to be completed for Legends in August. I am/was convinced that I could refinish the black plastic of the Radiator Fan Cover/Shroud (you know, the ‘tool tray’ at the front of the engine). It’s precisely why it was convenient for holding your tools and etc that makes these shrouds so messed up with scratches, gouges, scuffs, etc. And rather unsightly.

Image


Image


It was even more important to me to try this since these things are now NLA from BMW and used ones, even the crappy ones, are going for top dollar. I wanted to try before I resorted to painting it (which in the end would have been simpler, faster, less expensive and probably looked nicer. Oh well.)
So I set about trying many various plastic polishing compounds on a donor: ultra fine grit wet sanding, plastic treatments, ad nauseam.

Image


Too much aggressive sanding and it takes the top layer off (and nothing gets it back); this was with 2000 grit:

Image


Image


I finally landed on this stuff: Novus Plastic Polishes and Meguiar’s Mirror Glaze Clear Plastic Polish #10:

Image


Image


All in all, it looks really good for what I could accomplish. Did I get ALL the scratches out? No, but it certainly looks a helluva lot better than what I started with.

Image


Image


I’m now trying to source the correct securing pins/fasteners to hold it onto the body. Turns out the ones I’ve had are not correct.
Last edited by vinceg101 on Jul 22, 2025 5:03 PM, edited 1 time in total.
vinceg101
Posts: 4982
Joined: Jun 20, 2007 2:40 AM
Location: Los Angeles, CA

Re: 1985 Arktisblau M535i Renovation - Progression

Post by vinceg101 »

TRUNK:
This was another one of those projects that ostensibly was done in preparation for Legends, but needing to be completed anyway. This had several aspects to the overall scope: New Trunk Seal, Trunk Lid Cover, Tail Light Gaskets and some general rust abatement and repainting.
Trunk Lid Cover Panel:
This was a relatively simple task to clean up the Trunk Lid, replace the anchoring clips, and install thermal insulation to Cover Panel. Also re-glued some of the covering to the backing panel:

Image


Image


Image


Image


Image


Tail Light Gaskets:
This was also a relatively simple task to replace the original gaskets that had gotten compressed and dried out. I bought a set of the ones that were for sale here on the board and sat in a drawer waiting for installation.

Image


Image


Image


Image


Image


Image


This also gave me a chance to review the wiring on the assemblies, fix a few things and also chase a possible source to the Cruise Control non-op (I didn’t find it here and still haven’t).

Image


Image


Image


Image


Image


I also had to replace the Keyless Remote Locking module. It seems I go through these things like Chicklets (either the module or the remotes). They're cheap enough on Amazon (operative word being 'cheap').

Image


Trunk Lid Gasket:
This was the big component of this project, as you can see the original gasket had given up the ghost:

Image


Image


Image


Image


Image


Image


Image


Image


I had purchased a BMW gasket but headed the advice of others and picked up a URO branded one to use instead.
First up: removal and preparing the lip:

Image


Image


Image


Image


Image


Image


Image


Image


Image


Image


Not surprising, 40 years of a rather poor design feature took its toll; albeit mine was in much better condition than most E28’s out there. Once the old gasket was out, the old adhesive scraped/ground-out/etc., I could see what I was up against. The usual places to focus on were revealed: the upper corners (and underneath) and the lower corners:

Image


Image


Image


Image


Image

After grinding, wire-wheeling and sanding down, prepping the car for paint restoration began. Luckily, the corrosion damage was limited to mostly surfaces so grinding & sanding would be enough. Next came the Rust-Stop primer:

Image


Image


Image


Then repainting: three coats of base paint and three clearcoat:

Image


Image


Image


Image


Some wet-sanding after curing, and we were set for gasket installation. Now there are two camps out there on gasket replacement: 1) Glue in and 2) No Glue. I received advice from both advocates (and admittedly I fell into the Glue-in method camp beforehand, so I was a bit biased). The argument for the no-glue was that given the inherent design flaw, water easily gets trapped under the gasket if the adhesive isn’t fully applied so as to create a complete sealed bond. This is near impossible to guarantee with the 3M adhesive (I suppose you could achieve this with a spray or more liquid adhesive and about 3 more pairs of hands). This really matters if you live in damp/wet environment and/or the car subjected to getting hosed down/car washed, etc. None of that applied to my car now or into the known-near future. Also, the car survived the last 40 years with this condition with limited damage; so I’m sure it would be fine for another 40 years. Not to mention, the gasket just kind of flops around every time you open your trunk if it’s not glued in which could cause all kinds of issues especially if it doesn’t go back into the correct position every time. So, I glued mine in.
3M Black Weatherstip Adhesive (I know everyone uses the Yellow, but opted for the black). I don’t have many photos of this process since, well, my hands were kind of full with the giant rubber snake that is the gasket and the glue. But here are some (mostly during fitting and final pressing:

Image


Image


Image


Image


Image


Image


Image


Image


The easiest method is to lay the gasket in place then start applying the adhesive to the trunk lip very liberally (a cheap disposable China bristle brush worked best). If I recall, I started at the top lip doing that and setting the gasket in, then moving down each side and doing the bottom last since that is mostly a friction-fit. You have to stay ahead of the rapidly drying adhesive (or that critical tipping point of sticky-dry, if you’ve worked with any contact cement you understand this concept). You may have to reapply some adhesive along the way.

A final pressing all around, especially the upper corners, and any over-glue clean up (light acetone or Goof-Off), and close the Trunk Lid. Again, there are camps out there on how to press the gasket into place while the adhesive cures: a billion binder clips or simply close the Trunk Lid. I had the billion clips, but the Trunk Lid method is better at insuring a consistent, even pressing all around. Simply keep it closed for as long as you can, it was a week in my case since I left it alone for the following weekend.
Upon opening the following week, there were a few spots that needed some additional glue, but that was easy and using a single binder clip in those spots and/or simply closing the lid again did the trick.

Image


It was a surprisingly easy task once all the prep was completed; I was expecting it to be either much harder and/or messier. I had been procrastinating on this task not looking forward to it because of this fear, but really, it wasn’t hard at all. It took several weekends of prep-work with the corrosion abatement and painting, but the actual gasket installation only took about 30min (again, you have to work fast).

General Trunk Restoration:
After getting the Gasket replaced and Tail Lights back in, I turned my attention to prepping the whole Trunk for Legends (i.e. cleaning and treating). Upon removing all the Trunk Liner panels and spare wheel, I discovered more areas that needed some corrosion abatement and repainting: further up under the driver’s side upper corner behind the hinge, down in the bottom of the driver’s side well (up against the rear wheel well) and down at the bottom of the spare tire well (I had addressed this area before, but didn’t do a good job with painting, so this was more a re-paint job than corrosion abatement task).

Image


Image


Image


Image


Image


Image


I also repaired the rear Trunk Liner panel, re-gluing the covering back onto the cardboard backer (here are the infamous billion binder clips in action):

Image


MISC. PAINT TOUCH-UP:
Like a loose thread, once you start looking you start finding all the areas of paint you really need to address (various scratches, nicks, mars, etc). Hence another weekend or two of chasing these around which migrated from the Trunk to the door jambs:

Image


Image


Image


All this was necessary to button up the overall appearance of the car. The paint on this car is not perfect by any means, but these were ugly little blemishes (most caused by me over the years) that became focal points I couldn’t overlook anymore.

LOTA PREP:
That is Legends of The Autobahn in Monterey in August. So this has been a focal point in the shop since the beginning of June; each weekend has been dedicated to checking off a spreadsheet of items ending with a final packing and road trip on 8/11.
Mostly it’s been a big cleaning and detailing job from top to bottom to compete at a Concours level, but it has also been an opportunity to button up some various small items;

Image


Image


Image


Image


Image


Image


Image


Image


That’s Andy Wong (O2nut) doing the first step on the paint corrections; he’s coming back this weekend (7/27) to help with the rest of the polishing.

Image


This was replacing the Headliner Panel at the front (where the visors are attached to) since I had inadvertently installed the non-sunroof version (I couldn’t figure out why it didn’t go back together cleanly; another schooling by Kohler revealed that one.) Since BMW only has the non-sunroof versions still available, I purchased it by accident back when I started the Interior Remodel (I have no idea if this one is still available, I doubt it). I luckily found a really good one on ebay. Simple, not much to show here that I didn’t already show further back in this thread. These are the two long screws that go down through the Moonroof track and into to receiver nuts on the panel cover.

Image


Image


Image
vinceg101
Posts: 4982
Joined: Jun 20, 2007 2:40 AM
Location: Los Angeles, CA

Re: 1985 Arktisblau M535i Renovation - Progression

Post by vinceg101 »

Just to give some background ‘color’, in the 18 month interim I made some improvements to The Hangar in the form of 4-post lift and a complete Pneumatic system. Also some improvements for the lift happened as well: the LED lighting and jack tray w/jack (to pair it with the rolling bridge jack that came with the lift so this is now a serious service lift):

Image


Image


Image


Image


Image


Image


Image


Image


Image


Having the lift has certainly been making all this work much easier (on my back at least).
The car also made its rounds last year this spring: St.Paddy’s Day, Huntington Beach Concours, SoCal Vintage Meet, and a few others. Won a few awards also:

Image


Image


Image


Image


Image


Image


Image


Image


Life wasn’t always so cheerful last year, we lost both my father and Mary’s mother as well as some other family members. Life moves on and we carry on with it with full hearts.

Image


Image


Image


Well, that kind of catches everything up. There are two weekends of work left before leaving for Monterey on 8/11: full paint polishing & waxing and the interiors (cleaning & treating). Darin (Mlastovo) has been more than instrumental these few months coming up and helping (he was here this past weekend working on the Wheels & Wheel Wells) and will be back the weekend before we leave road-prepping the car. Then we meet up with the other Darrin (2ndeagle) and head north that Monday to meet up with Gary Collins (Gary Collins) in our rental house in Seaside for the week.

Stay tuned.
tig
Posts: 9445
Joined: Mar 18, 2013 6:25 PM
Location: Durango
Contact:

Re: 1985 Arktisblau M535i Renovation - Progression

Post by tig »

vinceg101 wrote: Jul 22, 2025 4:33 PM
2025:
RADIATOR FAN COVER/SHROUD:
This brings us into 2025 and has been a long (long) range project. This was part of a series of projects slated to be completed for Legends in August. I am/was convinced that I could refinish the black plastic of the Radiator Fan Cover/Shroud (you know, the ‘tool tray’ at the front of the engine). It’s precisely why it was convenient for holding your tools and etc that makes these shrouds so messed up with scratches, gouges, scuffs, etc. And rather unsightly.


Vince, I found soda blasting works magic. True, you don't get a polished finish, but it looks brand new AND stays looking that way longer than polished.

ImageImage
vinceg101
Posts: 4982
Joined: Jun 20, 2007 2:40 AM
Location: Los Angeles, CA

Re: 1985 Arktisblau M535i Renovation - Progression

Post by vinceg101 »

I wonder if there could be some kind of gloss or semi-gloss/satin coating that could be applied to the soda blasted parts other than a spray clear coat.
I imagine the spray clear coat would eventually flake off and/or discolor in the engine bay environment(?) But maybe a high temp version might work.

Might be worth doing a test. Do you have any spare blasted parts to try it out on?

[I have my old HF soda blaster and a bag full of media; I have to see if it still works. I could try it on my test cover panel (I can't hurt it any more than I already have.)]
Post Reply